
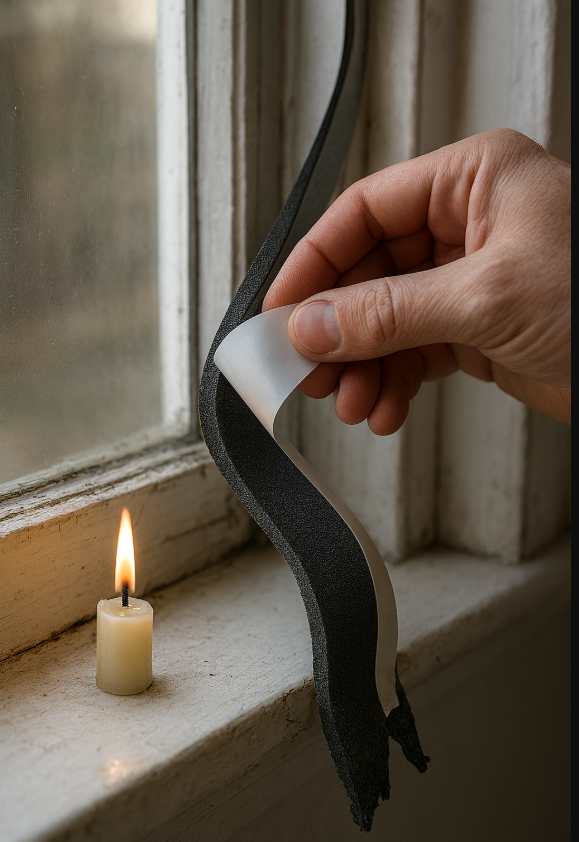

If you’re wondering how to stop drafts that are making your home cold and driving up your heating bills, sealing windows and doors is the most cost-effective solution available. Those gaps and cracks around your windows and doors can account for up to 30% of your home’s heating loss, turning your house into an expensive sieve during winter months.
There’s no need to hire in a contractor. Just you can stop those pesky drafts for good – and it’ll save you money and hassle, honestly. You think it’s complicated? It’s not. Start by checking gaps around your windows and doors, slap on weatherstripping, caulk cracks, seal the sill, and use door sweeps; test with a candle or your hand, fix room by room, and you’ll feel the difference fast, no fuss.
Why Do Drafts Even Happen?
Up to 30% of a home’s heat loss can be due to uncontrolled air leakage around the envelope, especially windows and doors. You get drafts because seals break down over time, materials settle and shift, and small construction gaps that were never sealed finally start to show. And since temperature and humidity make wood and trim expand and contract, a tight fit one year can leak the next – so you can’t just seal once and forget it.
Common Causes of Drafts
About 25-35% of a home’s air infiltration typically happens at window and door perimeters. You’ll often find worn or compressed weatherstripping, cracked caulk, warped sills, loose thresholds, and gaps where trim meets siding. Other usual suspects are attic bypasses, recessed lights, plumbing penetrations and unsealed electrical outlets on exterior walls. If your place has had DIY window installs or old frames, expect more trouble spots.
Spotting the Sneaky Air Leaks
Typical leaky homes test at about 3-5 air changes per hour at 50 pascals on a blower-door test, so tiny gaps add up fast. You can do quick checks yourself – use a lit candle or incense near frames, feel for cool drafts with your hand, scan for daylight at night, and watch curtains for micro-movement. And if you want certainty, rent a thermal camera or hire a pro for a blower-door plus infrared scan; those find what your senses miss.
Up to 25% of a home’s heat can escape through attic leakage, so start there when you hunt drafts. Use a flashlight at night to spot daylight at eaves, inspect attic hatch seals and recessed fixtures, and press around plumbing stacks and duct chases where insulation is thin. You can plug many of these with caulk, gaskets, or low-expansion foam, and if you try a smoke test on a windy day you’ll see exactly where the house breathes – weird but satisfying, right?
Tools and Materials You’ll Actually Need
About 80% of household drafts come through gaps you can seal with a small stash of tools and supplies, and you can outfit yourself for under $60 if you shop smart. You’ll want a caulk gun, utility knife, measuring tape, a few putty knives, and PPE – gloves and goggles – plus silicone and latex caulks, low-expansion spray foam, adhesive-backed weatherstripping, and a tube of window glazing compound for older sashes; mix and match based on the job, not brand hype.
The Essential Toolkit
Five basic tools handle most sealing jobs: a caulk gun, sharp utility knife, putty knife, measuring tape, and a screwdriver set – that covers removal, prep, and application. Toss in disposable gloves, a scrubbing pad and a rag and you’ll save time, and if you’re doing frames regularly, get a foam-gun or backer-rod too; they make large gaps so much easier to fill, and you won’t be chasing missed spots later.
Choosing the Right Sealing Products
Silicone caulk can last up to 20 years while acrylic-latex typically lasts 5-10, so you pick by exposure and paint needs: use silicone for exterior, high-moisture areas and latex when you need to paint. For gaps under 1/4 inch use caulk, for 1/4 to 1 inch use backer-rod plus caulk or low-expansion foam, and for big voids choose high-expansion foam but only where frame flex isn’t an issue.
Think about substrate compatibility and cure times next: silicone won’t stick well to oily plastics, latex shrinks less and is paintable, and spray foam can expand 20-30 times so you’ll want low-expansion for window jambs. Got a wooden sash? Use paintable latex or a specialty window sealant so you don’t trap moisture. Skin time matters too – 20-40 minutes lets you tool the bead, full cure can be 24-72 hours, so plan your weather window and don’t rush the prep or you’ll be redoing it sooner than you thought.
My Go-To Methods for Sealing Windows
Like swapping thin curtains for insulated ones, the techniques I use focus on where air actually slips past – sash edges, frame seams and the meeting rails; you tackle those and you cut drafts by 10-20% on heating bills. You’ll mix quick fixes (foam tape, plastic film) with longer-term solutions (weatherstripping, caulk, new sweeps), spend roughly $5-30 per window depending on materials, and usually finish most rooms in an afternoon if you prep first.
Weatherstripping – What’s the Fuss?
Like putting a snug jacket on a window, weatherstripping seals moving parts where caulk won’t work; you’ve got foam tape for temporary fixes, V-strip or vinyl for sashes, and silicone bulb or compression strips for heavier-duty seals. Costs run $3-20 per strip, foam lasts 3-5 years, silicone 8-10+, and installing it is often a 10-30 minute job per window – simple, cheap, and immediate relief from that pesky draft.
Caulking – Why It’s a Game Changer
Unlike weatherstripping, caulking fills fixed gaps and bonds materials so leaks stay shut for years; you’ll use paintable latex for trim and interior gaps, and 100% silicone or hybrid sealants for exterior joints near water. A single $5-15 tube usually covers one window’s exterior seams, cures in about 24 hours, and properly applied caulk can last a decade or more, cutting infiltration where it actually matters.
Compared to a tape fix, caulk is permanent when done right – but prep is everything: remove old caulk with a utility knife, clean with rubbing alcohol, and use a backer rod for gaps over 1/4 inch so the sealant bonds correctly. Cut the tip at a 45-degree angle to match joint width (start small – you can always widen), gun it steadily, and smooth within a few minutes with a damp finger or tool; do this above about 40 F and expect 24-72 hours to fully cure depending on product. Choose paintable latex for trim you’ll paint, pick 100% silicone for longevity, and keep a spare tube – one mistake can mean redoing the whole joint.
Here’s How to Seal Those Doors
You care because door gaps dump conditioned air and invite pests, and that hits your comfort and bills. Start by measuring gap sizes top to bottom and along the floor; 1/8 inch is tiny but noticeable, 1/2 inch is a wide-open highway for drafts. Pick solutions that match the gap: weatherstripping for jambs, sweeps for bottoms, thresholds for uneven sills. A few targeted fixes cut drafts fast and feel immediate.
Door Sweeps – Do They Really Work?
Yes, if you match the type to the gap. Want a quick win? Brush sweeps handle irregular floors, rubber or vinyl stops block bigger gaps, and automatic drop seals lock out air when the door shuts. You’ll stop most under-door drafts of about 1/8 to 1/2 inch this way. Installation is simple-10-30 minutes for a screw-on sweep; adhesive ones go faster but wear sooner. Cheap fix, big payoff.
Adjustable Thresholds – Should You Consider Them?
If your floor or sill is uneven, thresholds are often the better move. Adjustable thresholds let you raise or lower a rubber or neoprene seal to close gaps that a sweep can’t, and they also keep out water and dust on exterior doors. Typical adjustable ranges cover a few millimeters to about 1/2 inch, and they last longer than stick-on fixes. Worth it when you want a permanent, weather-tight result.
Measure first: lift the door and note the largest gap at the sill, then pick a threshold with an adjustable range that exceeds that gap by a few millimeters. Most aluminum thresholds with drop seals run $30-$120, while premium extruded options hit about $150. DIY install takes 30-90 minutes; you may need shims, a drill, and a hacksaw to trim. Seal the ends with silicone, test the door swing so you don’t bind it, and adjust until the seal compresses lightly.
The Real Deal About Insulating Your Home
On average, proper insulation can reduce your heating and cooling bills by about 15%, so if you’ve been sealing windows and doors but still see high bills, insulation is the next step. You should check attic and wall R-values – many homes need R-38 or higher in the attic – and target rim-joist and basement areas where heat sneaks out. If you act now you’ll lower HVAC runtime, improve comfort and cut noise, and yes, it pairs with draft sealing for the biggest wins.
Why Insulation Matters
Up to 40% of your home’s heat can escape through uninsulated attics and walls, so if you feel chilly near ceilings or exterior walls that’s a clue. You want the right R-value for your climate – R-38 to R-60 in attics for colder zones, R-13 to R-21 in walls – and to avoid gaps that let convection do the work for your furnace. When you plug those holes your system runs less, lasts longer, and you get fewer cold spots.
Bonus Tips for Better Energy Efficiency
Sealing air leaks plus upgrading insulation can shave roughly 10-20% off your energy use, so don’t treat them as separate projects. You should focus on attic insulation, rim-joist foam, weatherstripping doors, and sealing around plumbing and vents with low-expansion spray foam or caulk. And swap to LED bulbs and a programmable thermostat while you’re at it – small moves add up fast.
- Inspect attic insulation depth with a ruler – aim for recommended local R-values.
- Seal gaps around chimneys, recessed lights and plumbing boots before adding insulation.
- Upgrade low-R doors with foam weatherstripping and thresholds to stop edge leaks.
- Perceiving persistent drafts after sealing? get a blower-door test or thermal scan to find hidden leaks.
Programmable or smart thermostats can cut heating costs 6-10% annually, so if you haven’t switched yet it’s an easy win. You can set setbacks for sleep and work hours, zone areas you use most, and use geofencing to avoid heating an empty house – and that pairs nicely with better insulation so your thermostat isn’t chasing leaks. If you’re DIY-ing, tackle attic and rim-joist first; pros should be called for wall or cavity upgrades.
- Change HVAC filters monthly during heavy seasons to keep airflow efficient.
- Insulate hot water pipes and the water heater jacket to reduce standby losses.
- Use window treatments and draft guards seasonally to boost overall efficiency.
- Perceiving uneven temperatures between rooms? consider zoning or dampers to balance HVAC delivery.
DIY or Hire a Pro?
When to Tackle It Yourself
Want to save cash and handle most common leaks yourself? If you can use a caulk gun and a screwdriver, you can re-caulk, replace foam tape, fit door sweeps, and install window film-most jobs take 15-90 minutes per opening. And a $5-8 tube of silicone caulk or $5-15 roll of weatherstrip usually does the trick, with materials under $20 per window and potential draft-related savings of roughly 5-10% on heating costs.
And When to Call in the Experts
Got rot, warped frames, or failed insulating glass that fogs between panes? Call a pro when you see structural damage, persistent water intrusion, or condensation inside IGUs, and when work might affect load-bearing trim or gas appliances nearby. So expect repairs to run $150-400 and full replacements commonly $300-1,000 per window depending on size and materials.
Want to know what pros actually do? They’ll run blower-door tests and infrared scans, remove and replace sills, reframe where needed, install proper flashing and jamb liners, and fit low-e or argon units for better performance. You’ll get a written estimate, permit handling if required, and often a labor or seal warranty that protects your investment.
To wrap up
With this in mind, sealing your windows and doors is the fastest way to stop drafts and lower bills – no, really, it’s that effective. You can use weatherstripping, caulk, door sweeps and even draft snakes; pick what fits your budget and skill. Want comfort now? Start with the worst leaks and test with a candle. Do it once, do it right, and your home will feel way cozier.