


You’ll find that compact bathrooms don’t fail you by chance—they’re designed to work around constraints, not fight them. In small terraced homes, each inch must be planned, from fixture placement to door swing, so you gain space without sacrificing flow. If you want practical, scalable ideas that keep resale value intact, you’ll want to weigh layouts, materials, and storage strategies that keep the space legible and flexible. Let’s map your best options and pinpoint where a small change delivers the biggest gain.
What Makes Small Terraced Bathrooms Work

Small terraced bathrooms succeed when layout and fixtures maximize usable space without sacrificing comfort. You focus on a compact plan that places essential elements in a cohesive flow, reducing wasted movements.
Start with a vertical strategy: wall-hung vanity, slimline storage, and a compact toilet to free floor area for maneuvering. Prioritize plumbing efficiency by grouping hot and cold lines, installing a single shutoff, and selecting low-flow fixtures to reduce supply runs.
Choose bathroom aesthetics that reflect function—clean lines, light colors, and reflective surfaces to enhance perceived space. Use recessed or corner alcoves for toiletries, and install a shower enclosure with minimal hardware to avoid visual bulk.
Guarantee accessibility with smart door swing, bypass clearances, and a generous turning radius where possible. Regular detailing prevents leaks and supports durable performance.
Foundations: How to Read a Tiny Bath Floor Plan
To read a tiny bath floor plan effectively, start with the layout’s spine: the main wall that carries plumbing and fixtures. Then assess door swing, window placement, and check for clearances around toilets, sinks, and showers. You’ll read scale markers and note service routes for hidden chases and access panels.
Focus on pipe runs, vent paths, and future fixes that affect tile selection and ventilation layout. Consider how fixture groupings affect load and headroom. Map zones for wet and dry activities, keeping ventilation and moisture control in mind.
- Identify core plumbing wall and service routes
- Check door swings, clearance, and access
- Track ventilation paths and moisture risks
- Evaluate tile selection implications on layout robustness
This approach keeps your plan precise, actionable, and aligned with bathroom ventilation and tile selection needs.
Layout Principles for Maximizing Small Footprints
How should you shape a compact bathroom to maximize usable footprint while preserving comfort? Start with alignments that reduce dead space: consider a straight-wall layout, with the vanity and toilet placed flush to the wall, freeing central floor area for movement.
Optimize space by selecting compact fixtures, wall-mounted storage, and a slab door that minimizes swing. Prioritize clear zones for wet and dry activities, using a shallow shower tray or corner enclosure to preserve width.
Guarantee proper bathroom ventilation to prevent damp and odors, integrating an exhaust unit near the shower. Use lightweight, continuous tiling patterns to visually widen the room, and choose tiling patterns that align with fixtures to reduce grout breaks.
Keep finishes durable and easy to clean for ongoing maintenance.
Wet Rooms in Compact Spaces: Pros, Cons, and Setups

Wet rooms in compact spaces can redefine your bathroom’s footprint, offering a unified, barrier-free zone that reads as larger than it is. You’ll gain a streamlined layout with fewer walls, but you must plan drainage, waterproofing, and slip resistance upfront.
For a luxury spa feel, choose seamless floor tiles, concealed drains, and warm underfloor heating. Prioritize eco-friendly materials that resist mold and support durability in damp environments.
- Prioritize continuous waterproofing and a low-profile threshold
- Select non-slip, large-format tiles and warm tones for a spa vibe
- Specify moisture-resistant cabinetry and ventilation for longevity
- Use concealed plumbing and discreet drains to maintain clean lines
Corner Showers That Improve Flow in Narrow Plans
Corner showers maximize flow in tight footprints by freeing central space and reducing door swing.
In narrow plans, angular layouts boost usable area and directional movement, addressing Corner Shower Flow and Narrow Plan Efficiency.
Consider how these shapes create angular space gains without sacrificing enclosure integrity.
Corner Shower Flow
Corner showers can improve flow in narrow bathroom plans by maximizing usable space and reducing door swing interference. You’ll gain more central floor area for movement, and the angled footprint helps align fittings without cramping the room. Focus on practical details that speed installation and reliability.
- Use corner or diagonal shower trays to minimize wasted corner space
- Choose slim-profile doors or curtains to keep sightlines open
- Plan plumbing runs to reduce elbow joints and leaks
- Verify ventilation and moisture control with continuous exhaust and proper tiling patterns
For maintenance, guarantee easy access to valves and seals.
In layout reviews, confirm that bathroom ventilation remains effective with the new enclosure.
Tiling patterns should guide water flow and line up with the showerhead for consistent coverage.
Narrow Plan Efficiency
To keep a narrow plan from feeling cramped, optimize corner showers for efficient flow and clear sightlines. You’ll gain space by selecting a quadrant or neo-angle stall that minimizes door swing and maximizes usable footprint.
Align the shower edge with a fixed panel, not a curtain, to preserve visual width and reduce obstruction. Use a slim, continuous grab bar and a low-profile threshold to prevent trips and maintain clean sightlines down the corridor.
Prioritize moisture management with integrated bathroom ventilation near the shower niche to control humidity without exhausting space. Choose plumbing fixtures that share a single rough-in for water supply and drainage to simplify routing in tight walls.
Plan tiling and niche placement to avoid visual clutter, enhancing perceived breadth and function.
Angular Space Gain
When you design for angular space gain, prioritize corner showers that maximize usable floor area while preserving sightlines and flow. In narrow plans, angular enclosures reduce dead zones, improving movement and perceived space.
Align the shower with existing plumbing and ventilation routes to minimize disruption, and guarantee proper drainage slope without encroaching on other fixtures.
Integrate targeted lighting placement to highlight depth and keep reflections out of sightlines. Use frameless or low-profile doors to maintain openness and reduce visual clutter.
Plan for adequate ventilation near the shower to prevent moisture buildup. Consider recessed niches for toiletries to keep the floor clear and enhance cleaning efficiency.
- Optimize corner positioning to maximize floor area
- Pair shower enclosure with strategic lighting placement
- Use frameless doors to preserve sightlines
- Add recessed storage for clutter-free space
Back-to-Wall Fixtures to Reclaim Inches
Back-to-wall fixtures are a practical move when you’re reclaiming inches in tight terraced plans. Wall-hung won’t save inches here, so prioritize a compact toilet and depth-conscious basin choices to maximize usable space.
A big gain comes from selecting fixtures with reduced projection and integrated cisterns to keep the footprint predictable.
Wall-Hung Won’t Save Inches
Wondering why wall-hung toilets and cabinets still won’t save inches in tight terraced installs? You’ll find the core limits aren’t fixture type but measurement gaps, backs, and pipe runs.
In practice, you lose more space accommodating wall brackets, concealed cisterns, and access clearances than you gain from a slim profile.
- Consider floor-to-ceiling alignment, not just wall depth
- Plan for service access behind panels, not just aesthetics
- Account for door swing and drawer clearance in tight corridors
- Prioritize reliable, measured space-saving within the overall room footprint
Wall hung fixtures can look lean, but the hidden hardware and maintenance access erode inches.
Treat the layout as a whole-system edit, not a single “saver.”
Compact Toilet, Big Gain
Compact toilets edge out space-wasters by reclaiming inch after inch through back-to-wall design. You’ll gain valuable floor area in small baths by positioning the cistern entirely behind the wall, reducing visible depth and enabling tighter layouts.
Focus on toilet design that suits narrow alcoves and line-of-sight constraints, prioritizing compact fixtures without sacrificing serviceability. Choose concealed cisterns with accessible service panels and compatible flush mechanisms to maintain reliability.
When measuring, account for rough-in distances and wall thickness to avoid interference with doors or vanity units. Installers should verify clearance at the seat swing and ensure adequate rear clearance for maintenance.
Select a wall-to-front measurement that aligns with your room’s plan, then specify mounting hardware and sealant details for a durable, low-profile result.
Depth-Conscious Basin Choices
To reclaim inches in a small bath, prioritize depth-conscious basin choices that sit flush or nearly flush with the wall. Back-to-wall basins maximize usable footprint while preserving line-of-sight and room proportions.
Choose recessed or semi-recessed models to minimize projection without sacrificing usability. Install with precise carcass alignment to avoid gaps that steal space.
Plan vanity placement to maintain clear traffic paths and mirror positioning that reflects light without encroaching on the basin.
- Back-to-wall installation minimizes bulk and enhances perceived space
- Semi-recessed basins save depth while maintaining ergonomics
- Tight tolerances during mounting prevent awkward gaps
- Strategic vanity placement and mirror positioning boost light, access, and function
Wet vs Dry Zoning: Designing for Water and Dry Areas

Wet and dry zones are the backbone of a small terraced bathroom design. You’ll allocate wet areas where water adds value without cross-contamination, and dry zones for storage and hygiene tasks.
Start with a robust moisture strategy: specify floor slope, moisture barriers, and anti-slip finishes in wet zones, and airtight seals around cabinets to reduce humidity load.
Position the shower and bath away from the door and vanity to create a clear traffic pattern and minimize splash risk.
Integrate plumbing early: run shared services in a protected chase, coordinate with wall cavities, and select compact fixtures that fit tight widths.
Use a removable separator or curved enclosure to tailor zoning.
Prioritize simple maintenance, predictable drainage, and consistent finishes for durable moisture management and plumbing integration.
Kitchenette-Adjacent Baths: Smart Pairings That Work
When a bathroom sits beside a kitchenette, plan for shared services and minimal disturbance to workflows. You optimize layouts by clustering wet zones and coordinating supply runs, so installation stays clean and fast. Focus on bathroom lighting and toilet placement to maximize efficiency without compromising comfort.
- Position the toilet away from primary traffic and kitchen view lines
- Locate lighting zones to avoid glare on work surfaces
- Route hot-water and waste lines with shared risers for reduced trenching
- Use compact fixtures and partial walls to preserve sightlines and airflow
This pairing reduces noise transfer, speeds renovation, and keeps both spaces serviceable. Guarantee the plan allows easy access for maintenance, with venting sized for simultaneous use.
Finalize elevations that align cabinetry, toe-kicks, and door swings for smooth operation.
Linear Bath Layouts for Narrow Floors
Linear bath layouts suit narrow floors by stacking fixtures in a single line to maximize usable width. You line up the basin, toilet, and shower along one wall, preserving door swing and minimizing corridor interference. This approach simplifies plumbing runs, reduces waste space from corners, and supports clean, straight visual axes that read as a single architectural line.
Choose compact, wall-hung or corner basins to keep floor clearance intact for cleaning and accessibility. Selecting a corner or recessed shower preserves elbow room in the remaining floor area and helps maintain a functional traffic path.
Vintage fixtures can add character without compromising linework, while Artistic tiles create a focal point that enhances perceived width. Prioritize tight-fit dimensions, compliant clearances, and durable, water-resistant finishes for long-term performance.
Storage Solutions That Don’t Clutter
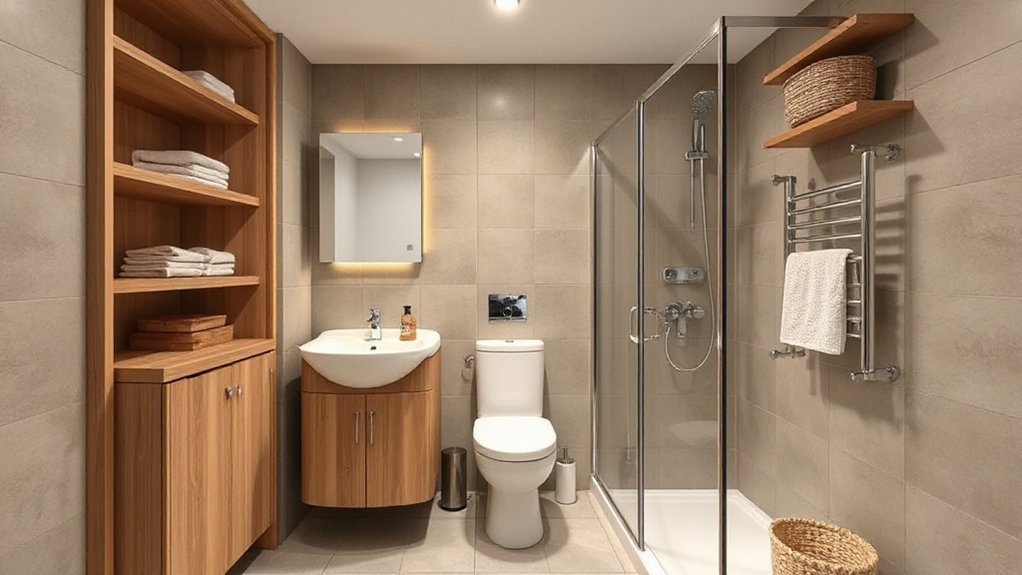
Hidden shelf solutions and slimline storage tactics help you keep essentials accessible without crowding aisles.
We’ll compare mounting heights, edge-to-edge profiles, and multipurpose units to maintain a clear, uncluttered flow.
Your focus is on maximizing hidden or slim storage that integrates seamlessly with compact layouts.
Hidden Shelf Solutions
In compact bathrooms, hidden shelf solutions maximize storage without encroaching on floor space. You’ll place discreet compartments within vanity cavities, mirror frames, or recessed walls to keep essentials reachable yet out of sight, preserving a clean line. Use pull-out–style organizers for small items, and label discreet dividers to speed access during quick routines. This approach creates secret storage without bulk, aiding maintenance and airflow.
- Mount recessed shelves behind medicine cabinets
- Integrate pull-out bins in vanity panels
- Use hollow vanity doors for slim organizers
- Place shallow niches above fixtures for daily-use items
Focus on consistency of depth, finish, and hardware to ensure seamless integration with the room’s geometry, enabling reliable access while maintaining visual calm. Hidden shelf, secret storage.
Slimline Storage Tactics
Slimline storage packs maximum function into minimal space by leveraging slim profiles, integrated accessories, and doorway or wall-mounted access. You’ll design around vertical real estate, using tall, narrow cabinets and recessed shelves to keep counters clear.
Choose products with integrated dividers, hooks, and pull-out trays to minimize empty gaps. Place vanity storage where it’s most accessible, optimizing workflow between sink, mirror, and shower.
Consider vanity placement to align with door swing and plumbing, reducing remodel complexity. Use color contrast to differentiate zones: light cabinetry against darker walls makes compact rooms feel legible and organized.
Hide clutter behind mirrored doors or frosted glass to maintain a clean silhouette. Finally, install toe-kick drawers for push-pull storage without encroaching on floor space.
Lighting Techniques to Open Up Tiny Baths
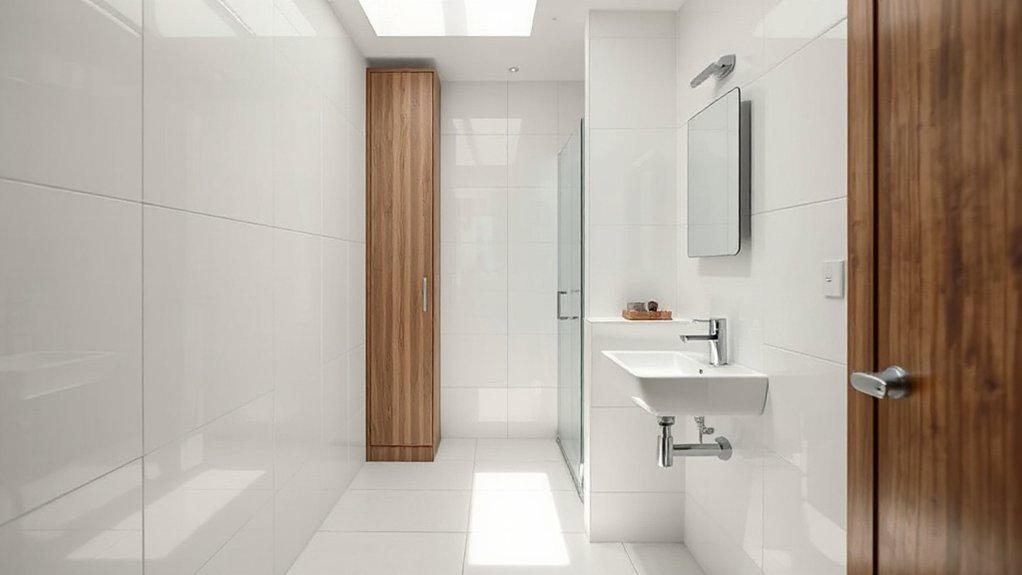
Effective lighting in tiny baths starts with layering: a bright general wash, targeted task lighting, and mirrors that multiply brightness. You’ll use this framework to visually expand space while preserving function.
Prioritize high CRI LEDs for true color and minimal glare on reflective surfaces. Choose a cool-to-neutral spectrum for daytime tasks and switch to warmer tones for mood lighting in evening routines.
Wall-mounted, slim fixtures reduce bulk, while recessed options keep sightlines clean. Balance brightness with dimmers to control mood without sacrificing clarity.
Placement matters: install task lights near mirrors, avoid backlighting, and reflectors help spread light. Lighting ambiance thrives with layered layers and strategic accents.
- Layer general, task, and ambient lighting
- Use dimmers for mood control
- Employ mirrors to multiply brightness
- Select high-CRI, low-glare LEDs
Ventilation Tactics for Compact Bathrooms
Do compact bathrooms trap moisture or compromise air quality without proper ventilation? In tight layouts, you’ll prioritize continuous air exchange over decorative features.
Start with a balanced exhaust strategy: an appropriately sized fan linked to a humidity sensor or timer improves exhaust effectiveness without wasting energy. Position intake and exhaust to promote cross-flow, using ceiling or wall-mounted units that minimize splash zones and noise.
Maintain ductwork access for cleanouts, reducing airflow resistance and ensuring peak performance. Establish a routine for ventilation maintenance, including filter checks and annual duct inspections, to prevent performance degradation.
For odor control, consider a dedicated exhaust cycle during and after showers and a passive vent for baseline air movement.
Document performance targets and monitor deviations to sustain long-term air quality.
Color and Material Schemes That Read as Bigger
Color and material choices can visually enlarge a compact bathroom by reflecting light and exaggerating depth. You’ll choose schemes that maximize perceived space while maintaining durability and finishability. Use light, cool neutrals as base tones to bounce daylight, then add purposeful contrast to define zones without shrinking the feel.
Consider color psychology to influence perception: airy blues and mint greens feel expansive, while warm whites create brightness without glare.
Prioritize material durability in wet areas, selecting solid-surface countertops, vitrified tiles, and moisture-resistant laminates.
- Light-reflective surfaces to enhance brightness
- Durable, non-porous materials for longevity
- Subtle tonal shifts to delineate zones
- Consistent grout lines for visual continuity
Privacy and Acoustics Without Sacrificing Light
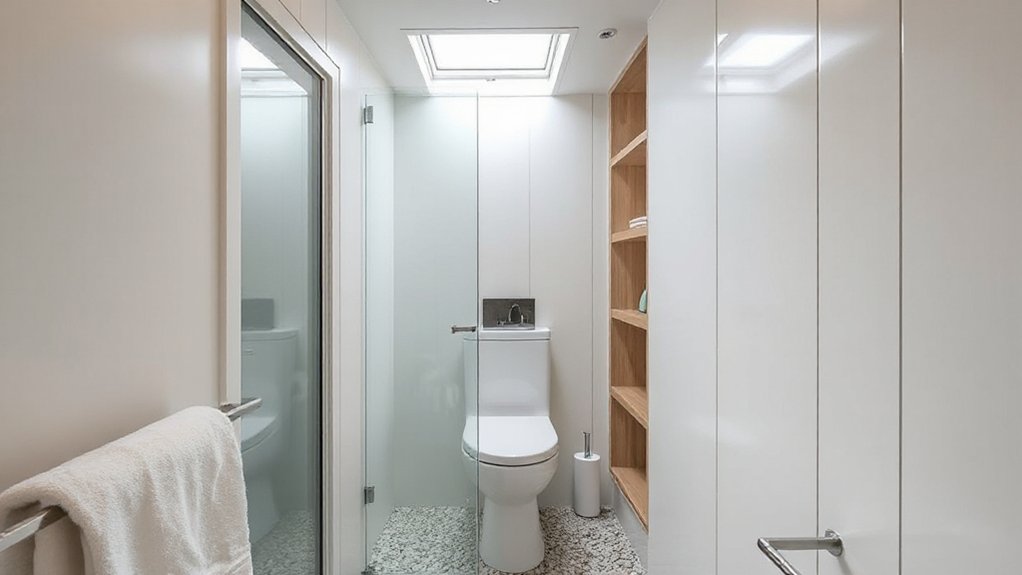
Natural light is non-negotiable in small terraced bathrooms, but you can protect privacy and control acoustics without blocking it. Start with privacy barriers that segment zones without visual clutter, using frosted glass, vertical slats, or half-walls above knee height.
In tight layouts, position the primary shower or toilet behind these screens to limit line-of-sight while preserving openness. For acoustics, apply targeted acoustic treatments that don’t mute daylight—use ceiling-mounted absorbers or wall panels placed away from windows to dampen splash and footfall noise.
Choose materials with low echo potential, like mineral wool composites or fabric-waced panels, and seal gaps around doors with weatherstripping. Integrate acoustic considerations into the ventilation strategy to prevent moisture-related issues and maintain a bright, airy feel.
Real-World Floor Plans for Inspiration
Real-world floor plans offer tangible benchmarks you can adapt to your small terraced bathroom. You’ll see compact zones, clear circulation, and where to place wet areas for efficiency. Use these proven layouts to guide your measurements, door swings, and fixture placement, then tailor them to your space.
Look for patterns that maximize storage without crowding the core path and prioritize direct access from bedroom zones.
- Optimize long walls with a shallow vanity and mirror to expand perceived space
- Align shower or tub with a sill-free threshold for easier access
- Pair vintage fixtures with tight-radius corners to save footprint
- Choose eco-friendly tiles that extend color and texture without crowding a wall
Apply tested space pointers, then prototype early on paper.
Quick-Upgrade Tricks to Boost Resale Value
Even small updates can lift resale value quickly, so focus on high-impact, low-effort upgrades you can complete in a weekend. Start with quick cosmetic wins: fresh caulk, clean grout, and a matte-finish paint refresh to brighten rooms without a full renovation.
Upgrade bathroom accessories that players notice first—new towel bars, a coordinated mirror, and a minimal shelf system to tidy surfaces. Replace dated lighting with brighter, energy-efficient LEDs to improve perception of space and reduce energy costs.
Tackle plumbing essentials only as needed: fix leaks, replace worn seals, and upgrade to flexible PEX lines where applicable for reliability.
Improve storage with recessed shelves and a slim medicine cabinet. Guarantee venting is adequate to curb humidity, then seal floors to preserve longevity.
Frequently Asked Questions
How Can I Add Space Without Shifting Plumbing Lines?
You can add space without moving plumbing by reconfiguring storage and fixtures tall or wall-mounted, freeing floor area. Use storage solutions like shelves, cabinets, and niches; apply lighting enhancements to visually expand the room and reduce clutter.
What Budget-Friendly Upgrades Yield the Biggest Impact?
Replace cabinet doors with soft-close, shaker styles, upgrade lighting, and install a slim vanity mirror. Budget-friendly upgrades yield the biggest impact: luxury upgrades and aesthetic improvements, all while you save on plumbing rearrangements and still finish on time.
Can Door Placement Affect Perceived Bath Size?
Door placement can alter your perceived bath size; strategic positioning, clearance, and sightlines expand or shrink the space. You’ll improve functionality and feel by aligning doors with plumbing walls and using pocket or barn options where feasible.
Are There Ergonomic Considerations for Small Users?
Yes—you’ll prioritize space saving furniture and ergonomic sink placement to fit small users. Start with tight clearance, then suspense builds as you test reach and pivot, ensuring practical, project-focused ergonomics that keep essential movements smooth and safe.
How Do I Choose Fixtures for Minimal Maintenance?
Choose low-maintenance fixtures like ceramic or enamel, avoid ornate surfaces, and prioritize reflective finishes. Opt for luxury fixtures with simple drainage and eco-friendly options, selecting durable coatings and easy-to-clean lines to reduce upkeep and maintenance over time.
Conclusion
You’ve seen how small terraced baths thrive on tight footprints, smart zoning, and wall-hung essentials. A near-even mix of linear layouts, corner showers, and recessed storage keeps traffic clear and surfaces easy to clean. One telling stat: bathrooms account for about 5–10% of a home’s resale value, so compact upgrades can punch above their weight. Prioritize a single, well-lit wet zone, reflective surfaces, and quiet tech to maximize perceived space without sacrificing function.