


Like a sealed box waiting for light, your garage can reveal a high‑value living space when you map every detail. You’ll define clear goals and a realistic budget, then check local codes early to avoid surprises. Plan insulation, vapor barriers, and a smart layout that feels spacious yet practical. Consider storage, multi‑use zones, and energy‑efficient systems, sparking a plan you can trust as you move toward the finishing touches that set your project apart—if you want to know what comes next, keep going.
Is a Garage Conversion Right for You?

Deciding if a garage conversion is right for you starts with your goals and budget. You’ll assess space, light, and usability so the project adds real value without overreaching. Consider whether you need extra bedrooms, a home office, or a multi‑purpose suite, and map how it fits your current layout.
Feasibility hinges on structural access, insulation, and code compliance, plus potential impact on resale. Before you embark on this project, sketch core requirements and a rough budget, then test pitfalls with a quick cost‑benefit check.
Focus on practical outcomes: reliable heating, quiet operation, and durable finishes that support daily life. Prioritize garage aesthetics and exterior upgrades that harmonize with your home’s style, while keeping long‑term maintenance in view.
This helps you decide confidently and plan smartly.
Define Your Goals and Budget Up Front
Start by setting clear objectives for what the converted space must deliver, whether it’s a guest suite, a home office, or an open living area.
Then map a budget allocation plan that prioritizes structural upgrades, insulation, and critical systems first, with a realistic reserve for surprises.
Keep your plan actionable: assign owners, timelines, and milestones so you stay on track and maximize value.
Set Clear Objectives
To set you up for success, start by defining your goals and laying out a realistic budget up front. Clarify what you’ll gain (space, comfort, resale value) and set a cap you won’t exceed. Then map practical milestones, from permits to finish finishes, so you stay on track.
With goals in hand, forecast costs for materials, labor, and contingency, and assign decision deadlines to avoid scope creep. Consider how Garage aesthetics and lighting design influence value and daily use, guiding every choice from insulation to fixtures.
- Define nonnegotiables and nice-to-haves
- Estimate total budget with a 10–15% contingency
- Prioritize open-plan layout and daylighting
- Align finishes with long-term maintenance
- Set decision deadlines to prevent drift
Budget Allocation Plan
Start with core needs: weatherproof shell, climate control, and safety systems, then allocate for aesthetics and function.
Track contingencies—set aside 10–15% for unforeseen issues, like structural tweaks or material price shifts.
Create a phased plan: demolition, rough-ins, build-out, and final touches, with clear milestones and decision deadlines.
For garage aesthetics, plan durable, timeless finishes that resist moisture and wear; for landscaping design, integrate site grading, drainage, and year-round appeal to extend value beyond the walls.
Regularly compare actuals to the budget, adjusting before overruns occur.
Check Local Codes and Permits Early
Start by checking local permit timelines early so you map the project milestones accurately.
Use a tight code compliance checklist to forecast required inspections, fees, and approvals before you buy materials.
It saves back-and-forth and keeps your build on track with minimal surprises.
Local Permit Timelines
- Create a master permit calendar with milestones
- List required drawings and calculations for each phase
- Schedule pre-submittal meetings with authorities
- Attach elegant garage aesthetics renderings for reviews
- Map landscaping plans to sightlines and setbacks
Code Compliance Checklist
Before you lift a hammer, map out the rules you must follow: start by checking your local codes, zoning restrictions, and permit requirements now so you don’t derail the project later. Your Code Compliance Checklist keeps you grounded from day one.
Confirm electrical, plumbing, and insulation standards; verify ceiling height and egress options; plan fire-rated walls and proper ventilation. Schedule inspections at key milestones to avoid backtracking.
Document retrofit needs for bedrooms, baths, and living spaces, and align them with energy codes and safety norms.
Consider garage aesthetics during planning to ensure finished looks meet code without unfortunate surprises.
For exterior upgrades, anticipate roofing, siding, and door/window openings under permitting guidelines to protect long-term value.
Plan Insulation, Vapor Barriers, and Thermal Breaks
Insulating a garage conversion starts with a clear plan for insulation, vapor barriers, and thermal breaks that fits your climate and budget. You’ll pick insulation materials suited to your walls, floor, and ceiling, then map where vapor barriers go to control moisture.
Include thermal breaks at framing to reduce condensation and heat loss. Choose materials with good R-values, fire ratings, and practical installability, and align them with your HVAC strategy.
Plan achievable installation milestones, inspection points, and budget buffers to avoid rework.
- Identify climate-specific insulation materials and recommended R-values
- Specify vapor barriers by location and washer/fastener compatibility
- Detail thermal breaks at studs, sill plates, and door thresholds
- Coordinate with electrical and plumbing to avoid gaps
- Schedule tests for air leakage and moisture after install
Design Layout for Comfort and Flow
Start with a clear footprint: map where you’ll live, work, and relax, then place major zones to minimize backtracking.
Prioritize traffic flow by keeping primary paths wide enough for furniture and frequent use, and align doors, windows, and outlets to support everyday tasks.
Consider sightlines and connections between zones to prevent crowding, while preserving flexibility for furniture rearrangement.
Space Planning Principles
To design a comfortable, efficient garage-to-living-space layout, start by prioritizing clear zones: a welcoming entry, a cozy living area, a functional kitchen and dining nook, a private retreat, and a smartly placed bathroom.
- Define sightlines and maintain open sight connections between zones.
- Use furniture with rounded edges to improve flow and safety.
- Reserve mechanicals and storage to the perimeters, not the center.
- Introduce flexible partitions or screens for adaptable space.
- Plan color schemes and decorative accents that unify zones.
Prioritize seating comfort, scale, and proportion to avoid crowding. Choose durable finishes and hide clutter with integrated storage.
Consider lighting layers (ambient, task, accent) to enhance mood and clarify function. Color schemes tie the plan together; decorative accents personalize the space while preserving cohesion.
Traffic Flow Optimization
Smart traffic flow starts with clear, intentional paths between zones: entry to living area, kitchen, dining, retreat, and bathroom. You optimize circulation by defining primary corridors and minimizing cross-traffic conflicts.
Prioritize a direct route from entry to most-used spaces, using sightlines and thresholds to cue movement without clutter. Measure traffic patterns across peak hours and adjust furniture to preserve at least 36 inches of clearance for pedestrian flow.
Place movement prompts—rug edges, lighting, and color changes—along routes to guide instinctive travel. Use furniture zones to create micro-traffic islands that reduce bottlenecks at doors.
Consider dual-access options for kitchen and retreat to avoid choked passages.
Finally, test, observe, and reconfigure until you sustain smooth, predictable flow throughout the living space.
Choose Subflooring and Thermal Breaks for Comfort
Choosing subflooring and incorporating thermal breaks sets the foundation for comfort in a garage conversion. You’ll start with a solid subfloor that resists moisture and supports heavy furniture, then add thermal breaks to minimize cold transfers from concrete.
Prioritize lightweight, durable underlayment options that suit your climate, and pair them with a sturdy subfloor layer for a stable, level base. Consider how flooring options affect foot traffic, acoustics, and warmth, and guarantee the installation accommodates future utilities without compression or squeaks.
Use proper moisture barriers and sealants to prevent mold growth.
- Flooring options that balance comfort, durability, and cost
- Moisture management and vapor barriers
- Thermal insulation placement for maximum efficiency
- Noise dampening considerations for a calm living space
- Easy-access seams and transitions for real-world use
Upgrade Electrical: Outlets, Lighting, and Safety

Upgrading the electrical simply isn’t optional in a garage conversion—it’s foundational for safety, comfort, and future usefulness. You’ll plan a robust circuit layout first, sizing feeds for living‑space loads, climate control, and outlets.
Prioritize dedicated circuits for high‑demand devices, like workshop tools or compact appliances, to prevent nuisance tripping. Install metal conduit or armored cable in exposed areas and use GFCI outlets in any space that might get wet or humid.
For outlet placement, stagger receptacles along walls to reduce extension‑cord use and map switches near doors for convenient lighting control. Choose ENERGY STAR–rated fixtures with dimmers to save energy and set the mood.
Label breakers clearly, and test every connection after wiring is complete to ensure electrical safety.
HVAC Options for Garage Conversions
You’ll optimize comfort and efficiency by choosing efficient HVAC ducting that minimizes heat loss and noise. Consider zone control options to tailor climate to different areas, reducing energy use and improving occupancy comfort.
We’ll compare compact duct runs, mini-split setups, and smart controls to keep installation practical and future-proof.
Efficient HVAC Ducting
- Plan trunk lines that serve zones with balanced pressure
- Choose appropriately sized ducts to minimize velocity noise
- Use insulated runs to curb heat gain or loss
- Seal every joint and provide accessible inspection points
- Label each run for future maintenance and diagnostic ease
Zone Control Options
Ever considered how zone control can transform a garage conversion from a drafty box to a comfortable, energy-efficient living space? With zone control, you tailor temp and airflow to separate areas, so you aren’t heating unused space.
Start by grouping high-occupancy zones near the entry and living area, then isolate storage or workshop nooks. Use smart dampers and a controller that supports occupancy sensing and schedules.
Pair fast-response thermostats with weather-appropriate setbacks to curb energy waste. When planning ductwork, prioritize minimal run lengths and sealed, insulated seams to prevent heat loss.
For garage organization, designate zones by function and install wall-mounted controls for quick adjustments. Don’t overlook tools maintenance—keep filters clean and dampers calibrated for consistent comfort across zones.
This approach delivers efficient comfort without sacrificing practicality or control.
Roof and Moisture Barriers to Prevent Leaks
A solid roof and proper moisture barriers are the frontline defenses against leaks when converting a garage into living space. You’ll protect your investment by selecting a weatherproof roof assembly and layering in impermeable barriers that address both interior and exterior moisture.
Prioritize continuous roof overlap, sealed joints, and proper drainage to prevent standing water on decks or ceilings. Implement moisture control with vapor barriers, air barriers, and a defined attic/ceiling ventilation plan to minimize condensation risks.
Regular roof maintenance keeps fasteners tight and flashing intact, reducing creep from temperature swings. Plan for future access, drainage paths, and spill prevention to simplify inspections and repairs.
- Inspect and reseal flashing after major weather events
- Use continuous vapor barriers for walls and ceilings
- Ensure proper attic ventilation and intake/exhaust balance
- Seal all penetrations with compatible sealants
- Schedule routine roof maintenance and quick fixes
Soundproofing for Privacy and Comfort
Soundproofing is essential for privacy and comfort when you convert a garage, and it starts with an airtight, layered approach that stops noise at the source and blocks it from spreading. You’ll deploy a continuous line of defense: seal gaps, install resilient channels, and use density-weighted drywall to reduce structure-borne noise. Choose acoustic caulk for joints and door sweeps that minimize leaks.
Add insulation in walls and ceilings tailored for your climate, then cap it with mass-loaded vinyl or foam panels in key zones. For practical results, combine soundproofing techniques with targeted acoustic treatments—decoupled ceilings, bass traps, and treated reflection points.
Test midrange performance with simple DIY methods, and adjust layers until you achieve consistent, comfortable quiet throughout the living space.
Windows and Natural Light for Garage Conversions
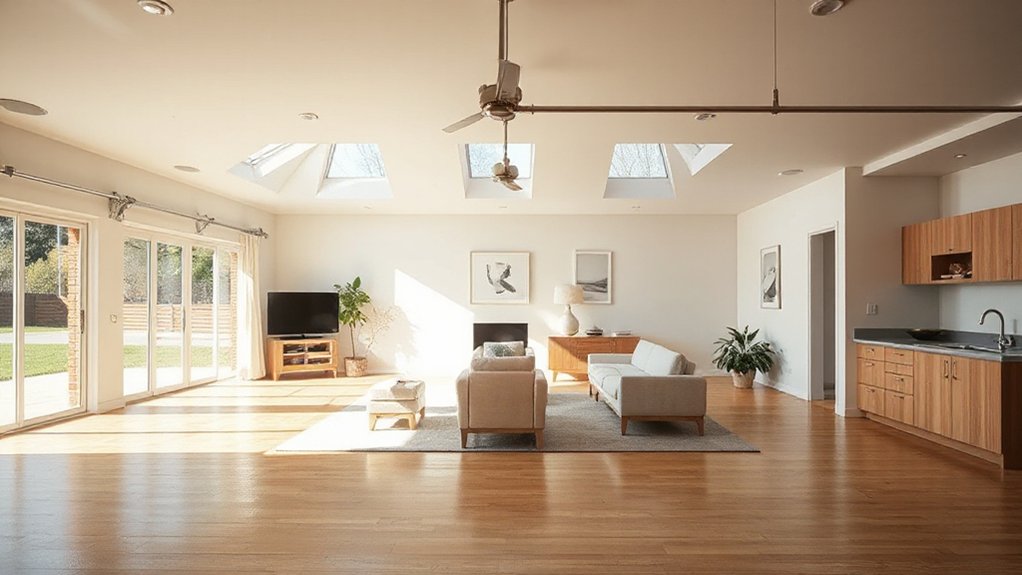
Natural light can transform a garage into a welcoming living space, so start with a daylight plan that fits your climate and usage. You’ll optimize windows and openings before any build, prioritizing scale, placement, and glare control. Use decorative window styles to add character without sacrificing energy efficiency, and pair with strategically placed natural light fixtures to balance brightness.
Choose low-emissivity glass, operable units for ventilation, and skylights or light tubes where wall space is limited. Consider sightlines from interior rooms to maximize openness. Use reflective surfaces and a light color palette to amplify daylight.
Install adjustable blinds or motorized shades for flexibility and privacy. Confirm flashing, insulation, and sealing meet local codes to prevent leaks and drafts.
- Decorative window styles enhance curb appeal and interior ambiance
- Natural light fixtures provide consistent brightness without heat spikes
- Skylights and light tubes expand daylight recovery
- Operable windows improve ventilation and comfort
- Smart shading maintains glare control and privacy
Plumbing Ready: Bath, Shower, or Sink Possibilities
Plumbing readiness begins with choosing the most space-efficient bath or sink configuration for your garage conversion, then wiring and framing to support it. You’ll assess wall lines, access points, and mechanical room placement to minimize disruption later.
Plan for common plumbing fixtures that suit your footprint, prioritizing compact baths or corner showers to maximize usable space. Map bathroom layouts that keep supply runs short and venting practical, reducing materials and cost.
Consider a single shared vanity and a combo unit to cut wasteful gaps between fixtures. Guarantee access for maintenance, with cleanouts and shutoffs clearly labeled.
Target standardized rough-ins and gentle slope requirements for reliable drainage. This approach keeps plumbing fixtures straightforward, scalable, and aligned with your future comfort goals.
Finishes That Elevate Garage Value
When you’re elevating a garage into a high-value living space, finishes matter as much as structure, so pick materials that pair durability with a polished look. Focus on Decorative finishes that resist wear while staying visually cohesive with adjacent rooms.
Prioritize Material durability in every choice, from flooring to ceiling treatments, to sustain long-term value.
- Epoxy or polished concrete floors for resilience and easy maintenance
- Low-VOC paints with satin or eggshell sheens for clean, modern walls
- Moisture-resistant wood or composite cabinetry with functional hardware
- Metal accents and beadboard or paneled details for texture
- Sealed stone or porcelain backsplash that wipes clean effortlessly
Smart Home Features That Boost Resale Value
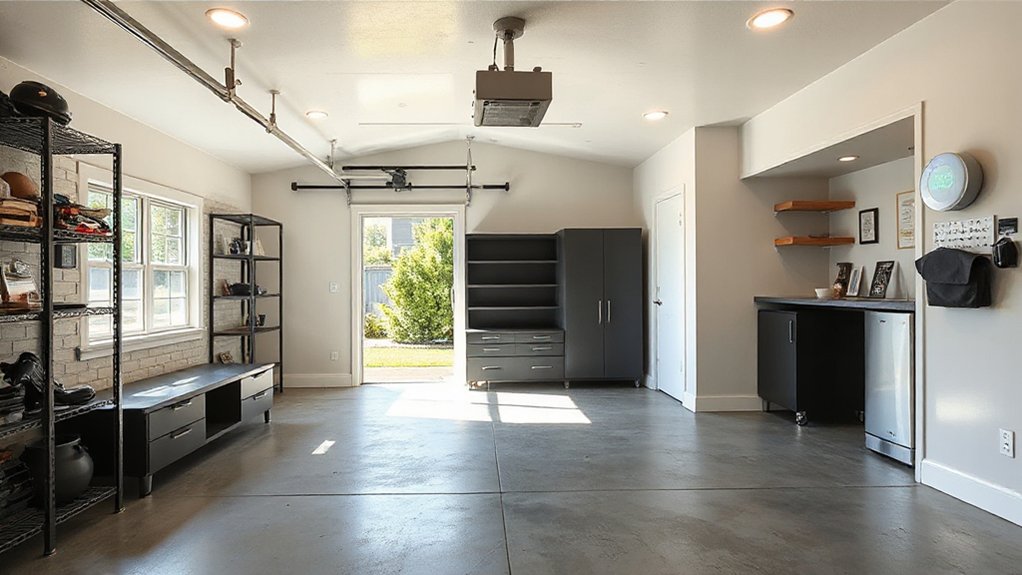
Smart home features not only add convenience but relentlessly improve resale value when you’ve already upgraded the garage with durable, stylish finishes. You’ll maximize impact with a cohesive system that’s easy to operate and scalable.
Prioritize central hubs that control lighting, climate, and locks, so upgrades feel integrated rather than isolated add-ons.
Smart lighting should offer zoning, schedules, and daylight harvesting to save energy and create ambiance that appeals to buyers.
Pair it with security systems that include cameras, door sensors, and remote alerts, ensuring visible ease of monitoring from phones or tablets.
Emphasize reliability, updateability, and clear demonstrations of energy efficiency in listings.
Document warranties and provide simple access to system controls during showings to convert interest into offers.
Storage Solutions and Multi-Use Areas
A well-organized garage conversion hinges on smart storage layouts and clearly defined multi-use zones that maximize every square foot. You’ll balance clutter defense with flexibility, using vertical racks, modular shelves, and labeled bins to keep tools, gear, and seasonal items out of sight yet reachable.
Prioritize Creative storage solutions that tuck away cords, hoses, and accessories behind closed panels, freeing floor space for daily use.
Implement multi functional furniture, like fold-down desks, transformable sofas, and storage ottomans that double as seating.
Zone the area with rugs or differing finishes to denote living, workshop, and hobby nooks without walls.
Choose build-in cabinetry in light tones to enhance perceived space and ease maintenance.
- Creative storage ideas that hide essentials
- Multi functional furniture for tight layouts
- Quiet, durable corner worksurfaces
- Hidden charging and power hubs
- Clear labeling for fast access
Timeline, Milestones, and Risk Mitigation
To keep your garage conversion on track, map a realistic timeline with clear milestones and built-in buffers for common delays. Start with a 2–4 week design and permitting phase, then schedule structural tweaks, insulation, and electrical in parallel where possible.
Set milestone goals: permits approved, framing complete, rough-in ready, and finish selections locked. Build in a 10–15% time buffer for weather, supplier delays, and inspection holds.
Mitigate risk by prequalifying trades, confirming material lead times, and documenting changes with written change orders.
Plan for Garage aesthetics early—specify finishes, lighting, and acoustics to avoid retrofits. Factor exterior upgrades into the timeline so siding, doors, and windows align with interior workflows.
Maintain ongoing risk reviews after major milestones to adjust the schedule proactively.
Final Checklist Before Moving In
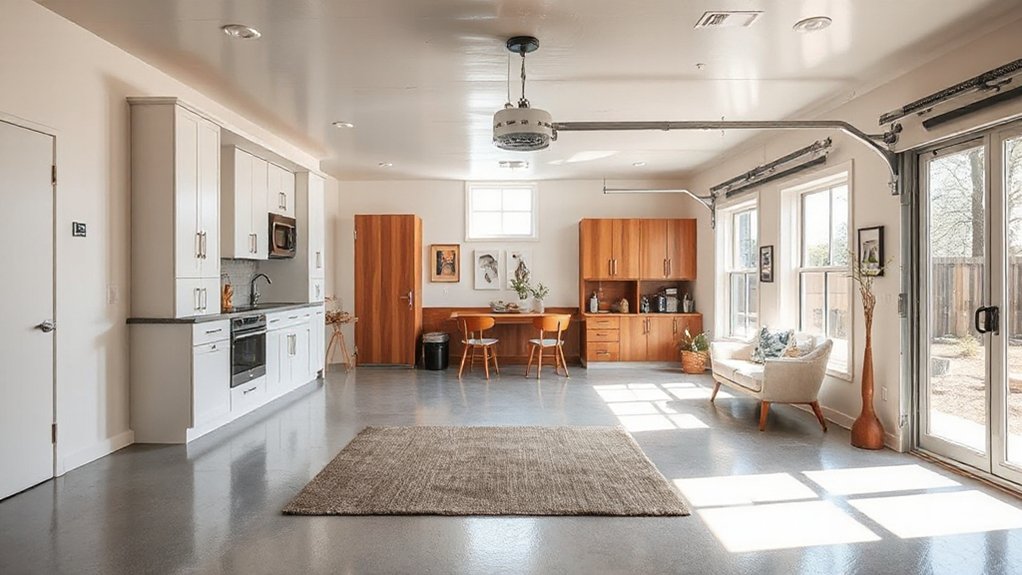
Before you move in, run a final, disciplined checklist to confirm the space is ready for daily living. You’ll verify airflow, lighting, and thermal comfort, then test all utilities, doors, and windows. Make sure the subfloor is clean, sealed, and level, with solid finishes that resist wear. Confirm safety systems are functional, smoke and carbon monoxide detectors are active, and exits are clear.
Inspect built-ins, HVAC zoning, and electrical outlets for charging stations and device placement. Finish with final decor decisions to maintain Garage aesthetics while preserving practical flow. Reassess storage solutions to avoid clutter and maximize footprint.
- Verify lighting layers and task zones
- Test all doors, windows, and locks
- Confirm safety detectors and exits
- Inspect finishes, sealants, and moisture control
- Review storage solutions and furniture placement
Frequently Asked Questions
How Much Value Can a Garage Conversion Add?
You’ll typically add 10–20% value, depending on finishes. Prioritize Garage insulation and Flooring options to maximize bang for buck, minimize energy loss, and boost appeal. You’ll improve comfort, reduce costs, and attract buyers with smart, durable choices.
What Financing Options Work Best for Conversions?
You’ll find that favorable financing for conversions includes HELOCs, renovation loans, and lender-backed energy programs. Design inspiration guides choices, while material selection affects budgets and timelines; align goals early, compare terms, and choose flexible, low-interest options.
Can I DIY or Must I Hire Pros?
Can you DIY or must you hire pros? You can DIY, but assess Garage insulation, permitting requirements, and safety. You’ll plan, measure, and budget; you’ll compare permits, inspections, and timelines; you’ll know when to hire pros for critical tasks.
What Odors or VOC Concerns Should I Anticipate?
You’ll encounter odor control challenges and VOC safety concerns, so ventilate early, seal materials properly, and choose low-VOC finishes. Heed air-quality tests, use activated charcoal filters, and maintain ongoing monitoring to protect occupants and interiors.
How Long Does the Project Typically Take?
Typically, the project takes several weeks to a couple of months, depending on scope. Plan for rough framing, electrical, and insulation. Garage insulation and Flooring options influence timeline; budget extra time for inspections and potential delays. Stay flexible and proactive.
Conclusion
Converting your garage isn’t just an upgrade—it’s a doorway to better living. You’ve mapped goals, nailed codes, and stitched insulation like a careful tailor. With a smart, airy layout, durable finishes, and quiet, climate-controlled comfort, your new space breathes value. Think of storage as hidden treasure and multi-use zones as flexible furniture that grows with you. Stay mindful of milestones, edge toward mindful risk mitigation, and you’ll open a versatile, efficient retreat that elevates your home’s story.