You’ll assess space, light, and budget, you’ll plan layout tweaks and storage, you’ll choose durable finishes that age well, you’ll weave flexible zones with built‑in systems, you’ll upgrade efficiency with smart tech, and you’ll track progress with clear milestones; you’ll pursue a balanced upgrade that preserves character while modernizing daily living, and you’ll discover a practical path that invites you to tackle the first high-impact changes now.
Define Your Back-to-Back Upgrade Goals: Space, Light, and Budget
To start, you’ll define clear goals for space, light, and budget so your upgrades stay focused and achievable. You’ll map how architectural styles influence your plan, ensuring any changes respect proportions and exterior rhythm.
Identify must-haves for flow, storage, and function, then rank them by impact on daily life. Set a realistic budget with line items for permits, materials, and contingencies, avoiding scope creep.
Consider historical preservation as a guiding principle: decide where preservation adds value and where modern intervention clarifies use without compromising character.
Measure existing constraints—columns, load paths, and window openings—to prevent rework.
Prioritize daylight access, then adjust layouts to maximize usable space without crowding.
Document decisions so contractors stay aligned and timelines stay predictable.
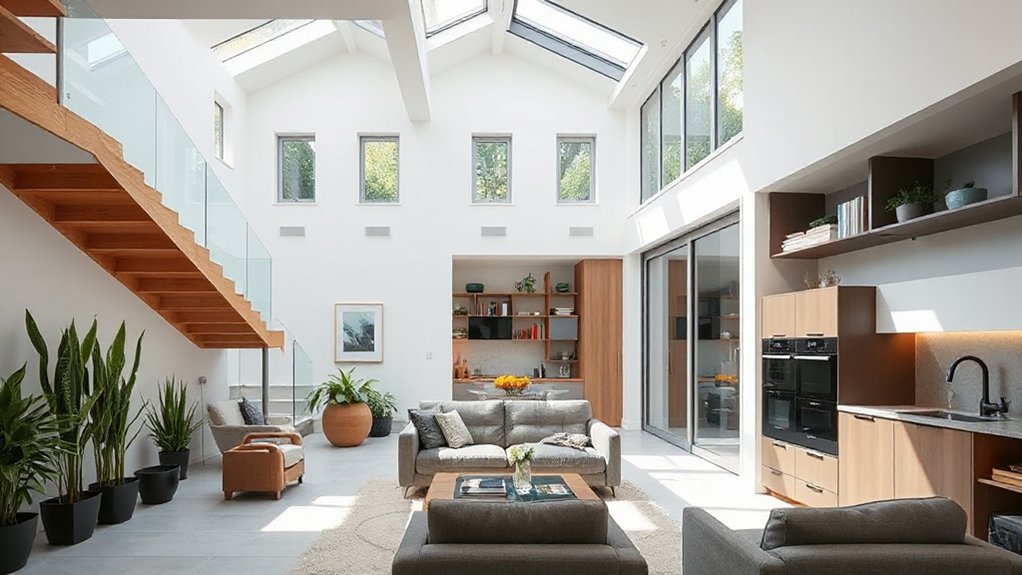
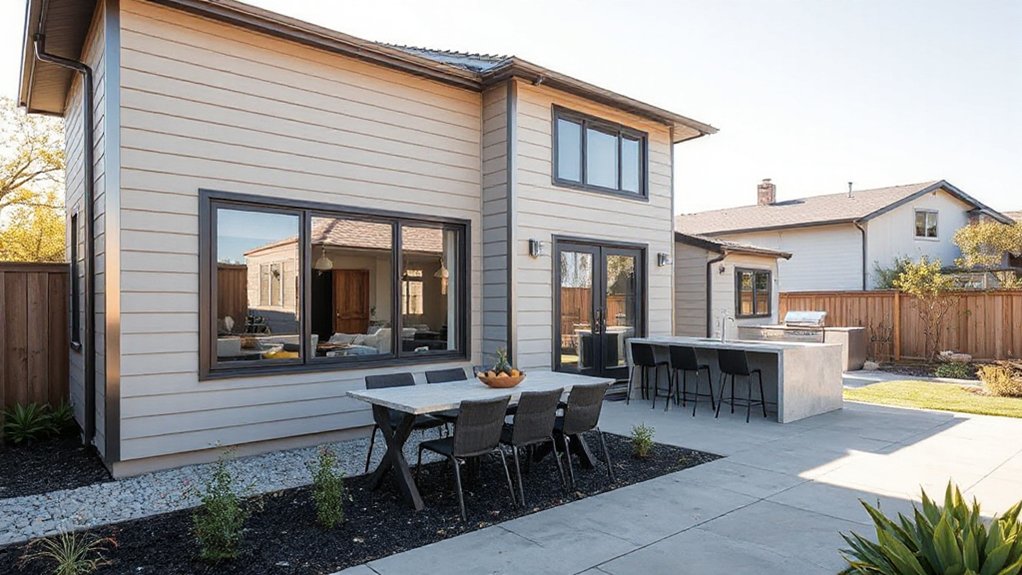
Maximize Light With Layout and Fenestration Tweaks
Start by prioritizing window orientation to maximize natural light throughout the day, aligning living spaces with sun paths for brighter rooms. Use light-focused layouts that place common areas along the strongest glazing.
Consider open sightlines to amplify daylight without sacrificing privacy. Keep fenestration tweaks precise—think proportion, frame color, and glazing type—to achieve a modern, luminous feel.
Maximize Window Orientation
If you’re aiming to flood a back‑to‑back home with daylight, start by rethinking where windows sit and how they align with your daily routines. Prioritize window placement that mirrors traffic flow and occupancy—kitchens and living zones deserve unobstructed morning sun, while quieter rooms benefit from strategic shading.
Use taller, narrow openings on opposing walls to encourage natural ventilation without sacrificing privacy. Consider overhangs and mullion spacing to tame glare while maximizing light penetration from dawn to dusk.
Align high sidelights with hallway or stair landings to bounce light deeper into the core. Elevate efficiency by pairing operable windows with dimmable glazing, and track seasonal sun paths to anticipate shading needs.
This approach sustains brightness, minimizes heat gain, and stabilizes comfort all year.
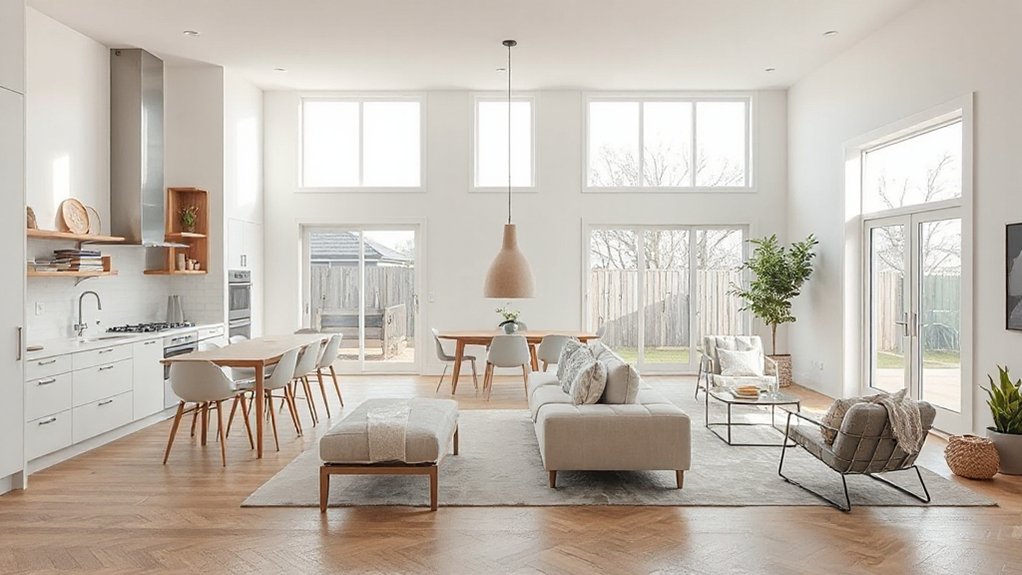
Light-Focused Room Layouts
Aiming to flood each room with daylight starts with how you lay out spaces and tune fenestration to daily rhythms. Place primary living zones along the longest glass walls, then buffer private rooms with light-transmitting screens or frosted panels to keep glare down.
Opt for open sightlines that invite daylight deeper, using low, slim furniture and minimal clutter to avoid blocking the sun’s path. Choose ambient lighting that complements daylight, such as dimmable LEDs, so you can shift mood without sacrificing brightness.
Color schemes should reflect light—soft whites, warm beiges, and cool grays—while accenting with reflective surfaces. Align window treatments to harness morning and late-day sun, then fine-tune with mirrors or glazed screens to bounce light into corners.
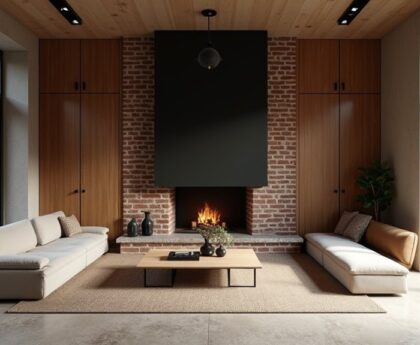
Design Flexible Zones With Built-In Storage
One smart way to maximize a back-to-back home’s value is to create flexible zones that adapt to daily life, with built-in storage that stays tidy and unobtrusive. You’ll define multipurpose spaces using movable screens, shelves, and alcove desks that tuck away when not in use.
Prioritize built-in storage that doubles as room dividers, so furniture and closures align with your layout without crowding. Label zones for work, play, and guest time, then equip each with targeted storage: shallow bins for quick access, deeper cabinets for seasonal items, and hidden compartments for cords and tools.
Keep the lines clean and materials cohesive to maintain a calm flow. This approach delivers functional flexibility, modern aesthetics, and practical, long-lasting organization. Built-in storage supports Flexible zones.
Improve Airflow and Thermal Comfort Efficiently
To improve airflow and thermal comfort efficiently, start with a practical assessment of your back-to-back layout and identify bottlenecks that blunt circulation. Map current air paths, note stairwells, and check seal integrity around doors and windows.
Prioritize efficient ventilation strategies that move stale air without creating drafts, such as balanced exhaust with fresh-air intake and door undercuts or transfer grills between rooms. Pair this with targeted insulation techniques to reduce heat exchange where you don’t want it and minimize humidity swings.
Consider ceiling fans or inline ducts to boost cross-ventilation without noisy blowers. Use zoned controls so you adjust airflow by room use, not just by season.
Finally, track performance after tweaks and refine gaps in thermal barriers or air leaks.
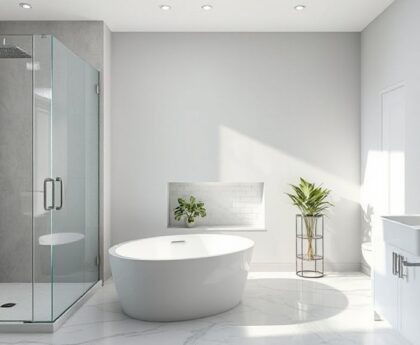
Refresh Finishes With Durable, Low-Maintenance Materials
You’ll start with a Durable Materials Guide to pick surfaces that withstand daily wear without shouting for replacement.
Choose Low-Maintenance Finishes that clean easily, resist stains, and stay consistent across high-traffic zones.
Explore Invigorating Texture Options that add depth—think matte vs. satin, tactile wall coverings, and subtle grain patterns—without adding upkeep.
Durable Materials Guide
Durable, low-maintenance finishes are the backbone of a modern back-to-back remodel, delivering lasting appeal with minimal upkeep. You’re selecting materials that resist wear, stains, and moisture while staying within budget.
Prioritize sustainable materials that don’t sacrifice performance; look for certified timber, low-VOC coatings, and recycled-content composites for counters and flooring.
For walls, pick operable surfaces with firm resistance to impact and easy cleaning, such as polymer-based panels or cementitious boards.
Acoustic insulation remains essential; choose products that dampen sound between units without adding bulk.
When evaluating options, verify warranty terms, installation ease, and maintenance requirements. Favor systems that allow quick repairs and color stability over time.
Plan shifts between living, sleeping, and service areas to minimize maintenance hotspots and maximize durability.
Low-Maintenance Finishes
Refresh finishes with durable, low-maintenance materials that stand up to daily life while keeping a modern look. You’ll prioritize surfaces that resist stains, scratches, and moisture, so upkeep stays minimal. Choose tight-grain woods or high-pressure laminate for cabinetry and countertops, paired with matte, fingerprint-resistant wall coatings.
Eco-friendly materials matter, so look for low-VOC paints and recycled-content tiles that still feel premium. For floors, consider engineered alternatives with wear layers designed for heavy traffic.
Acoustic insulation should be integrated where possible, improving comfort without adding bulk. Select finishes that are easy to wipe clean, resistant to dents, and quick to refresh with simple, repeatable updates.
Tip: coordinate tones between walls, cabinets, and fixtures to preserve a cohesive, modern vibe.
Refreshing Texture Options
Texture is where practicality meets personality, so choose finishes that add tactile interest without sacrificing maintenance. For refresh options, prioritize durable, low-maintenance materials that age well with daily use.
Start with wall textures that resist fingerprints and scuffs—think washable paints, vinyl-backed wallpapers, or infused plaster for subtle depth. Introduce textural contrast by pairing smooth, satin surfaces with matte, tactile fabrics or paneling.
Material layering matters: combine stone-look porcelain, engineered quartz, and wood composites to cut upkeep while elevating depth. Consider ceiling finishes that mirror walls without heavy upkeep, and cabinet facades that resist scratches.
Keep colors cohesive to maintain flow, then punctuate with deliberate texture pops in trims or backsplashes to sharpen modern edges. Prioritize moisture resistance in kitchens and baths for lasting appeal.
Budget-Friendly Kitchen and Bath Updates
If you’re upgrading a back-to-back kitchen and baths on a tight budget, start with high-impact fixes that don’t break the bank. Focus on durable surfaces: laminate countertops that mimic stone, cost-efficient but resilient, and mid-range ceramic tiles for backsplashes.
Refinish cabinetry instead of full replacement; a fresh coat of paint and updated hardware will radically transform the look. Choose vintage fixtures to add character without a premium price, and pair them with clean, modern silhouettes to keep the space feeling current.
For lighting, install statement lighting pieces that draw the eye and provide ample task light without overspending. Prioritize water efficiency with low-flow faucets and toilets.
Finally, reseal grout lines and caulk gaps to prevent leaks and preserve the upgrades.
Add Smart Tech and Energy-Saving Upgrades
Smart tech and energy-saving upgrades should start with a clear plan that fits a back-to-back layout, where efficiency and ease of installation matter as much of aesthetics. You’ll prioritize compact, wall-mounted devices and centralized hubs to minimize clutter and wiring.
Choose smart automation that anchors routines—lighting, climate, and power strips—so you can simulate occupancy and trim standby drain without manual fiddling. Opt for energy-efficient appliances with consistent performance and low heat output, and pair them with occupancy sensors to avoid waste.
Reuse existing conduits where possible and use dash-friendly cables to keep maintenance simple. Scope long-term savings by layering upgrades: smart thermostats, LED lighting, and smart outlets first, then expand with integration-ready panels.
Focus on measurable gains in energy efficiency, reliability, and user-friendly control.
Personalize Circulation and Entryways for Everyday Use
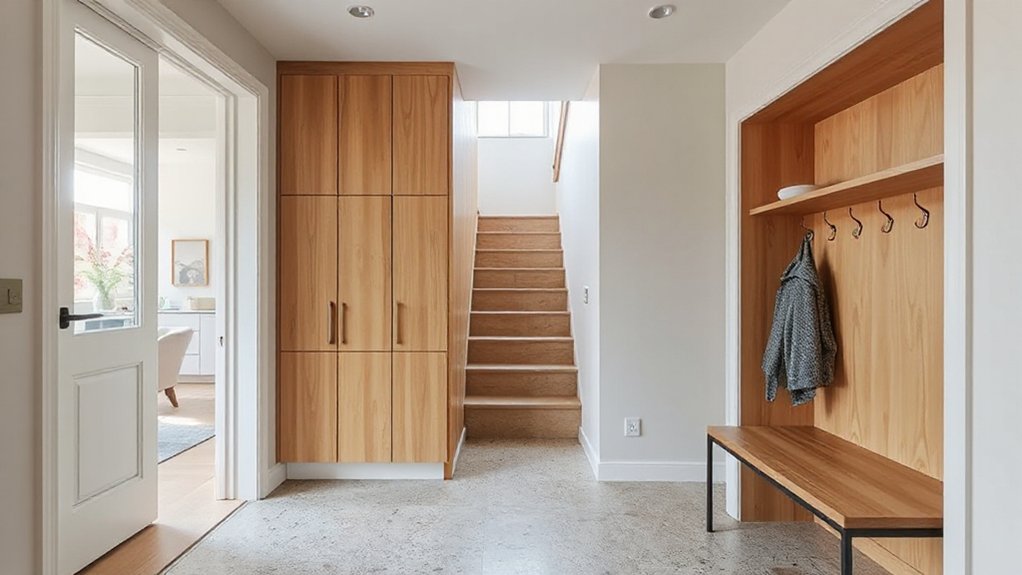
As you refine your smart upgrades, you’ll want circulation and entryways that feel effortless and welcoming every day. Your goal is personalized flow that streamlines daily moves while keeping furniture and tech aligned.
Begin with a clear path from door to main living zones, using furniture breaks and rug boundaries to guide flow without crowding. Choose an entryway design that integrates storage for coats, shoes, and bags, reducing clutter near thresholds.
Prioritize low-friction materials and soft, indirect lighting to soften transitions from outdoors. Implement color and hardware cues that signal zones—bold handles near the stairs, matte finishes in living spaces.
Consider motion-activated lighting and automated doors or magnetic catches to minimize touches while preserving security and style.
Plan Your Budget, Timeline, and Quick Wins
Plug in a realistic budget first, then map a tight timeline that aligns with your priorities and neighborhood approvals. You’ll define capex, opex, and contingency, then lock in fixed milestones for design, permits, and contractor handoffs.
Prioritize quick wins that show traction—like decluttering, shuttered draft-proofing, and smart outlet upgrades—to validate cost estimates without delaying bigger moves.
When you plan, choose sustainable materials and creative storage solutions that maximize space without inflating costs. Build a phased schedule that targets high-impact areas first: kitchen reconfigure, bathroom efficiency, and insulation upgrades.
Track progress with weekly check-ins, adjust for weather, and secure approvals upfront to prevent stalls. Document decisions in a simple spreadsheet, so you can justify every spend and stay agile through renovation twists.
Frequently Asked Questions
How Can I Future-Proof My Back-To-Back Upgrade Choices?
Prioritize durable interior insulation and modular systems, so upgrades stay relevant. You’ll future-proof by planning for Smart home integration and scalable networks, plus energy-efficient devices, wireless controls, and flexible layouts that adapt to evolving tech and living patterns.
What Licensing or Permits Are Typically Required Locally?
Building codes and zoning regulations dictate your permits; you’ll likely need plan approvals, electrical and plumbing inspections, and occupancy permits. You’ll check with local building departments, verify code compliance, and secure deadlines, fees, and review timelines before starting.
Which Materials Best Withstand Back-To-Back Moisture and Noise?
You should use moisture resistant materials like gypsum board with rubberized backing and solid core doors, plus robust soundproofing techniques such as acoustic sealant, resilient channels, and mass-loaded vinyl to curb noise and moisture transfer effectively.
How Do I Assess Resale Value After Modifications?
A recent study shows homes with smart upgrades sell 8% faster. You assess resale value by tracking interior design appeal and energy efficiency upgrades, noting how cohesive finishes and annual energy savings attract buyers and justify asking prices.
What Are Cost-Safe Methods to Phase the Project?
To phase cost safely, you plan in stages, using Energy efficient windows and Sustainable insulation to cut expenses early. You prioritize flexible scopes, reusable materials, and reputable contractors, scheduling work during off-peak periods to minimize disruption and cash-flow spikes.
Conclusion
If you follow these upgrades, your back-to-back will finally feel breezy, bright, and barely budget-busting—because nothing screams “modern living” like glare-free mornings and a thermostat that doesn’t fight you. You’ll love the flexible spaces, built-ins, and killer lighting… even when the grout’s not perfect. Irony aside, the better you plan, the less you’ll need dramatic renovations later. So start with the kitchen, finish with smart tweaks, and enjoy the glow you earned—without the drama.