
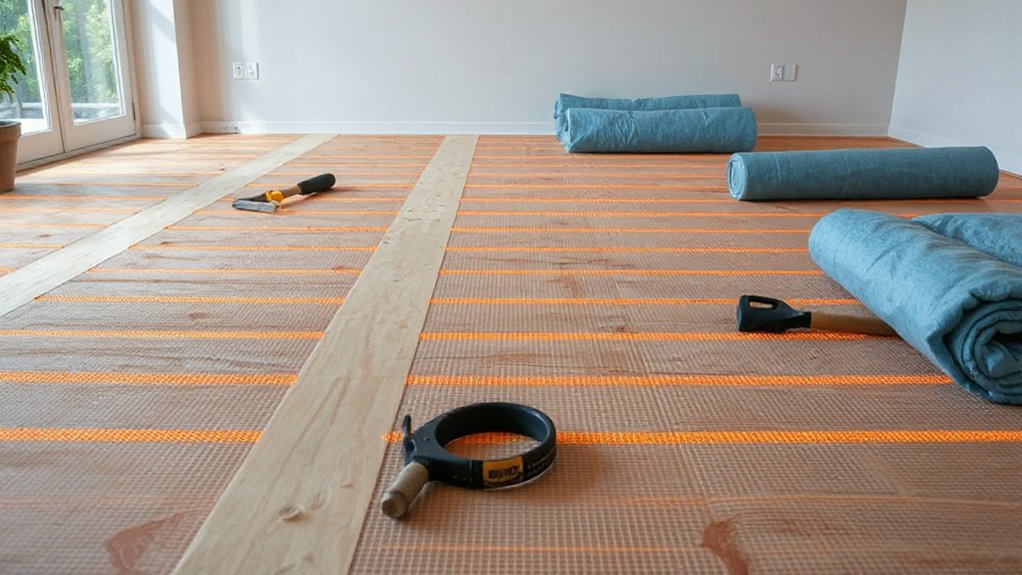

You can retrofit underfloor heating, but it demands a careful check of your floor structure, insulation, and cover materials to guarantee compatibility. Electric mats offer quick installs and good zoning; hydronic systems deliver steady warmth but involve more disruption. Start with solid feasibility—room by room, budget, and local codes—and plan for possible floor height changes. Ready to weigh your options, confirm insulation needs, and choose a qualified installer before moving forward.
Can You Retrofit Underfloor Heating? Core Viability Criteria

Yes—you can retrofit underfloor heating, but it hinges on a few core viability criteria. First, assess floor structure and insulation; solid subfloors without excessive depth changes simplify installation and improve energy performance.
Next, verify system compatibility with your existing heat source—hydronic or electric—and confirm control options match your lifestyle. Check floor coverings; tile and stone transmit heat well, while thick carpets can impede efficiency.
Guarantee adequate room to accommodate the loops or mats without compromising clearance for doors and trims.
Prioritize Sustainable heating and Energy efficiency by choosing well-insulated pipes, low-water-content manifolds, and precise thermostat zoning.
Finally, budget for professional load calculation and professional retrofitting to prevent cold spots and overheating, delivering reliable comfort with minimal energy waste.
Is Retrofit UFH Right for Your Home? Foundational Assessments
To decide if retrofit underfloor heating (UFH) fits your home, start with foundational assessments that map practicality and impact. Begin with a room-by-room sweep: floor type, insulation levels, and existing electrical or boiler setups, so you know where retrofit is most feasible.
Check ceiling and wall insulation, as air leaks influence warmup times and comfort.
Gauge your heating load, aiming for a balanced, energy-efficient system rather than a brute-force retrofit.
Consider how you’ll access floors for installation and the impact on living spaces during work.
Plan for DIY installation pitfalls, including safe wiring and controls understanding.
Finally, align expectations with energy efficiency goals and maintenance needs, ensuring long-term cost savings and consistent comfort.
Electric Mats vs Hydronic Pipes: Which UFH System Fits Your Situation?
Electric mats and hydronic pipes both heat floors effectively, but your choice hinges on existing systems, installation disruption, and long-term costs.
If you already have a robust boiler, radiant loop, and space for a pump, hydronic pipes offer strong thermal mass and steady heat, with potential energy efficiency gains when paired with weather compensation. However, they require more floor construction and longer install time, plus higher upfront expense.
Electric mats shine in retrofit projects with minimal disruption, fast heat-up, and precise zoning, though operating costs can be higher if you’re paying peak electricity rates.
Consider thermal comfort patterns you want, your climate, and how you’ll control the system. In many homes, a careful evaluation reveals the most practical balance of energy efficiency and comfort.
When to Consider a Hybrid UFH Solution

A hybrid UFH solution makes sense when you want the best of both worlds: steady floor warmth from hydronic components where you need it, paired with the quick response and zoning flexibility of electric mats in other zones.
You’ll choose hybrid when you have mixed spaces: bathrooms or patios benefit from fast heat, while living areas benefit from steady, even heat. Use hydronic loops for consistent temperatures and radiant comfort, and reserve electric mats for rooms that demand rapid setpoints or separate schedules.
Pair the system with Smart thermostats to fine‑tune heat by zone, time, and occupancy. This approach supports Energy efficiency by limiting boiler runtime and leveraging responsive electric zones for priority rooms, reducing overall energy use without sacrificing comfort.
Regular balancing and proper insulation remain essential.
How Floor Height and Insulation Shape Retrofit Success
When retrofit projects hinge on floor height and insulation, you’ve got a few levers to pull that can make or break performance. First, assess floor height early; excess build-up can push UFH beyond ideal temperature response. If you’re already tight on space, consider a thin-profile system and compatible screed to minimize loss.
Next, evaluate insulation quality beneath the heated layer; high-quality boards or slab insulation reduces heat demand, lowers heat-up times, and improves efficiency. Match insulation to the allowable floor height, ensuring no gaps or thermal bridges. Use calibrated measurements for a balanced layer stack—insulation, screed, then finish.
Finally, test for uniform heat distribution across zones to avoid cold spots. Clear floor-height planning and robust insulation are your fastest path to reliable, efficient retrofit performance.
Will Your Boiler or Heat Pump Support Retrofit UFH?
Your boiler or heat pump can drive retrofit UFH, but compatibility isn’t automatic. To evaluate, check your heating source’s maximum output and the UFH circuit’s design flow.
Some combi boilers struggle with the extra load; others cope with a properly sized mixer and pump. If you have a heat pump, confirm the system operates efficiently at lower water temperatures suited to UFH, or you’ll waste energy and comfort.
Verify that your unit supports an external pump and compatible control signals. Install smart thermostats to modulate flow and set daily schedules.
Plan zoning control so you can heat only used areas, avoiding dead zones and cold spots.
When in doubt, consult a heating pro to verify electrical and hydraulic compatibility before work begins.
Subfloor Prep for UFH: Insulation, Moisture Barriers, and Leveling

Before laying UFH, you must prep the subfloor properly: install a continuous insulation layer, add a moisture barrier where required, and guarantee a flat, level surface to prevent hot spots and pump strain.
Start by evaluating substrate condition, repairing cracks, and sealing gaps.
Choose Floor insulation that minimizes thermal loss and aligns with your joist spacing.
Lay the insulation sheets smoothly, staggering joints, and tape seams for a continuous barrier.
Install Moisture barriers where moisture risk is present, especially over concrete or ground floors.
Confirm a level surface using self-leveling compound or patches as needed, then recheck for flatness with a straightedge.
Proper prep reduces thermal resistance, protects the system, and ensures even heat distribution across the floor.
UFH Installation Timeline: Step-by-Step Process and Milestones
Starting with a clear plan, you’ll map out each stage of the UFH install and assign target dates to keep the project on track. Begin with a site survey, confirming room dimensions, load requirements, and heat zones.
Next, verify thermal insulation placement and moisture barriers align with local codes, preventing heat loss and moisture risk.
Prepare subfloor surfaces, ensuring evenness and clean channels for loops.
Install the heating mat or pipes, securing elements per manufacturer instructions, and connect to the manifold.
Conduct an insulation and vapor check before pouring or laying the screed or flooring.
Allow curing times per product specs, then perform system testing at low and full power.
Schedule final floor coverings after pressure and leak tests, documenting milestones for maintenance and future audits.
Cost Breakdown: Materials, Labour, Permits, and Hidden Fees
When you plan your retrofit, you’ll start with a clear materials cost breakdown so you can compare options and stay on budget.
We’ll outline Labour and Time Estimates to match your project scope, so you can schedule trades and avoid delays.
Finally, we’ll flag Permits and Hidden Fees early, giving you a practical view of all charges and how to minimize surprises.
Material Costs Breakdown
Ever wonder how the material costs in underfloor heating break down across components like mats or tubing, insulation, fasteners, and controls? You’ll map costs by function: mats or tubing (the system’s core), insulation (heat retention), fasteners and fixing hardware (stability and coverage), and controls (thermostats, sensors, and wiring).
For tile flooring, radiant heat requires low-profile mats or PEX tubing compatible with thin tile assemblies, which can raise material needs slightly but improve heat transfer. Expect higher upfront spend on good insulation boards and a reliable manifold or manifold-compatible tubing.
Budget for the control unit and minimal wiring, plus sealants or edge insulation for efficiency. Compare brands that offer compatible sensors and controllers to prevent overpaying for features you won’t use.
Labour And Time Estimates
A practical look at labour and time estimates starts by understanding how installation steps map to cost categories: materials, labour, permits, and hidden fees.
You’ll plan based on room layout, floor structure, and heat source compatibility, then align tasks with an efficient sequence.
Expect longer duration for retrofit projects where subfloor access and thermal expansion controls matter, since first you must prep the substrate, install insulation, then lay the heating circuits with precise spacing.
Labour time scales with floor area, junctions, and testing, so you’ll need clear milestones and do-not-cross limits for overlap.
Budget for moisture control provisions in damp or concrete slabs, which can add setup steps but save failures later.
Keep a tight schedule, document progress, and track any deviations promptly to prevent cascading delays.
Permits And Hidden Fees
- Identify applicable permits and timelines
- Estimate upfront permit fees and review charges
- Check for rebates related to solar panels and rainwater harvesting
- Plan for inspection and revision costs
- Build a contingency for unexpected code changes
Real-World Pros and Cons of Retrofit UFH

Real-world retrofit underfloor heating (UFH) offers tangible benefits, but it also comes with trade-offs you’ll want to weigh before you commit. You’ll enjoy comfortable, even heat and space-saving install, but recognize disruption during retrofit and a longer setup than some wall- or radiator-based options.
The biggest wins come from integrating UFH with efficient, modern insulation and a controllable thermostat, boosting comfort per watt. Downsides center on potential floor height changes, protection of existing finishes, and the need for careful zoning to avoid cold spots.
When considering alternative energy options, UFH can pair well with heat pumps, improving overall efficiency. Zoning restrictions or building codes may influence design choices and required documentation.
Plan carefully, measure each room’s heat load, and align install sequencing with existing systems to minimize downtime.
Maintenance and Long-Term Performance: Keeping UFH Efficient
Maintenance and long-term performance are about staying on top of UFH efficiency through simple, proactive habits, not guessing overnight fixes. You’ll protect energy efficiency by regular system checks, balancing flow, and confirming insulation isn’t degraded.
Schedule annual inspections to catch leaks, thermostat drift, or sensor faults early, and log each maintenance action for future reference.
When weighing costs, do a clear cost comparison between running temperatures, floor types, and thermostat settings to minimize energy waste.
- Schedule annual inspections and document results
- Verify insulation and detect cold spots
- Balance flow and check manifold for leaks
- Calibrate thermostats and replace faulty sensors
- Track energy use and compare with prior periods for true cost comparison
How to Choose a Qualified Installer: Key Questions to Ask
Choosing a qualified installer is essential for reliable underfloor heating, and you should start with a clear set of questions to gauge both expertise and fit.
First, ask about certifications, licensing, and manufacturer training, plus how they document system design and load calculations.
Inquire about experience with retrofit projects, preferred subfloor types, and any required renovations.
Ask for a detailed written quote that breaks out materials, labor, contingencies, and warranty terms.
Probe their approach to Smart thermostats, zoning options, and how they’ll integrate with existing controls.
Discuss energy efficiency expectations, including insulation, pipe spacing, and balancing procedures.
Request references, photos of past installs, and post-install support.
Confirm timelines, on-site project management, and a clear communication plan to track progress and adjustments.
Quick Decision Guide: Is Retrofit UFH the Right Move for You?

First, assess your existing floor type to determine if retrofit UFH can heat effectively without costly substitutions.
Weigh the upfront cost against disruption to floors and daily life, so you know how long before you recoup the investment.
Then run a compatibility check on your system to confirm wiring, controls, and insulation will cooperate for reliable performance.
Assess Existing Floor Type
Evaluating your existing floor type is Step 1 in deciding if retrofit underfloor heating (UFH) is the right move. You’ll assess compatibility, surface, and performance to avoid surprises later. Focus on how the floor currently behaves and what you want UFH to achieve.
- Check subfloor material and its ability to carry radiant heat.
- Inspect thickness and existing finish for compatibility.
- Consider decorative finishes and how they’ll respond to heat.
- Evaluate flooring durability and wear tolerance.
- Verify installation access and future maintenance needs.
Cost vs Disruption
Deciding whether retrofit underfloor heating is worth it comes down to cost and disruption: you’ll weigh the upfront price and installation downtime against long-term comfort, energy savings, and the chance to upgrade your floor without a full rebuild.
In practical terms, expect a clear line between materials, insulation, and labor, with chosen routes for wiring or tubing that minimize disruption. Timeframes vary by room size, existing finish, and access to subfloor space, so plan for a couple of days to a week per zone.
Budget for decorative finishes and aesthetic options to avoid rework later, since UFH alters surface tolerances. Consider phased installation to spread disruption.
Align expectations with a firm quote that includes testing, commissioning, and warranty coverage.
System Compatibility Check
Wondering if retrofit underfloor heating fits your home right now? A System Compatibility Check helps you decide quickly. You’ll assess floor type, structure, and insulation to avoid surprise costs. Confirm that your existing joists, screed, and routing support UFH without major rebuilds.
Check heat source compatibility, thermostat control, and zoning capabilities for efficient energy savings. Confirm the finish surface matches design aesthetics while preserving comfort and performance.
- Floor type and thickness alignment with UFH
- Screed condition and curing considerations
- Insulation levels and thermal mass impact
- Boiler or heat pump compatibility and flow rates
- Thermostat zoning, wiring, and control integration for energy savings
Frequently Asked Questions
Can Retrofit UFH Work With Existing Radiant Systems?
Yes, retrofit UFH can work with existing radiant systems if you upgrade floor insulation and install compatible heating controls, zone valves, and thermostats; make certain the mat or pipe layout matches your current manifold, balancing flow, heat loss, and system pressure.
What Ceiling Height Clearance Is Required for Retrofit UFH?
Raising your eyebrow, you’ll need at least a 2.5–3.0 inch ceiling height clearance for retrofit UFH. You must account for joist depth, insulation, and pipe or cable routing as part of clearance requirements. Measure precisely before installation.
How Long Does Retrofit UFH Take From Start to Finish?
Installing retrofit UFH typically takes several days, depending on floor type and routing; expect planning, subfloor prep, testing, and curing. You’ll encounter installation challenges and material compatibility issues, requiring care, sequencing, and possible floor height adjustments to succeed.
Will Retrofit UFH Significantly Increase Floor Warmth Variability?
Yes, it will smooth warmth, but not dramatically if insulation or flooring compatibility isn’t ideal. You’ll want good thermal insulation and compatible flooring to minimize hotspots and maximize comfort during retrofit, with careful planning and practical, solution-focused steps.
Are There Noise or Disruption Concerns During Installation?
Yes, there can be installation noise and disruption concerns, but you can minimize them by scheduling during off-peak hours, using streamlined trenching, and coordinating with trades. Prepare space, protect surfaces, and expect brief interruptions to comfort.
Conclusion
You can retrofit underfloor heating, but do it with a clear plan and real-world checks. Assess your floor, insulation, and cover materials; decide between electric mats or hydronic pipes; and consider hybrids for mixed needs. Timeline, costs, and floor height matter—don’t skip permits or professional guidance. Choose a qualified installer and insist on a solid maintenance plan. It’s a tightrope of practicality and performance—reach the other side with confidence, not compromise.