
A rear extension on a semi-detached home can tighten your timeline, because small changes may slip under permitted development while bigger tweaks trigger planning permission. You’ll weigh depth, height, and boundary impact against PD limits, then decide whether to proceed under notification routes or full approval. Get a clear sense of your options, stay within local rules, and know what could stall your project before you commit to design choices. Let’s map the specifics that matter most to you.
Do You Need Planning Permission for a Rear Extension? A Quick Decision Guide

If you’re planning a rear extension, you may not always need full planning permission. You’ll determine this quickly by checking guidance on permitted development and local constraints.
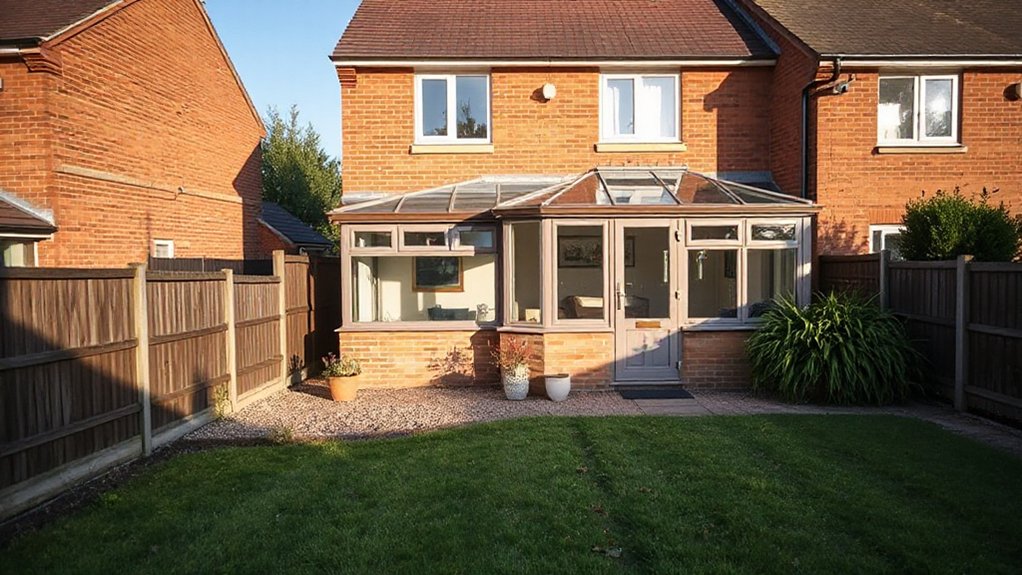
In practice, assess your home’s size, position, and any alterations that could affect neighboring light or privacy. For semi-detached properties, shared boundaries matter, and you may face restrictions that trigger a planning application.
A quick decision helps you avoid delays: if your extension stays within height, depth, and eaves limits, and uses similar materials, you’re more likely to avoid full consent.
Consider garden landscaping implications and how the design influences energy efficiency, such as insulation, glazing, and thermal performance.
If in doubt, consult planning guidance or a professional early to verify requirements and reduce risk.
What Counts as Permitted Development for Rear Extensions?
Permitted development for rear extensions has clear boundaries you must respect, including height, depth, and proximity to boundaries. You’ll need to check the rear extension limits, how they sit within local authority requirements, and where the boundaries of permitted development apply to your property.
Start by mapping the plans to these rules so you can identify where planning permission may still be needed.
Permitted Development Boundaries
Are rear extensions always covered by permitted development, or are there boundaries you must respect? Permitted development boundaries define what you can add without planning permission. You measure these limits against your semi‑detached pair, ensuring you don’t exceed size, depth, or height thresholds that trigger consent.
You also check materials and design so it remains in character with the home and neighbors. In practical terms, plan for clear setbacks and alignment with existing windows to preserve light and privacy. Consider garden landscaping and energy efficiency as you design, since these factors influence overall compliance and performance.
Understanding these boundaries helps you avoid rejections and costly changes.
- Size and depth limits must be respected for both halves
- Height, eaves, and ridge alignment with the existing roofline
- Material and finish choices that preserve appearance and neighboring amenity
Rear Extension Limits
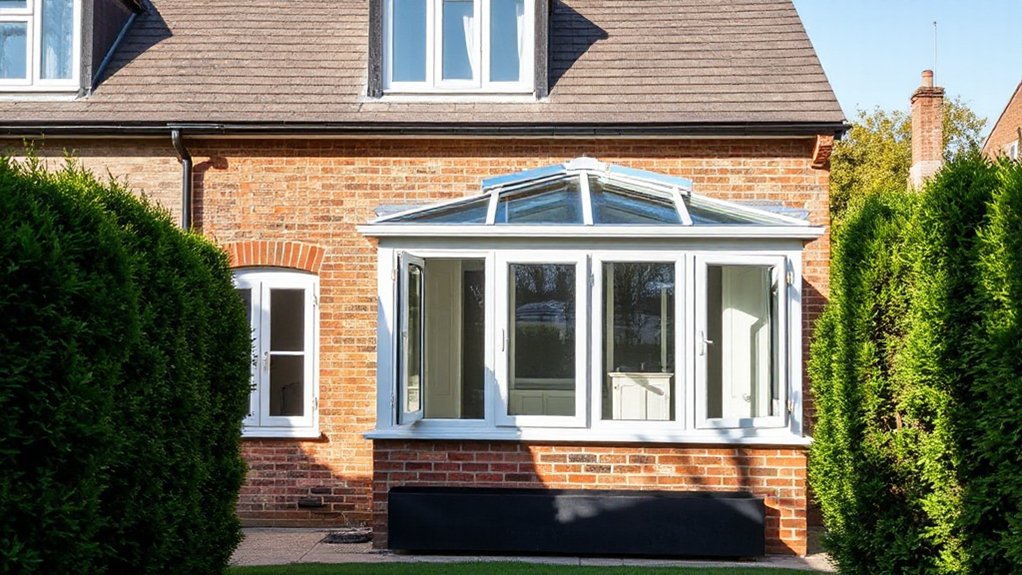
Rear extensions fall under specific permitted development boundaries that limit depth, height, and site coverage. You must verify the maximum depth you’re allowed from the original rear wall, plus any prevailing eaves height constraints.
In many scenarios, two-storey rear extensions exceed permitted limits, but single-storey options may fit within thresholds if you stay within the prescribed depth and total area.
Side- and rear-facing openings should respect stated cap rules for glazing and doors, while roof forms must remain flat or pitched within height limits.
Materials and finish should be consistent with the dwelling’s design, avoiding changes that imply a new build.
When planning, consider garden landscaping implications and how interior renovation plans align with preservation of permitted development.
Confirm compliance before submitting any notice.
Local Authority Requirements
Local authority rules determine what counts as permitted development for rear extensions, and you’ll often need to distinguish between what you can do under nationwide limits and what may require planning consent.
Local checks focus on size, depth, and proximity to boundaries, plus any impact on property valuation and energy efficiency. You’ll want to verify site-specific constraints, such as Article 4 directions or local supplementary planning guidance, to avoid inadvertent breaches.
If you stay within limits, you may proceed without formal consent; otherwise, permit requirements kick in and costs rise.
- Size, depth, and footprint relative to your semi-detached pair
- Impact on energy efficiency and thermal performance
- Area-specific rules affecting permitted development status and deemed planning permission
When Semi‑Detached Homes Qualify for PD: Size, Depth, and Limits
Semi-detached homes qualify for permitted development (PD) when the addition remains within size, depth, and height limits and doesn’t exceed dwelling-specific caps. You must verify maximum eaves height, overall height, and rear projection length for your property type, as rules vary by region and prior extensions.
PD limits typically constrain depth to a defined measurement from the original wall, with total footprint and volume forming any cap. If you’re approaching the boundary, you’ll often need prior notification or planning consultation.
Practical checks: confirm materials, avoid facing setbacks that trigger different rules, and guarantee works don’t encroach on neighbours’ rights. Prioritize Roof insulation and Energy efficiency to maximize performance while staying compliant and avoiding additional permissions.
PD vs Planning Permission: The Practical Decision Framework

When you’re deciding between PD and full planning permission, the practical framework hinges on your project specifics, site constraints, and risk tolerance.
- Assess scope: identify non‑controversial elements (e.g., garden landscaping enhancements) versus items that trigger consent (e.g., roof renovation complexity) and quantify impact on neighbors and council.
- Evaluate constraints: footprint, height, and proximity to boundaries inform risk and potential for PD approval or planning conditions.
- Align objectives with process: if timing and flexibility matter, PD tends to be faster; if heritage, design quality, or significant alterations are planned, plan for formal approval and potential mitigations.
Focus on how each path affects constructability, budget, and long‑term use of the rear extension.
How Size, Depth, and Setbacks Affect Your Approval Odds
Size, depth, and setbacks are the levers inspectors use to judge whether your rear extension fits the local envelope. You’ll notice that each dimension trims or expands your approval odds: footprint must respect total site coverage, eaves height, and maximum depth relative to your party wall.
If you push the depth too far, you’ll trigger closer-than-allowed rear gaps or encroach on protected sightlines, increasing the chance of a rejection or required revisions.
Setbacks from boundaries influence daylight, privacy, and garden landscaping considerations; minor reductions can still pass if other metrics stay within limits.
Roof extension, as a component, often carries stricter height and eaves controls.
Align your plan with envelope rules first, then refine materials and glazing to maintain consistency with the surrounding semi-detached street context.
When Your Rear Extension Falls Inside or Outside PD Limits
If your rear extension sits inside the PD (Permitted Development) limits, you can proceed without planning permission for most standard cases, provided you meet the defining size, depth, and setback criteria.
Within PD, small deviations like modest roof profiles or slightly altered eaves may still qualify, but you must verify height caps and position relative to boundaries.
If it falls outside PD, you’ll need planning consent or a building notice, and potential risks include neighbour objections and stricter limits on volume.
- Garden landscaping considerations can influence perception of space and utility without affecting PD status
- Roof modifications must stay within height and projection caps to avoid export to full planning
- Confirm reconfiguration of boundaries and overlooking controls with the local authority before committing
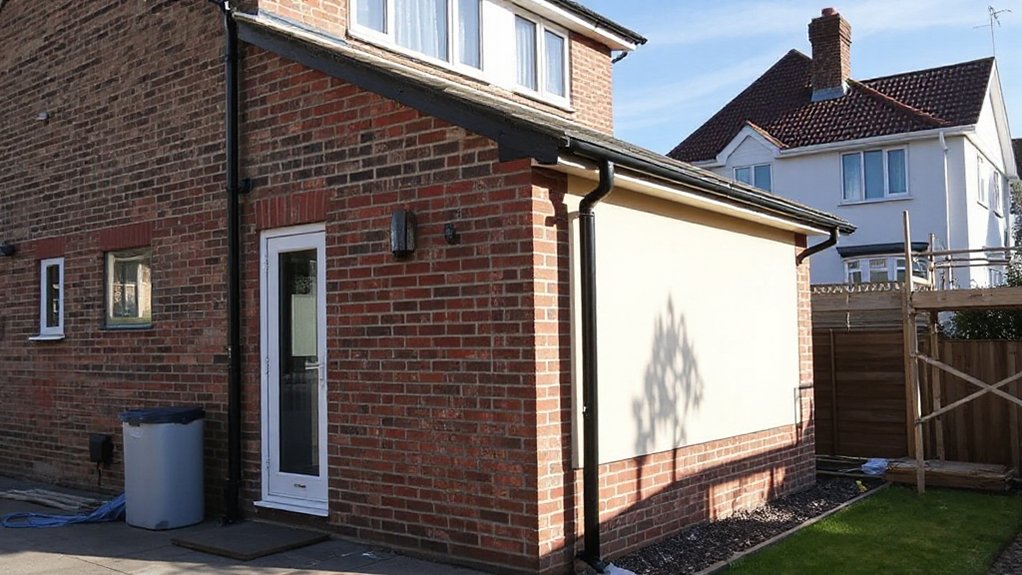
How Materials Influence Planning Decisions for Semi‑Detached Homes
Materials choices directly shape planning decisions for semi-detached homes by influencing appearance, perceived massing, and integration with surroundings. You assess external finishes for compatibility with your neighbor’s facade, ensuring a coherent street rhythm.
Material durability informs long‑term maintenance expectations and replacement cycles, which planners weigh when evaluating sustainability and upkeep risk. Consistency in texture, color, and weight reduces visual discord and supports a predictable streetscape profile.
You should document why chosen materials meet structural and fire‑safety standards while matching existing construction methods where feasible. Aesthetic consistency across new and existing elevations helps the authority accept a design as a respectful extension rather than a discordant addition.
Balance performance, cost, and appearance to minimize planning objections and maximize approval prospects.
Daylight, Overshadowing, and Neighbour Impact: What Planners Look For
You’ll need to assess daylight reduction thresholds, ensuring any loss remains within established limits for habitable rooms and principal elevations.
You’ll quantify overshadowing impacts and explain how they affect adjacent properties across different times of day and year.
You’ll also confirm neighbour notice requirements and document engagement steps to demonstrate transparency and compliance.
Daylight Reduction Thresholds
- Precise metrics guide window-to-room ratios and shading considerations
- Site orientation informs setback adjustments and light corridors
- Design refinements balance daylight with functional space planning
Overshadowing Impacts Explained
Sunlight and shadow aren’t just about comfort; they directly affect planning decisions on rear extensions. Overshadowing considerations focus on how your extension might block daylight to neighbours and your own rooms. You’ll assess height, pitch, and proximity to boundaries, quantifying solar access through described tests or daylight simulations.
Planners look for proportionate impacts: temporary shading is acceptable, but long, deep shadows that reduce usable daylight can trigger objections. Practical controls include staggered roof lines, modest eaves, or stepped elevations to limit overshadowing.
You should also consider landscaping ideas that maintain light levels, like sparse, perpendicular planting rather than dense screens. Combine these with measures for energy efficiency, such as high-performance glazing and insulation to maximize daylight use while minimizing heat loss.
Neighbour Notice Requirements
How do daylight, overshadowing, and neighbour impact inform notice requirements?
You’ll see how daylight, overshadowing, and neighbour impact shape who gets notified and when. Planning authorities require clear documentation of changes to light and privacy before issuing Building permits or Construction permits, so notice isn’t vague.
You’ll prepare concise impact statements showing likely effects on adjoining properties, including windows, gardens, and living spaces. Notice timing aligns with potential changes, giving neighbours a fair opportunity to comment.
You’ll highlight mitigations, such as orientation, eave height, or setbacks, to reduce objections. In practice, accurate, timely notices streamline approvals and minimize delays.
You’ll ensure your project aligns with consent conditions and supports a smooth permit path.
- Notice scope and timing
- Impact explanations for daylight and privacy
- Mitigation commitments for neighbour relations
Building Regulations vs Planning Permission: What You Actually Need
When planning a rear extension, you must understand the difference between Building Regulations and planning permission and decide which you actually need.
Building Regulations govern structural integrity, fire safety, insulation, ventilation, and energy performance. They apply regardless of planning consent and ensure your build meets safety standards.
Planning permission, by contrast, controls use, appearance, and impact on neighbors and the local environment; some extensions may proceed under permitted development without full consent, others require a full or householder application.
In practice, you’ll often pursue both pathways concurrently. Check local policy and assess whether limits, heights, and materials trigger consent.
Architectural styles and Building materials influence assessment outcomes, so plan for compliant designs from outset to avoid costly revisions.
Coordinate with a building inspector early to align requirements.

When to Apply: Signs You Should Seek a Local Planning Authority Decision
You’ll want to spot Local Authority Triggers early, so you know when to apply. Look for project thresholds, design constraints, and zoning conditions that require a decide-or-not step.
If timelines or review points show tight milestones, seek a planning decision promptly to avoid delays.
Local Authority Triggers
- Garden fencing exceeds height or visibility constraints
- Roof modifications alter massing or ridge height
- Changes affect shared boundaries or party wall considerations
Decision Timeline Indicators
Deciding when to apply hinges on clear timeline indicators that signal the need for a Local Planning Authority decision. You assess project phases against thresholds: size, height, and distance from boundaries trigger notifications or pre-application advice.
If planned changes exceed permitted development limits, or involve listed features, you should seek formal guidance promptly.
Timeline indicators include planning-committee debates, objections from neighbors, or statutory consultation windows that close without resolution.
Document changes to garden landscape elements that affect curtilage, and any alterations to roofing materials beyond standard replacements.
Any intention to modify materials or layouts that impact drainage, access, or light requires timely submission.
In practice, act when milestones align with regulatory checkpoints, ensuring your application proceeds with complete, precise plans and supporting assessments.
What to Include in a Planning Application for a Rear Extension

When preparing a planning application for a rear extension, include clear, detailed plans and supporting documents that demonstrate compliance with local planning policies and design guidance.
You’ll present existing site context, footprint, elevations, and materials, with precise measurements and scale. Include a design statement that explains mass, proportion, and how the extension respects the character of the semi-detached pair.
Additionally, provide sustainability data and energy performance estimates.
Include access diagrams, rights of way checks, and correspondence with neighbours.
A robust because-statement of use should be included, along with a fire safety approach where required.
Cross-reference relevant policies, show landscaping implications, and note any mitigation for overbearing impact.
Gardening tips and interior design insights can help illustrate how outdoor spaces flow into interiors and maintain a cohesive aesthetic.
Key components to include are:
- Site context and elevations
- Compliance statements with policy references
- Landscaping, access, and neighbour considerations
How to Craft a Robust Design Proposal That Wins Approval
You start with a clear design rationale that ties your rear extension to your site’s context and the brief, so reviewers see purpose from the outset.
Guarantee your proposal demonstrates impactful visual integration through massing, materials, and detailing that respect nearby properties and street rhythm.
Pair this with a robust compliance documentation strategy that preempts common objections and confirms standards, permissions, and evidence.
Clear Design Rationale
How can you guarantee your design proposal communicates a clear, defensible rationale that wins approval? You present a tightly reasoned case, linking every element to planning criteria, site constraints, and the home’s existing fabric.
Articulate measurable benefits, like increased energy efficiency, improved access, and material compatibility with the neighbourhood. Anticipate objections by documenting constraints and the evidence behind choices, including maintenance implications for garden fencing and ongoing roof repairs.
Use precise terminology, cite standards, and show constructability, cost, and schedule implications. Your rationale should read as a cohesive argument, not a collection of features.
In short, demonstrate how the proposal meets policy, conserves character, and minimizes disruption to neighbours and utilities.
- Align design decisions with planning criteria and site context
- Quantify impacts of garden fencing and roof repairs on disruption, cost, and durability
- Provide a defensible narrative supported by evidence and standards
Impactful Visual Integration
To guarantee your rear extension reads as a seamless part of the home, start with visual integration that respects the existing architectural language, materials, and scale. Prioritize alignment with roofline, eaves, and window rhythm to minimize contrast.
Specify materials that age consistently with the original facade, and detail joinery, cornices, and detailing to read as an intentional extension, not a retrofit. Use a restrained palette and proportionate glazing to preserve solar gain without overpowering the dwelling.
For garden design, plan landscape edges, setbacks, and hedging to extend the home’s line beyond the built footprint, creating a coherent exterior flow.
Address roofing options, selecting systems that maintain continuity on sightlines while delivering weather performance and insulation. Provide performance metrics, mockups, and RGB or material swatches to support decision-making.
Compliance Documentation Strategy
Are you prepared to assemble a complete, submission-ready compliance package that clearly demonstrates how the proposed rear extension meets planning and building-code requirements?
You’ll document scope, standards, and constraints with a tight, evidence-backed narrative. Structure submissions around statutory tests, adjacency, and protection of neighbors, citing relevant policy and guidance.
Include measured drawings, sections, and a concise justification for height, footprint, and materials. Pair the technical package with garden landscaping and interior decor considerations to show holistic design integration.
Your documentation should be auditable, traceable, and easily reviewable to minimize back-and-forth. Present a clear compliance map from planning to delivery, highlighting risk controls and decision-rationale.
- clear compliance map with milestones
- rationale linking garden landscaping and interior decor to the scheme
- auditable, concise supporting evidence
How Local Policies and Neighbourhood Plans Shape Your Build
Local planning policies and neighbourhood plans directly influence what you can build, setting clear boundaries on height, footprint, and design details that your rear extension must meet. You’ll find constraints codified in local development plans, supplementary design guidance, and village or ward-level statements.
These rules shape materials, window ratios, setback distances, and integration with surrounding streetscapes. Check whether your site sits in a Conservation Area, AONB, or area of special character, as additional considerations apply.
Community-led policies may prioritise landscape gardening and public domain access, influencing landscaping plans and boundary treatments. You’ll also see energy efficiency expectations, such as insulation standards and efficiency targets for glazing.
Aligning your build early reduces revisions and speeds up approval while preserving neighbourhood cohesion.
Common Reasons Planning Applications Get Refused (and How to Avoid Them)
Common planning refusals usually fall into a few predictable categories: design and impact on streetscape, scale and massing, and failing to meet local policies or conservation rules. You can prevent refusals by aligning your proposal with the prevailing look of the semi‑detached row, avoiding jarring materials, and preserving sightlines from the street.
Consider how your rear extension affects shadowing, access, and the rhythm of adjacent homes. Clearly address garden landscaping and interior remodeling implications in the design brief, showing practical benefits and maintenance plans. Provide measured drawings, compliance notes, and a concise heritage or conservation statement if required.
Early pre‑application discussions help refine details and reduce revisions later.
- Design compatibility with streetscape and materials
- Compliance with local policies, conservation rules, and amenity impacts
- Practical integration of garden landscaping and interior remodeling plans
How to Speed Up the Planning Process Legally and Efficiently
To speed up the planning process legally and efficiently, you should align your submission with Timeline Streamlining Strategies, ensuring milestones are clear and achievable.
Prepare a Documentation Readiness Checklist to confirm all required plans, forms, and assessments are complete before submission, reducing back-and-forth.
Be aware of Plan Approval Nuances that can affect timing, so you tailor your package to local policies and expedite decisions.
Timeline Streamlining Strategies
Efficient planning timelines rely on upfront clarity and proactive coordination: map your submission, approvals, and potential delays before you apply. You’ll lock in milestones, pre-empt conflicts, and reduce back-and-forth.
Build a clear pre-application package that highlights garden landscaping impact and energy efficiency measures to streamline decisions. Align your design, consultant inputs, and local constraints early to minimize revision cycles.
- Define a submission calendar with key dates, fees, and required documents, including landscape and efficiency notes.
- Pre‑consult with planning officers and neighbours to identify objections and secure informal feedback.
- Bundle technical details (structural, energy performance, drainage) into a single, cohesive package to prevent rework.
Documentation Readiness Checklist
A thorough Documentation Readiness Checklist accelerates approvals by ensuring every required item is prepared, organized, and verifiable before you submit.
You’ll assemble a concise package: site plan, existing and proposed drawings, and a clearly annotated method statement.
Include a detailed block plan showing boundaries, access, and setbacks, plus elevation views that reflect accurate materials and finishes.
Prepare a rationale for the rear extension, linking it to design guidelines and any planning constraints.
Confirm ownership, rights of light, and party-wall agreements are noted or obtained.
For compliance, attach a Garden landscaping outline and a brief Home interior description, noting access routes and structural implications.
Review dates, file names, and version control, then submit a professional, legible bundle with a contents page and page numbers.
Plan Approval Nuances
Charting plan approvals hinges on anticipating the process steps and aligning your submission with local planning policies and deadlines. You’ll streamline scrutiny by presenting clear justifications, referencing policy clauses, and avoiding extraneous detail. Focus on tangible factors that trigger quicker responses, like consistent drawings, precise elevations, and documented material specs.
Plan approval nuances hinge on the interplay between constraints, exceptions, and applicant responsiveness. Prepare to address garden landscaping impact assessments and roof renovation interfaces with existing structures, ensuring compatibility with neighboring amenities. You’ll also anticipate potential conditions, drafting compliant mitigation early to reduce revisions.
- Align design intent with policy guidance and site-specific constraints
- Pre-empt common objections with concise, evidence-backed notes
- Coordinate phased submissions to minimize back-and-forth delays
Handling Neighbour Objections and Consultations Effectively
To handle neighbour objections and consultations effectively, start by identifying all potentially affected parties and inviting them to review your plans early. You’ll document concerns in a formal log, timestamping each submission and response to maintain traceability.
Communicate clearly about scope, height, and materials, emphasizing how the rear extension preserves daylight and current sightlines. Use objective technical drawings and a concise design narrative to preempt misunderstandings.
Where issues arise, propose measured mitigations—adjusting eaves, screening, or garden landscaping elements to reduce impact on adjoining gardens.
Schedule a structured consultation window, provide a summary of changes, and offer a follow‑up meeting.
If interior renovation components affect party walls, present a temporary works plan and compliance notes to reassure neighbours.
Maintain professional, factual tone throughout.
Alternatives If Planning Permission Is Denied

If planning permission is denied, you have clear, practical paths to contemplate: appeal the decision, revise and resubmit with targeted design changes, or explore alternatives that meet your aims without requiring consent. This may be to move house, say to a larger detached or semi with an extension already in place.
- Appeal the decision with the planning authority, presenting new evidence or revised plans that address their concerns about massing, impact, and overdevelopment.
- Revisit design options off the back of site constraints, focusing on garden landscaping and layout tweaks to improve screening, light access, and useable outdoor space without enlarging footprint.
- Consider energy efficiency-focused alternatives, such as compact extensions, fenestration changes, or retrofits to the existing structure, to achieve your goals while staying within consent limits.
Practical Steps to Stay Compliant During Construction and a Realistic Budget
Before the project starts, lock down a clear, realistic budget and a plan to stay compliant on site: establish a detailed cost baseline, assign responsibility for each compliance task, and set up submittal and inspection timelines that align with your build schedule.
From there, track every variation, update the forecast weekly, and maintain a change log to avoid overshoot.
Embed Environmental sustainability goals into material selection, waste management, and energy efficiency measures from day one.
Map regulatory milestones to on-site activities, and verify site access, drainage, and noise controls regularly.
Preserve Historical preservation constraints by documenting alterations and securing approvals for any sensitive features.
Establish routine internal audits, and empower a single point of contact for rapid issue resolution.
Maintain open client and authority communication to prevent delays.
Frequently Asked Questions
Can PD Apply if Extension Exceeds Depth Limits Due to Siting?
Yes, you can apply if the extension exceeds depth limits due to siting, but it must satisfy Design flexibility and Building regulations, with precise documentation and evidence demonstrating compliance and how flexibility is accommodated.
Do Local Policies Override National PD Thresholds for Rear Extensions?
Yes, local policies can override national PD thresholds for rear extensions. You must consult Building regulations and secure construction permits, because local planning rules may impose stricter depth, height, or proximity limits than national guidance. Verify with planning authority.
How Does a Neighbour’s Right to Light Affect PD Decisions?
Neighbour’s right to light can limit your PD decisions because damaged sunlight access may trigger objections; consider property boundaries, potential shadowing, and guarantee your design preserves sun exposure to affect neighboring windows and your extension’s layout.
Are There Permitted Variations for Listed Buildings or Conservation Areas?
Short answer: Yes, there are heritage restrictions and conservation regulations that apply to listed buildings or properties in conservation areas. You’ll need to check local policy, consult heritage officers, and secure permissions for alterations.
What Is the Typical Decision Timeline for a PD Extension Appeal?
You typically get a decision within 8–20 weeks for a PD extension appeal, depending on complexity. You should focus on Design considerations and Building codes, ensuring submissions address compatibility, safety, and local standards to avoid delays.
Conclusion
You’re the architect of your home’s future, but permissions are the compass. Treat PD limits like guardrails—keep your extension within them, or risk the detour of a full planning process. The size, depth, and setbacks map your odds; know them before you start. When neighbours’ light and privacy are at stake, you’ll need conversations as your bridge, not fences. Plan legally, document diligently, and budget for contingencies—your house will stand steadier for it.