
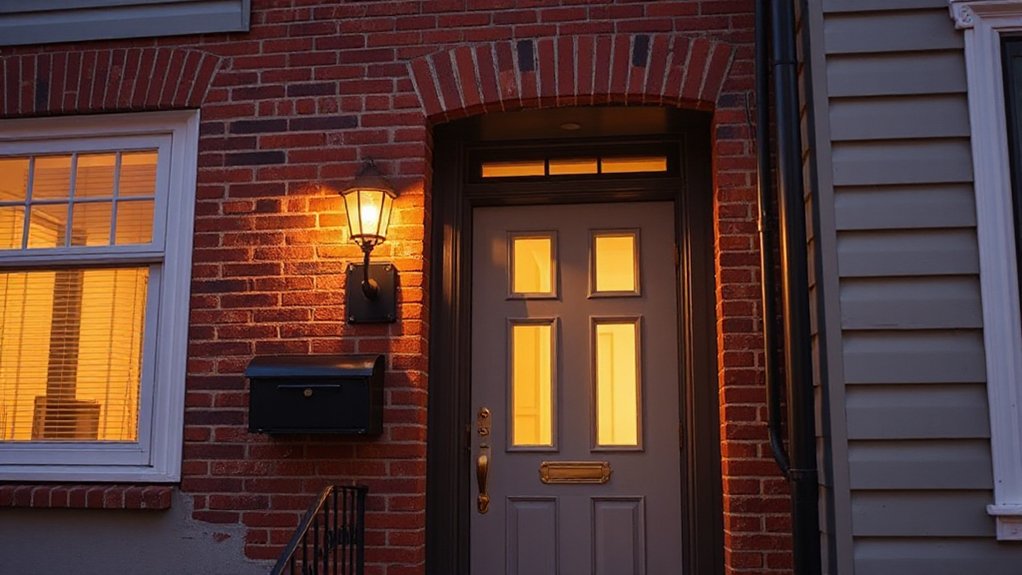

Like a quiet whisper from the past, your townhouse asks for light that respects its character. You’ll map wiring paths, choose discreet smart options, and preserve original fixtures while boosting efficiency. Start safe, plan reversibility, and test thoroughly before committing. If you hit a snag or find vintage wiring quirks, you’ll want a solid plan and clear steps to keep the charm intact. Stay with me to map the practical path forward.
Why Smart Lighting Fits an Older Townhouse Today

Smart lighting fits an older townhouse today because it upgrades control without altering the architecture. You gain reliable, centralized control over rooms, stairs, and entryways without invasive wiring or cosmetic changes.
Wireless hubs, dimmers, and scene presets let you tailor lighting to activities, preserves, and natural daylight. This approach maintains vintage charm while adding modern convenience, keeping familiar fixtures functional and energy-smart.
You can automate schedules to align with daily rhythms, reducing waste and improving safety at night. Compatibility with existing switches lets you mix legacy hardware with smart modules, minimizing disruption during installation.
Focus on a clean, minimal setup that respects original trim and alcoves. By choosing quality drivers and robust connectivity, you guarantee consistent performance across seasons and occupancy patterns.
How to Assess Wiring Safely Without Permits
To assess wiring safely without permits, start with a ground-up check of what’s already in place and how it’s connected to your smart lighting plan. Inspect service panels, breakers, and junction boxes for labeling, corrosion, or signs of overheating. Verify that neutrals, grounds, and hot conductors are intact and correctly bonded, and note any aluminum wiring or age-related insulation degradation.
Map circuits that will power new fixtures, avoiding overloading existing branches. Look for historic preservation constraints that could limit modifications, and plan practical, noninvasive routing where feasible.
If wiring modernization seems necessary, consult licensed pros for non-permit tasks that are allowed locally, or pursue permits where required. Prioritize safety, organize a plain-language upgrade checklist, and document findings for future maintenance.
Choosing Bulbs That Suit Vintage Fixtures
Choosing the right bulbs for vintage fixtures starts with understanding the fixture’s socket type, size, and light output needs, then matching those specs to modern, compatible options. You’ll prioritize bulbs that preserve vintage charm while delivering safe, steady brightness for everyday use.
Pay attention to color temperature; opt for warm whites (2700–3000K) to enhance period details without glare. For filament-style or decorative bulbs, verify dimming compatibility and total wattage to prevent overloads.
Consider bulb shape that mirrors original silhouettes for authenticity without sacrificing efficiency. If a fixture uses unusual bases, seek LED options labeled as compatible or “retrofit” to avoid socket adapters that loosen connections.
- Socket type and base compatibility
- Filament vs. standard LED aesthetics
- Dimming, wattage, and warmth balance
Fixture selection supports authentic look and reliable performance. Vintage charm
Smart Switches vs Smart Dimmers: What Fits Your Walls

If you’ve decided to modernize control without rewiring, you’ll want to compare smart switches and smart dimmers to see which fits your walls and usage patterns. A smart switch replaces a standard wall switch and provides single-pole or multiway control, usually without an integrated dimming feature.
A smart dimmer sits in place of the switch and offers adjustable light levels, preserving existing brightness choices. Check compatibility with your current dimmable bulbs, fixture types, and total load; some dimmers require specific minimum wattage.
Consider color temperature options if you want cooler or warmer tones, and whether the device supports voice control for hands-free scenes. For historic rooms, prioritize reliability, neutral wiring requirements, and clear labeling so you don’t obscure original switch plates with bulky modules.
Reversible Upgrades That Preserve Historic Charm
You can add reversible lighting upgrades that respect the home’s history by choosing fixtures and controls that can be removed without altering structural elements.
Prioritize options that preserve original moldings, switch plates, and wiring paths, so you can restore the townhouse to its prior look if needed.
Start with non-invasive methods, like smart bulbs and plug-in solutions, then document placements for easy restoration.
Reversible Lighting Upgrades
- Opt for wireless dimmers and smart bulbs that fit existing sockets.
- Use battery‑powered or plug‑in controls to avoid rewiring.
- Label removable modules and keep original hardware ready for reinstallation.
When selecting finishes, match finishes to original metalwork and glass where possible, preserving Historic preservation goals.
Test compatibility with your existing color temperatures to avoid clashing with period lighting.
Plan for easy removal to minimize impact on historic fabric.
Preserve Historic Aesthetics
Preserving historic aesthetics means choosing reversible upgrades that respect original details while offering modern convenience. You’ll plan smart lighting that can be removed without damage, preserving trims, moldings, and original fixtures.
Start with discreet controls: wireless dimmers or battery-powered switches that don’t require new wiring, so you can revert if needed. Choose fixtures that echo era materials—alabaster, bronze, or brass—and favor warm, soft white light to avoid stark contrasts with historic surfaces.
For historical preservation, document placements before changes and use temporary adhesive mounting when possible. Integrate lighting with existing architectural lines to achieve aesthetic integration without altering silhouette.
Prioritize reversible power options, plug-in LEDs, and smart bulbs housed in compatible, non-intrusive housings to maintain charm while enabling modern functionality.
Essential Power and Safety Checks You Should Perform
Before tackling smart lighting installation, perform essential power and safety checks to guarantee the system will operate reliably and safely. You’ll confirm panel capacity, verify circuits, and inspect for signs of wear. Check grounding, GFCI outlets, and smoke detectors, replacing any expired units.
Confirm wiring age is compatible with low-voltage drivers, and locate junctions to avoid overheating.
- Test circuit amperage and trip thresholds, labeling dedicated loads for smart components.
- Inspect insulation, brittle conductors, and moisture risks in basements or crawlspaces.
- Verify proper grounding and operation of all safety devices, plus compatible power-saving modes.
As you proceed, balance Historical preservation with practical, artistic lighting goals, avoiding overloading circuits while maintaining safety and aesthetic clarity.
Common Wiring Layouts in Older Townhouses Explained
You’ll see how wiring phases and circuits shape what you can control with smart lighting, so you can plan loads and scene options without overloading a breaker.
We’ll cover switch box constraints and how box size, conductor count, and fill affect where you can add smart switches or dimmers.
Finally, we’ll map common cable routes in older townhouses to anticipate where power comes in, where it runs through walls, and where to access for new wiring.
Wiring Phases and Circuits
In older townhouses, wiring phases and circuits must be understood before any smart lighting upgrade, because the layout determines where you can add or retrofit pieces without overloading the system.
- Know whether you have a single, two, or multi-phase feed, and map each circuit to its switch leg.
- Identify the main service panel’s labeling, amperage, and breakers, focusing on room-by-room load expectations to avoid tripping.
- Prioritize wiring safety by keeping dimmers and new drivers on appropriate circuits, and practice proper grounding and insulation when extending or replacing wiring.
If you encounter vintage fixtures, plan replacements or adapters to match circuit capacity, never piggyback feeders. Confirm compatibility with your home’s electrical standards.
Switch Box Constraints
Switch boxes in older townhouses often impose tight constraints on how you can add smart lighting. You’ll work within limited space, existing conductors, and small junction cavities, so plan carefully before any wiring.
Typical layouts center on a single gang or multi-gang box feeding a series of fixtures, switches, or outlets, with limited room for additional modules. If your box is full, you’ll need to rehome devices, use slim smart modules, or relocate a low-profile switch.
Maintain accessibility for future service by preserving the original cover plate footprint where possible. Keep wiring neat and labeled to avoid misfires or code trouble during retrofit.
Balance modernization with vintage decor and historical preservation, ensuring updates respect character while delivering reliable control.
Common Cable Routes
Most common cable routes in older townhouses follow predictable paths that balance serviceability with preservation. You’ll notice wiring often runs along baseboards, up interior studs, and through attic chases, minimizing visible alterations. When planning, map existing Cable pathways to avoid redos that compromise vintage charm.
Prioritize routes that keep cables away from load-bearing members and damp areas, while preserving plaster or wallpaper.
- Use centered wall cavities and chase spaces behind crown molding for neat concealment
- Prefer attic or basement access for runs to minimize doorframe openings
- Label and photograph transitions at junctions to simplify future updates
This approach reduces disruption, preserves character, and supports reliable smart lighting integration without sacrificing the townhouse’s charm.
Planning a Scalable Lighting System for Future Add-Ons

Effective scalability starts with a clear plan for future add-ons, so you match wiring, controls, and power runs to anticipated needs rather than patching after the fact. You map each zone and expected load, leaving extra conductor and conduit capacity for growth.
Choose a scalable system: a hub, modular drivers, and switchable scenes that can expand without rewiring. Align control methods with your home’s architecture, balancing comfort and energy data.
Plan wiring paths that respect Historic preservation while allowing modern upgrades, using low-profile routes and recessed channels where possible. Prioritize centralized power distribution and labeled circuits to simplify future upgrades.
Document connector types, cable gauges, and spare terminations. Favor discreet hardware that sustains Modern aesthetics while retaining serviceability for anticipated add-ons.
Budgeting for a Townhouse Smart-Lighting Upgrade
Start with Budgeting Basics first to set a realistic ceiling and avoid overinvesting in features you won’t use.
Compare Cost vs Value trends to identify where upgrades yield the most return, and earmark essential components before optional add-ons.
Then map a phase-wisely spending plan that aligns with your townhouse’s electrical capacity and future expansion goals.
Budgeting Basics First
Budgeting for a townhouse smart-lighting upgrade starts with a clear, practical plan: define your goals, map out the rooms to upgrade, and set a realistic timeline and budget range. You’ll translate needs into measurable costs, then identify non-negotiables versus nice-to-haves.
Prioritize wiring, control systems, and fixture compatibility early to avoid late changes. Factor in historical preservation considerations and modern aesthetics to balance charm with functionality.
- Define scope by room and fixture type, noting electrical access and dimming needs
- Estimate costs for controls, hubs, and smart bulbs, plus potential professional labor
- Build a stepwise timeline that aligns with seasonal maintenance and project milestones
This approach keeps budgeting tight, precise, and aligned with both preservation and contemporary living.
Cost vs Value Trends
Focus on compatibility with existing fixtures to minimize retrofits, since intrusive changes erode value. Consider historical preservation concerns: discreet wiring routes and noninvasive controls protect character while preserving resale appeal.
Track maintenance costs, noting that smart LEDs reduce replacement frequency and heat output, boosting efficiency.
Interior design considerations matter: dimming, color temperature, and scene settings can influence perceived value without major cosmetic changes.
Use reputable benchmarking data and local pricing to refine your model, updating assumptions as market energy prices shift. A disciplined, data-driven approach clarifies when upgrades become cost-neutral or profitable.
Phase-Wisely Spending Plan
A phased spending plan keeps townhome smart-lighting upgrades affordable and controllable by aligning purchases with a clear timeline and measurable milestones. You’ll allocate budget segments for core wiring, dimmers, and routing, then layer in sensors and voice-control hardware as milestones arrive.
Track costs against a written schedule to avoid overbuying, and reserve a contingency fund for unexpected retrofits tied to Historical preservation and interior aesthetics constraints. Prioritize components that blend with existing trim and finishes, preserving the building’s character while maintaining upgrade flexibility.
Review quarterly to reallocate funds if a milestone underperforms. Use these practical steps:
- Define milestones tied to wiring, control hubs, and finishes
- Allocate a small contingency for repairs or permits
- Evaluate aesthetics compatibility before purchases
Room-by-Room Goals: Placement and Lighting Tasks
To set clear room-by-room goals, start by mapping each space’s purpose and the specific lighting tasks that support it. Then align placement with traffic flow and electrical access.
In living areas, position layered fixtures to highlight seating zones without glare, and add dimmable controls for ambiance.
In kitchens, guarantee task lighting over counters and islands, with switches near entrances, keeping pathways clear.
Hallways need bright, even wash from wall sconces or linear fixtures to boost safety.
In bedrooms, zone lighting around beds and desks supports reading without waking others.
For historical preservation and Vintage aesthetics, choose fixtures with period-appropriate profiles and warm color temperatures, integrated smart controls tastefully.
Prioritize wiring plans that minimize retrofits, and document placements for future upgrades.
Picking Neutral White: Brightness and Tone Explained

Neutral white is a versatile choice for a townhouse, balancing brightness with warmth to keep spaces inviting while preserving detail. You’ll gauge brightness by room use and ceiling height, aiming for 3000–3500K to feel clean without harsh glare.
Consider fixture compatibility: some LEDs dim unevenly or shift hue at low output, so test with your dimmer and switch types first. In practice, pick a color temperature that maintains color accuracy for artwork and textiles, then adjust with subtle accents.
- Choose a single color temperature per space to avoid color cast
- Test dimming behavior with existing fixtures and smart controls
- Match driver specs to your dimmer for consistent tone
Energy-Saving and Mood-Boosting Automation Ideas
Think about pairing energy-saving lights with smart schedules that dim or turn off when rooms are unused, so you cut costs without sacrificing comfort.
You can set mood-boosting automations that brighten cool whites in the morning and switch to warmer tones at night, all while maintaining efficiency.
Start with a few targeted scenes—bedroom, living room, and hall—then expand as you verify real-world performance.
Energy-Saving Lights
Could you cut energy costs and brighten daily routines at the same time? You can, with deliberate choices that respect vintage charm and historic preservation. Use LED bulbs labeled for good color rendering and dimmable operation, so you retain authentic aesthetics while lowering consumption.
Integrate smart switches to schedule lighting by room function, avoiding unnecessary daytime use. Pair occupancy sensors with task lighting on each level to minimize waste without sacrificing visibility.
- Choose warm, 2700–3000K LEDs to preserve character while reducing power draw
- Install dimmers and motion sensors in hallways and entryways to prevent overlighting
- Use power-efficient smart plugs for lamps, enabling off-hours shutdown and routine adjustments
Mood-Boosting Automations
Smart lighting can boost mood while trimming bills, especially in an older townhouse where ambiance matters as much as efficiency. Mood-boosting automations pair practical tweaks with comfort, so you stay focused on daily tasks.
Start with color temperature settings that mirror natural daylight: cool, bright mornings; warm, relaxing evenings. Schedule gradual shifts to support circadian rhythms, reducing fatigue and improving focus.
Use scenes that combine brightness with color accents for dining or reading nooks, avoiding glare on reflective surfaces. Integrate voice control for quick tweaks without fumbling for switches.
Tie lighting to activity sensors in hallways or entryways to gently wake spaces when you enter. Finally, log energy use to confirm savings, and adjust schedules seasonally for consistent mood support.
Ensuring Compatibility With Existing Fixtures and Switches
To guarantee compatibility with existing fixtures and switches, start by inventorying every light fixture, switch type, and ceiling box in your townhouse. Note whether each is wired for line voltage, low voltage, or is controlled by a dimmer.
Assess fixture compatibility with smart modules, including size, base type, and whether any are enclosed, which can affect heat and dimming performance.
Confirm color temperature options align with your bulbs and sensors, and map dimmer-capable circuits to compatible smart dimmers.
Create a simple labeling system for future upgrades and avoid mixing incompatible tech on the same circuit.
Plan for potential neutral requirements and wired-to-dedicated switch controls where needed.
- Inventory status and voltage
- Dimmer and fixture compatibility notes
- Color temperature alignment and labeling
Quick, Plug-and-Play Installation Steps
Here are quick install steps you can follow for a plug-and-play setup. Start by turning off the power.
Then snap in the smart switch or bulb module according to the manufacturer’s directions.
Finally, reconnect power, pair the device, and test with a quick button press to confirm basic operation.
Quick Install Steps
Installing the basics is quick and straightforward: you’ll pair each fixture with your hub or bridge, then power it up and test the connection before moving on. You’ll keep the setup focused on reliability, not flair, so you can preserve Historical authenticity while upgrading your lights.
- Pair each device in close proximity to the hub for a strong initial signal
- Name rooms clearly and assign scenes before mounting
- Verify dimming and color settings, then label cables and bridges for future tweaks
This approach favors practical steps over speculation, ensuring a solid foundation for later refinements.
As you work, consider vintage cues that respect Historical authenticity, so the system complements your existing Vintage decor without overpowering it.
You’ll finish with a tested, ready-to-use setup that’s simple to expand.
Simple Setup Guide
Effortlessly set up your smart lighting with a quick, plug-and-play approach that builds on the basics already in place. You’ll pair bulbs or modules with a central hub or app, then follow step-by-step prompts to connect each device. Verify power, switch modes, and confirm firmware updates before testing.
Place garden lighting fixtures where you want coverage, ensuring bulbs seat firmly and cables stay clear of walkways. Use simple scene presets to align brightness with dusk routines and seasonal needs.
For outdoor reliability, install outdoor sensors in sheltered locations, calibrate sensitivity, and test in different weather.
Label rooms and zones in the app for quick control, and enable geofencing if available to auto-activate upon arrival. Keep documentation handy for replacement parts and future expansions.
Plug-And-Play Process
To start the plug-and-play setup, pair your bulbs or modules with the hub or app, then follow the on-screen prompts step by step. You’ll confirm the device type, assign rooms, and name scenes for quick access.
Next, test basic functions like brightness and color temperature to ensure reliable control. If conflicts occur, re-sync and check firmware updates for the smartest performance.
- Pairing and naming devices efficiently for quick access
- Verifying room assignments and scene presets to suit smart technology
- Testing dimming, color settings, and automations for consistent results
Keep the process concise to preserve vintage decor aesthetics while maintaining modern reliability. Use a single hub if possible, and document any unusual steps for future troubleshooting.
When to Hire an Electrician for Smart Lighting

If you’re considering smart lighting, there are clear when-to-hire signals to watch for: electrical work beyond simple plugs, existing wiring age or damage, or plans that require code-compliant changes to circuits, panels, or dimming systems.
You’ll hire an electrician when you encounter uncertain wiring, old insulation, or nonstandard breaker layouts that impact safety or future upgrades.
For smart security and voice control, verify the pro confirms panel capacity, grounding, and proper load calculations before adding smart hubs or dimmers.
Ask for a written plan, permit guidance, and code-compliant wiring routes. A licensed electrician can install junction boxes, updated neutral wiring, and surge protection.
This minimizes fire risk, guarantees reliability, and accelerates compliant integration of smart lighting.
Reversible Mounting for Wall Controls and Hubs
Reversible mounting lets you swap wall controls and hubs between vertical and horizontal orientations without tools or disruption. You’ll benefit from flexible placement while preserving the room’s historic character.
Plan locations that align with existing switch boxes and avoid over-penetration of plaster or drywall. Reversible mounting helps you adapt to future layouts without repainting or patchwork, which supports historic preservation goals.
- Confirm mounting brackets accommodate both orientations and stay firmly supported
- Use spacer washers if needed to maintain a flush surface and clean lines
- Label controls for quick reorientation during future remodels or tenancies
Maintenance Tips to Keep Smart Lighting Reliable
Smart lighting stays reliable when you keep hubs, bridges, and bulbs clean and up to date, and you should schedule regular checks as part of routine maintenance. Begin with a quarterly inspection of mounts and power supplies to guarantee cables aren’t stressed, and verify firmware versions across devices are current.
Dust sensor and switch panels with a microfiber cloth to prevent subtle heat buildup that can impact performance. Replace aging bulbs promptly and keep spare compatible units on hand. Label wiring paths for easy service, and document any changes in a simple log to aid future upgrades.
When planning renovations, prioritize Historical preservation and Vintage aesthetics so smart features complement the townhouse’s character, rather than clash with it. Test scenes after any hardware update to confirm reliability.
Troubleshooting Common Smart-Lighting Snags
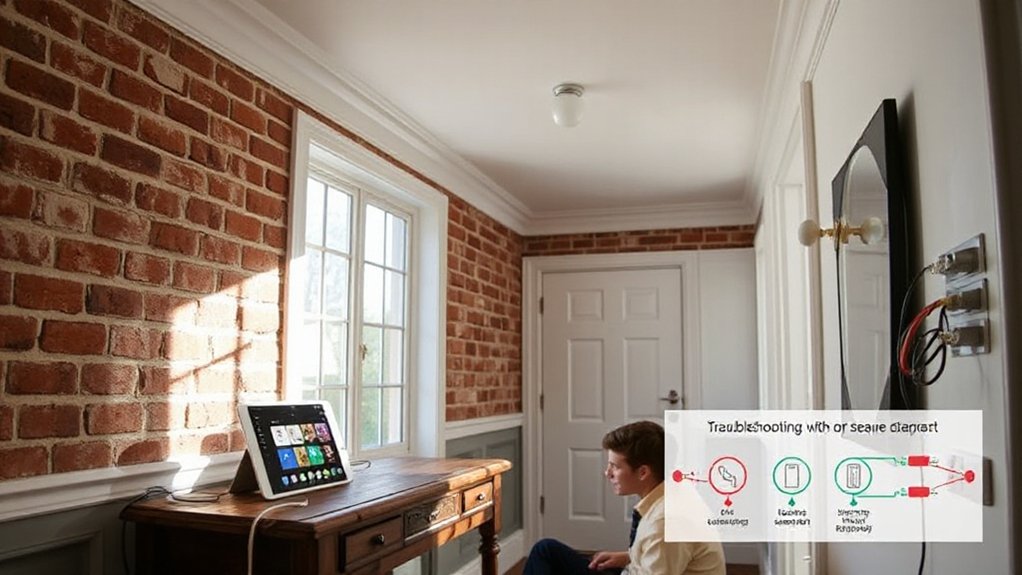
When a smart-lighting snag crops up, start with a quick, methodical check of connections, power, and firmware. If lights won’t respond, verify hub or bridge visibility, and confirm your app is on the latest version.
Next, inspect individual bulbs for compatibility with your system and confirm the power supply isn’t flaky. For persistent issues, reassess wireless connectivity paths and interference sources, such as dense walls or other networks.
- Smart bulb selection: match bulbs to your hub and required color/brightness, noting max loads per circuit.
- Wireless connectivity: guarantee reliable ping times, minimize range issues, and secure firmware updates.
- Reboot sequence: cycle power, reset devices as needed, and re-pair bulbs to restore stable control.
Frequently Asked Questions
Can Smart Lighting Preserve Plaster-Wall Aesthetics?
Smart technology can preserve plaster-wall aesthetics if you choose recessed or wireless fixtures and slim wiring. You’ll minimize damage, guarantee proper wall preservation, and keep exterior character intact while integrating smart lighting that respects historic finishes and textures.
Are Smart Bulbs Fully Compatible With Antique Fixtures?
Smart bulb limitations depend on fixture hardware and dimmer types, but most antique fixtures work with standard smart bulbs. You’ll face compatibility gaps; verify bulb brightness, base, and transformer specs for antique fixture compatibility before installation.
How to Hide Hubs and Wires Discreetly in Vintage Spaces?
Like shadows learning to dance, you hide hubs and wires by routing wireless integration paths through walls and baseboards. You’ll conceal wiring behind crown molding, use wireless integration, and mount hubs in closets for a clean, discreet setup.
Do Smart Switches Require Rewiring Beyond Code Basics?
Smart switch installation typically doesn’t require rewiring beyond rewiring code basics; you should assess circuits first. If existing wiring is outdated, upgrade with a licensed electrician. Guarantee compliance with local rewiring code and manufacturer guidelines throughout.
What’s the Best Way to Retrofit Without Damaging Historic Elements?
Yes—retrofitting without damaging historic elements means prioritizing historical accuracy and preservation techniques. You’ll use slim-profile fixtures, surface-mount wiring or low-profile conduits, and non-invasive dimmers, documenting changes for future preservation while maintaining authentic aesthetics and structure.
Conclusion
You can add smart lighting without losing your townhouse’s character if you plan, test, and document every step. Start with discreet upgrades, map your wiring, and choose vintage-matching fixtures. Use smart bulbs or modular dimmers that won’t damage moldings, and pick switches that blend in. When in doubt, hire an electrician for safety. Keep everything reversible and labeled, then maintain and test regularly. With care, your home shines smarter—like a quiet beacon guiding you through history. It’s a careful seam, knitted.