
Learning how to install a peel-and-stick backsplash is the quickest and easiest way to transform your kitchen without the mess, expense, or commitment of traditional tile. These clever self-adhesive tiles have come a long way from their dodgy beginnings—modern versions look remarkably realistic and can be installed in an afternoon with nothing more than a ruler, scissors, and a bit of patience.
DIY upgrades can transform your kitchen in an afternoon, no contractor needed… You can peel, stick and be done without the mess or dust, it’s faster than you think and way less stressful. So, want a fresh backsplash but hate the chaos? You’ll get simple prep tips, tools to grab and trick to avoid bubbles – plus a few pro moves so it looks custom, not slapped-on, because you deserve that polished look.
Why I Think Peel-and-Stick Backsplashes Are a Game Changer
They’re the quickest way to transform your kitchen without calling a pro. You can go from tired to tidy in a weekend – most 10 to 30 sq ft backsplashes take 1 to 3 hours to install if you prep properly. Peel-and-stick comes in vinyl, metal and glass-look sheets that mimic tile texture, many priced from about $10 to $40 per sq ft, and most peel off later with heat if you want a different look down the road.
The Magic of Easy Installation
You don’t need fancy tools to get pro-looking results – a tape measure, level, utility knife and a squeegee do most of the work. Clean, dry and flat is the drill, then you peel the liner, align edges, press firmly and smooth out bubbles; small trims with a utility knife and silicone at seams finish it off. Lots of folks cover 20 sq ft in under two hours once they get the hang of pattern matching – simple, fast, no grout dust.
Affordable and Stylish Options
There are tons of looks that won’t break the bank – subway tile, marble veining, brushed metal and even faux mosaic sheets at big-box stores. Prices often start around $10 per sq ft for basic vinyl, climb to $25-$40 for textured metal or glass-look sheets, and you can mix and match accent strips without wrecking the budget. Want luxe without the markup? You can get the look for a fraction of real tile.
If you’re tracking numbers, here’s a quick reality check: a 20 sq ft backsplash at $12 per sq ft is about $240 in materials.
You’ll save serious cash.
Contractor tile installs often run $30 to $60 per sq ft for labor alone, so DIY peel-and-stick can cut overall project cost by hundreds. Still, splurge on a heat-rated product behind a range or choose a metal-look option for durability – small upgrades where it matters keep the job looking high-end.
Getting Ready – What You’ll Need
Gather Your Tools
You’re standing in your kitchen with a box of 12×12 peel-and-stick sheets and a coffee, wondering what to grab first. You’ll want a measuring tape, straightedge and level, a utility knife with extra blades, scissors, seam roller, plastic scraper or putty knife, 120-grit sanding block, rubbing alcohol (70%+), mild degreaser or TSP, painter’s tape, a caulking gun with silicone, and optionally 3M Primer 94 plus a hair dryer or heat gun for tricky bends. That’s it.
Prep Your Surface
You’re not prepping drywall the same as old ceramic tile; start by removing outlet covers and wiping the area with dish soap and warm water, then follow with 70% isopropyl alcohol to cut grease. Sand glossy surfaces lightly with 120-grit, fill holes with spackle, and let everything dry – give it at least 24 hours in humid kitchens. Test a small tile to check adhesion before you commit.
Scuffing counts – on laminate or glossy paint scuff with 120-grit until it loses shine, and vacuum the dust. And for porous surfaces like unpainted drywall or plaster, a light coat of 3M Primer 94 improves bond; spray or wipe on and wait about 10 minutes to flash off. When gaps exceed 1/8 inch over 12 inches, flatten with a thinset skim or backer like Hardie-Backer, because peel-and-stick will show every imperfection. Do a 24-hour adhesion test with a 6-inch square to be sure.
The Real Deal About Measuring and Cutting
It’s 9pm, you’ve peeled three sheets and then notice one row comes up 3/8″ short under the cabinet – ugh. You need to measure every run horizontally and vertically to the nearest 1/8″, mark high and low spots, and note obstructions like outlets and light switches in inches and fractions. Use a level to draw a straight baseline, transfer measurements to the back of the sheet, and plan cuts so seams fall behind appliances or under a cabinet lip whenever possible.
How to Measure Twice, Cut Once
You’re standing with a tape and a coffee, take two full-length measurements and compare them – not one, two. Mark cuts on the backing with a pencil and straightedge, score 3-4 times with a utility knife then snap for vinyl; for metal-look sheets use tin snips or aviation shears and wear gloves. Allow a 1/16″ to 1/8″ gap for caulk at edges and always test-fit a scrap before committing.
Tackling Those Corners and Edges
Inside corner where two cabinets meet can be maddening, so butt the sheet into the corner and leave a 1/16″ to 1/8″ gap for silicone – that tiny seam hides a lot. Outside corners you can wrap the sheet around the edge, trimming the face slightly shorter so the overlap tucks neatly, or miter two pieces at 45 degrees for a cleaner joint. Use a seam roller and a soft cloth to press edges tight.
For tricky profiles use a contour gauge or make a cardboard template from the profile, transfer that to the sheet and cut slowly with multiple shallow passes of your knife. Heat the adhesive with a hairdryer or heat gun on low to make wraps easier and to reduce bubbling, especially around rounded edges. For outlet boxes cut 1/8″ oversized so you can caulk and still reinstall the cover plate flush.
Seriously, It’s Easier Than You Think: The Installation Process
You probably thought this would take all weekend, but once you tackle a 12 sq ft patch you’ll be surprised – a 10-tile run can go in under 2 hours. You prep, peel a few inches, align, press and roll; most tiles take 3-5 minutes once you get a rhythm. After the first two tiles the rest flows and the mess-free part really hits home.
Applying the First Tile
You might’ve stared at the wall wondering where to start, so test-fit a 3×6 or 4×4 tile at the corner to check spacing and cuts. Peel only 2-3 inches of backing, line it up with your pencil baseline, press the center then the edges, and use a J-roller or firm hand pressure for 15-30 seconds. Don’t pull the whole backing off until you’re happy with alignment – control beats rush every time.
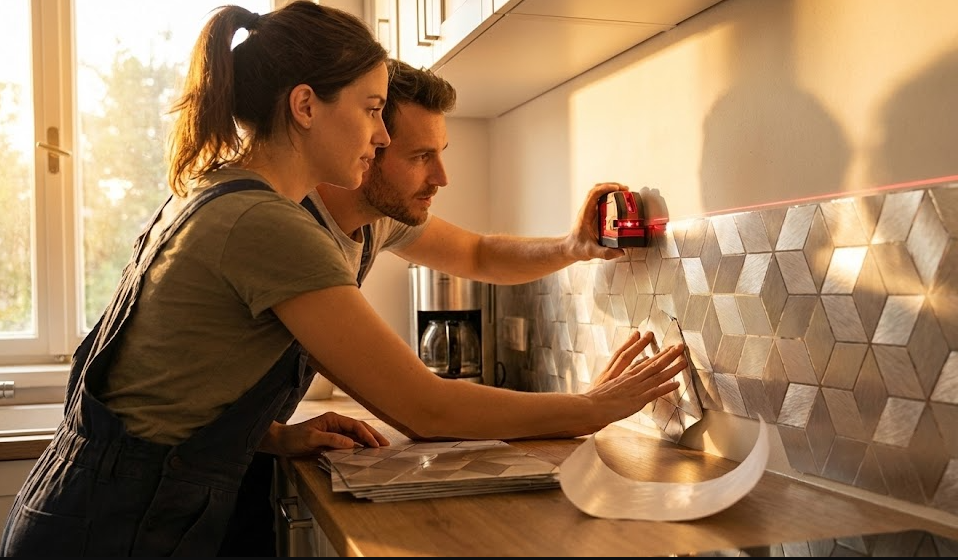
Keeping It Straight and Level
You probably slapped a tile on and watched the row drift at least once; happens to everyone. Snap a pencil line or use a laser level as your reference, then check with a 4-foot level every 12 inches or every 2-3 tiles. Want it dead straight? Use painter’s tape or thin spacers and measure 1/16-1/8 inch above the countertop for caulk and movement.
You likely found that starting from the center line saved a ton of fiddling on one job. Work out to the edges so cuts balance, use painter’s tape as a temporary clamping guide while adhesive grabs, and roll each tile with a 3 lb rubber roller to remove bubbles. A single straight line makes the whole job look pro.
Also keep the room above 50°F (10°C) for best tack and if a tile lifts within the first 30 seconds you can peel and re-seat it without drama.
My Take on Making It Look Professional
Compared to a slapdash job, a pro finish hides the seams and frames the backsplash like it belongs there; you want consistent 1/16 to 1/8 inch spacing, tiles aligned to a focal point like the range or sink, and a level line every time. Use a chalk line and a 48-inch level, plan cuts so you avoid tiny slivers at corners, and dry-fit entire rows before you peel – trust me, layouts you redo once save hours later.
Grouting and Finishing Touches
Unlike full ceramic tile, many peel-and-stick products need silicone at edges and unsanded grout only if joints hit about 1/8 inch; for wider joints use sanded grout, and in wet zones apply 100% silicone caulk where the backsplash meets the countertop. Work grout with a rubber float, wipe haze with a damp sponge within 10 minutes, and let grout cure 24 to 48 hours before light cleanup or taping for trim.
Cleaning Up the Mess
Rather than letting adhesive sit, tackle residue fast: warm the area with a hair dryer on low to soften glue, scrape gently with a plastic putty knife, then clean adhesive with 70% isopropyl alcohol or a citrus-based remover-test first in an unseen spot. Vacuum before you wipe, use microfiber to avoid streaks, and bag scraps for proper disposal so your counters actually look finished.
Instead of guessing which solvent to use, follow a simple escalation: warm and peel within 24 hours for easiest removal, then alcohol or Goo Gone for sticky bits; if that fails, try mineral spirits sparingly and test under tile edge. For grout haze mix one part white vinegar to four parts water and scrub with a nylon brush, but don’t use vinegar on epoxy grouts. Wipe spills within 24 hours.
If you hit stainless or glass, a single-edge razor at a low angle removes residue cleanly-use steady pressure and keep the blade flat to avoid scratches.
Common Mistakes and How to Avoid Them
You probably know someone who slapped panels up fast and had edges peel in 2 weeks, your buddy or maybe you once did it. Skipping surface prep, misaligning patterns, and ignoring temperature/humidity are the usual suspects. Clean with 70% isopropyl, sand glossy paint with 120-grit, and keep room temp between 55-85°F. In my experience, taking those steps cuts failure rates dramatically – adherence often improves by roughly 50% when people do the prep right.
Don’t Rush the Prep Work
You once thought a quick wipe would do, so did a neighbor who lost tiles after a week. Spend 10-15 minutes per 10 sq ft: degrease with 70% isopropyl, sand shiny areas with 120-grit, patch holes with fast-setting spackle and sand smooth. Prime painted surfaces with a high-bond primer and let it dry 1-2 hours. Take the time and your sheets will lay flat and hold, not curl at the edges.
Watch Out for Air Bubbles
You peel a sheet and spot a bubble, panic? Don’t. Many adhesives let you reposition for 30-60 seconds; lift slowly, re-seat and smooth from center outward with a plastic squeegee or a clean credit card. Work in 6-12 inch sections rather than trying to press an entire sheet at once. Small bubbles under 1/8 inch usually flatten with firm pressure; bigger ones need a quick lift and redo to avoid puckering.
I’ve fixed stubborn pockets by pricking the bubble with a sewing needle or 1/16-inch pin, then pressing the adhesive down – that tiny vent releases trapped air. Warming the area with a hair dryer on low (around 120-140°F) softens the adhesive and makes rolling easier. Use a 2-3 inch seam roller or hard plastic squeegee and practice on a 6×6 inch scrap so you learn how long you can reposition and how the adhesive responds to heat.
Final Thoughts: Enjoying Your New Backsplash!
Wrapping up
With peel-and-stick exploding on social media and big-box stores expanding styles, you can finish a 6-ft backsplash in about 2-4 hours and clean-up is basically none, so why drag it out? You’ll love that most tiles peel off the paper and stick firmly, and if you mess up you can usually lift and reposition once or twice. Try a quick run of silicone caulk along edges for moisture protection, and enjoy how a simple weekend swap updated my friend’s 10-year-old kitchen without a contractor – it really changes the room.