
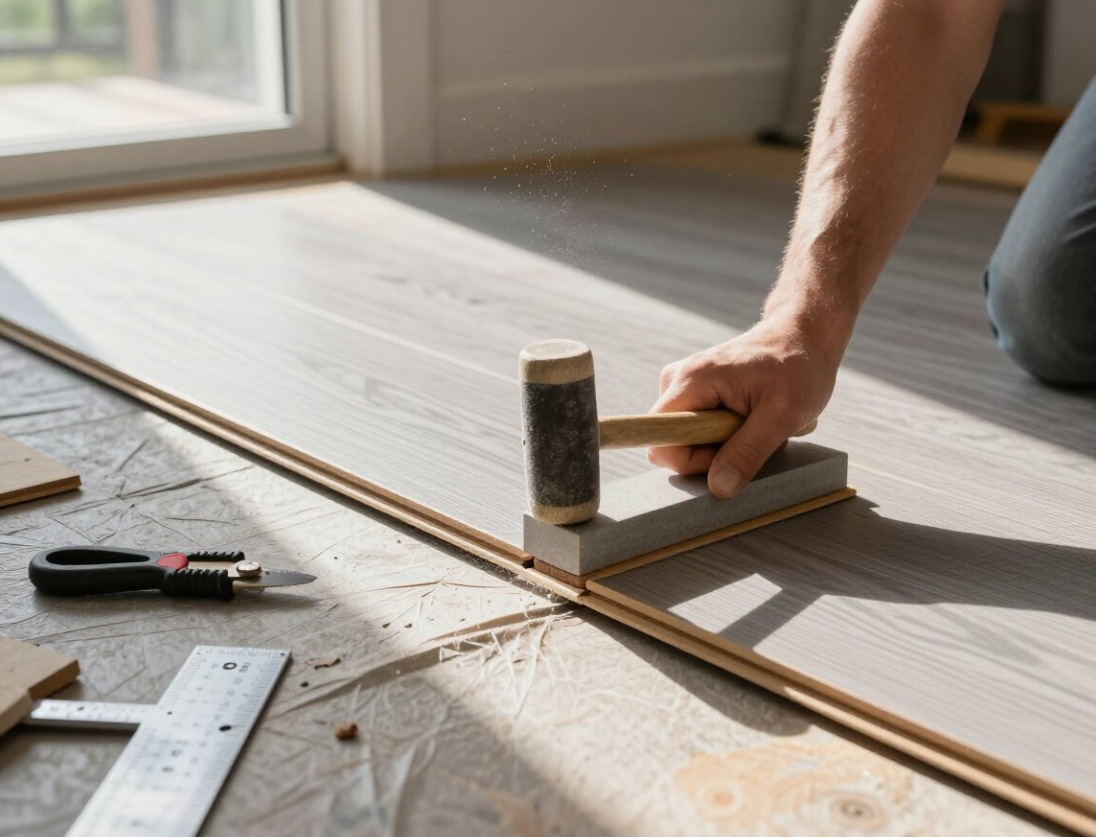

Discovering how to install vinyl plank flooring is easier than you might think, making it the perfect DIY project for homeowners who want beautiful, durable floors without hiring expensive contractors. Modern vinyl plank flooring looks remarkably like real hardwood but installs with simple click-lock systems that don’t require glue, nails, or special tools.
With a quick vinyl plank install you can totally transform your space and save a bundle, and that matters because you want durable, easy-care floors that actually look good; you’ll learn the basics here so you won’t mess it up. Want a pro finish without hiring someone? You can do it – comfy shoes, a tape measure and patience go a long way. I’ll walk you through prep, layout, cutting and snapping planks so your room looks solid, not sloppy.
What’s Vinyl Plank Flooring and Why Should You Care?
Vinyl plank gives you hardwood looks without the hardwood price. You get realistic wood grain and color variation from a photographic layer, typically topped with a wear layer of 6-20 mils for residential or 20-30 mils for commercial use. It’s often 100% waterproof, installs as click-lock or glue-down, and runs about $2 to $7 per sq ft depending on quality. So if you want durable, low-maintenance floors that you can install yourself in a weekend, vinyl plank actually delivers. Don’t skimp on quality though.
The Benefits of Choosing Vinyl Plank
You get a lot for relatively little: waterproof performance for kitchens and basements, scratch resistance for pets and kids, and easy maintenance – mop and you’re done. High-end LVP matches hardwood visuals and can carry 15-25 year warranties; lower-end options still outlast cheap laminates. Install time is fast too – a 300-500 sq ft room often goes down in a day with click-lock planks. And if a plank gets damaged, you only replace that plank, not the whole floor.
Common Myths Busted
Think vinyl looks fake or peels after a year? Not true for modern vinyl plank. Luxury Vinyl Plank uses embossed textures and high-res layers so you can barely tell it from oak or hickory, and quality wear layers resist scratches and fading. Manufacturers now add UV stabilizers and rigid cores for dimensional stability, so your floor won’t bubble or warp the way older sheet vinyl sometimes did.
Myth: you can’t repair vinyl. You actually can-spot-replace damaged boards, and many installers keep a few extra planks for that reason. Myth: it’s toxic. Most reputable brands meet indoor air quality standards like FloorScore and emit very low VOCs. Myth: it sounds hollow. Underlayment fixes that-add a 2 mm cork or foam layer and the floor feels and sounds solid. Those specifics are why so many pros recommend vinyl plank today.
Do You Really Need to Prep the Subfloor?
You pull up the old floor and find paint blobs, a few nails and a low spot by the sliding door – looks rough, right? If you skip prep you’ll often get gaps, clicks or premature wear; most manufacturers want the subfloor within about 3/16 inch over 10 feet to avoid problems. So yeah, a bit of prep up front usually saves hours of headaches later, and you’ll get a floor that actually lasts.
Checking for Levelness and Cleanliness
Say you roll a 6-foot straightedge across the room – any trip or light showing under it means action. Flatness target: 3/16 inch over 10 feet is a common guideline.
You should vacuum, scrape adhesive or paint spots, countersink protruding nails and sweep until the surface is dust-free; even small grit will make planks sit uneven and click as you walk. Want a pro tip? Use a long level or laser level for big rooms – it exposes dips you won’t feel until the last row.
Repairing Any Damage Before You Start
Picture a soft patch that squishes when you step on it – that plywood’s toast and needs fixing before you lay vinyl. For small holes or shallow gouges, use a manufacturer-approved leveling compound; for rot or flexing replace the plywood with 3/4 inch tongue-and-groove or screw in new subfloor panels, screwing every 6 to 8 inches to stop movement. If you leave a spongy area it shows up fast once traffic starts.
In one job I found a 4 by 3 foot soft spot near a bathroom – I cut out the damaged 3/4 inch ply, sistered in a new sheet, fastened it with 2-inch screws at 6 inch spacing, then feathered the edges with a polymer-modified patch so the seamed area was invisible under the planks. You should also check concrete with a moisture test or meter and follow the vinyl maker’s moisture limits before patching – excessive moisture means a proper vapor mitigation system is needed, not just a quick patch.
Here’s How to Measure Your Space Like a Pro
Most measurement errors happen because you assume rooms are perfect rectangles – they rarely are. Start by sketching the room and breaking it into simple rectangles, then measure each segment in feet to the nearest inch; multiply length by width for each and add them together. If your main area is 12 x 14 you’ve got 168 sq ft, but don’t stop there – note door swings, closets and any raised thresholds, and measure twice for peace of mind.
Tools You’ll Need for Accurate Measurements
You don’t need a hardware-store cart, just the right handful of tools: a 25-ft tape measure, a laser distance meter for runs over 30 ft, a carpenter’s pencil and graph paper or your note app, a straightedge or carpenter’s square for corners, and a calculator or phone. Use a chalk line for long straight references and grab a level if transitions are tricky – these keep your numbers honest and your layout clean.
Calculating How Much Flooring to Buy
Buying a little extra saves headaches later – plan on adding 10% for straight installs and 12-15% for rooms with lots of cuts or patterns. Multiply total square footage, add the waste percentage, then convert to boxes using the square-footage-per-box listed on the packaging; for example, 200 sq ft with 10% waste becomes 220 sq ft.
Check the box coverage – most vinyl plank boxes cover between 20 and 25 sq ft. So if you need 220 sq ft and each box is 22.5 sq ft, you’ll buy 10 boxes (220 / 22.5 = 9.78, round up). Also factor in matching – buy all from the same production lot when possible and keep an extra box or two (about 3-5% more) for future repairs or mismatched cuts in adjacent rooms.
What’s the Best Way to Lay Down Vinyl Plank Flooring?
Nearly 70% of DIY installers pick a floating click-lock method because it’s fast and forgiving. You’ll want to plan runs so seams are staggered at least 6 inches, especially in rooms longer than 20 feet, and run planks parallel to the longest light source for the best look. Prep matters – flat subfloor, acclimated boards, and measured layout save you headache and wasted material.
Choosing Your Lay Pattern
Staggered joints at least 6 inches apart reduce plank movement by up to 40%. You can go straight for a clean modern look, a 50/50 offset for a natural wood vibe, or a 45-degree diagonal to make small rooms feel larger. Kitchens and open plans often benefit from mixed-length runs (9, 12, 16 inch pieces) to avoid repeating patterns and to look more authentic.

Tips for Seamless Installation
Proper acclimation reduces plank swelling failures by over 90%. Let boxes sit in the installation room 48 hours at 65-85°F, keep humidity stable, and maintain a 1/4 inch expansion gap at all walls with spacers. Use the right underlayment for sound and moisture, score-and-snap thinner planks with a utility knife, and tap locks gently with a block so you don’t crush the profile.
- Snap a chalk line every 8 feet for long, straight runs so you don’t drift.
- Stagger seams by at least 6 inches and vary starter board lengths to avoid a tiled look.
- Trim door casings and jambs so planks slide under for invisible thresholds.
- After you’ve finished a section, roll with a 100 lb floor roller to seat loose-lay or adhesive-free planks.
Using a tapping block can cut click-lock damage by 75%. When you lock boards together, hold the tongue up and tap the groove evenly, use a pull bar on the final row, and always test-fit around door frames, vents, and pipes. If you spot a slightly raised seam, loosen and re-seat rather than forcing it-small fixes now beat redoing rows later.
- Confirm subfloor flatness within 3/16 inch over 10 feet; shim or patch as needed.
- Use manufacturer-recommended underlayment on concrete to mitigate moisture and improve acoustics.
- Label end pieces and keep a stash of common cut widths to speed repairs and future matching.
- After you finish, walk the entire floor, tighten any loose seams, and install transitions for a pro finish.
Is It a Good Idea to Glue or Click? Let’s Discuss
The Lowdown on Glue-Down vs. Floating Floors
Glued planks bond to the subfloor for a rock-solid feel, while click-lock planks snap together and float above it, so they act differently underfoot. Glue-down often gives a firmer, more permanent surface and is common in commercial jobs; adhesives usually need about 24 hours to set. Floating installations are friendlier to DIYers-you can often finish a 12×12 room in a day and walk on it almost immediately.
Pros and Cons of Each Method
One method costs more up front but handles heavy traffic better; the other saves time and makes repairs easier-which suits your project? Below is a quick, practical breakdown so you can match method to room, budget and long-term plans.
Pros and Cons: Glue-Down vs Floating
| Glue-Down | Floating (Click) |
|---|---|
| More permanent, solid feel underfoot | Quick to install and easy for DIYers |
| Often preferred in commercial spaces and heavy-traffic areas | Better if you plan to move or reuse the floor later |
| Adhesive needs about 24-48 hours to fully cure | Walkable almost immediately after locking boards in place |
| Requires flatter, well-prepped subfloor; may need leveling | Tolerates minor subfloor imperfections with 2-3 mm underlayment |
| Harder to replace single damaged planks | Individual planks can be popped out and replaced |
| Better for heavy rolling loads like carts and file cabinets | May shift or gap under constant heavy rolling without proper support |
| Can reduce hollow sound-more solid acoustic performance | Often needs underlayment to cut down click and echo |
| Installation labor is usually more expensive and may need pros | Labor costs are lower; many homeowners handle it themselves |
If you want specifics: glue-down is a go-to for retail or offices where heavy foot traffic and rolling carts are daily, and you shouldn’t expect to move the floor later. So, plan on at least a day or two extra for adhesive cure and possible subfloor leveling to meet common flatness standards (often 3/16 inch over 10 feet). But if you’re doing a weekend DIY in a kitchen or bedroom, floating saves time, lowers labor expense and makes future repairs or relocation far easier-just use a decent underlayment (2-3 mm) to control sound and minor irregularities.
How Do You Finish Up After Laying the Planks?
Trimming and Adding Baseboards
Compared to a sloppy edge, a clean trim and properly installed baseboards make the whole room pop; you should leave a 1/4″ to 3/8″ (6-10 mm) expansion gap, use spacers for the last row, and rip planks to fit with a table saw or circular saw. Undercut door jambs with a jamb saw so the plank slides under cleanly, and fasten baseboards to the wall not the floor so your floating floor can move. Want it seamless? Add quarter round or flexible caulk around corners.
Post-Installation Care Tips
Unlike glass or tile, vinyl tolerates moisture but you still need smart care: wait 24 hours before moving heavy furniture onto a newly laid floating floor, sweep or vacuum with a soft-brush head weekly, and avoid steam cleaners or abrasive pads which can damage the wear layer. Keep indoor humidity around 35-65% and use felt pads on chair legs to prevent scratches – small steps that pay off big time. Need longevity? Treat it like a high-end surface.
- Vacuum with a soft-brush or use a microfiber dry mop; avoid beater bars.
- Blot spills within 24 hours and use a damp mop with pH-neutral cleaner for spots.
- Place felt pads under furniture and rotate rugs to spread wear.
- This helps prevent gaps, cupping, or premature wear and keeps your warranty valid.
Compared with casual upkeep, a few extra practices will extend life: use a pH-neutral cleaner diluted per label for monthly damp mopping, never wax or polish vinyl, and avoid dragging heavy appliances – roll them on plywood if you must move them. Check seams and transitions every 6 months, replace felt pads twice a year, and trim pet nails regularly; those small habit changes can add a decade or more to appearance and performance.
- Use only pH-neutral cleaners and soft microfiber mops; no wax or harsh chemicals.
- Deep-clean monthly and spot-clean spills immediately with mild soap and water.
- Inspect transitions, seams, and pads every 3-6 months and address issues early.
- This routine preserves finish, prevents moisture issues, and keeps the floor looking new.
Final Words
As a reminder, when you’re staring at a living room full of vinyl planks after a long day and wondering if you bit off more than you could chew, take a breath – you’ve got this, and the steps are straightforward if you stick to them. Prep well, pace yourself, snap the click-locks with care, and don’t rush the seams. Want a pro tip? Test a seam first. Small patience now means flooring that looks pro later.
FAQ
Q: What prep do I need before laying vinyl plank flooring?
A: Most manufacturers require a subfloor flatness of 3/16 inch over 10 feet for vinyl plank, so you gotta check that first – that tolerance matters a lot. Start by clearing the room, pulling baseboards, and making sure the subfloor is clean, dry and free of adhesive residue; call in a leveling compound if you see dips or high spots. You should also test moisture with either a calcium chloride or in-situ relative humidity test depending on the product, because excess moisture will wreck a new floor fast.
Acclimation helps – leave unopened boxes in the room for at least 48 hours if the instructions call for it, and stack them flat. If you’re installing over plywood or existing vinyl, make sure seams are tight and any loose boards are screwed down – squeaks are the enemy. Use an underlayment only if the product allows it, and pick the right kind for sound and comfort.
Do a moisture test before you do anything else.
Q: How do you install click-lock (floating) vinyl plank step-by-step?
A: Most click-lock systems require a 1/4 inch expansion gap at the walls, and some larger rooms need up to 1/2 inch, so plan your layout accordingly. Start along the longest straight wall, lay the first row with the tongue facing the wall and use spacers to keep that expansion gap, then angle and click the next plank into place – it’s like snapping Lego but with a mallet and tapping block. Stagger end joints by at least 6 to 12 inches for strength and a natural look; tight joints matter so tap them gently until they lock, but don’t force things – you’ll damage the locking edge.
Cutting’s easy with a utility knife and straightedge for most vinyl planks: score, snap, and trim the backing; for thicker rigid cores you might need a fine-tooth saw. Use a pull bar to fit the last row, and trim door jambs so the plank slides under for a clean finish. If you hit a tricky doorway, dry-fit pieces first – better to walk it through slowly than rip something out later.
If a plank gets damaged during install, replace it now not later.
Q: What finishing touches and maintenance should I do after installation?
A: Many vinyl plank warranties range from 10 to 25 years, but proper finishing and care make a big difference in how long your floor looks great. Install transition strips at doorways and between different floorings, reattach baseboards or install quarter-round to hide the expansion gap, and use silicone or manufacturer-recommended sealant only where specified like at wet areas if your product calls for it. Check cabinet and appliance thresholds – you might need reducers or T-molding to handle height changes.
For day-to-day care sweep or vacuum without a beater bar, mop with a pH-neutral cleaner occasionally, and never use wax, oil soaps, or abrasive scrubs. Put felt pads on furniture, lift heavy items instead of dragging, and avoid steam mops unless the manufacturer explicitly says it’s OK. Small scuffs buff out sometimes with a melamine sponge or recommended cleaner, but deep gouges may need plank replacement.
Keep spills wiped up quickly and you’ll keep that floor looking new for years.