


Start by deciding whether to buy or DIY your outdoor bar, weighing cost, time, and customization. Choose a weather-ready setup with exterior-grade materials, UV-safe finishes, and durable fasteners, then plan a layout that centers the bar, with clear sightlines to seating and pathways. Stock essentials, keep pre-measured stations, and design an ergonomic counter with accessible storage. Add layered lighting and weatherproof controls for evenings. Ready to optimize flow and ambiance? There’s more to optimize beyond this overview.
Decide: Buy vs. DIY Outdoor Bar for Summer
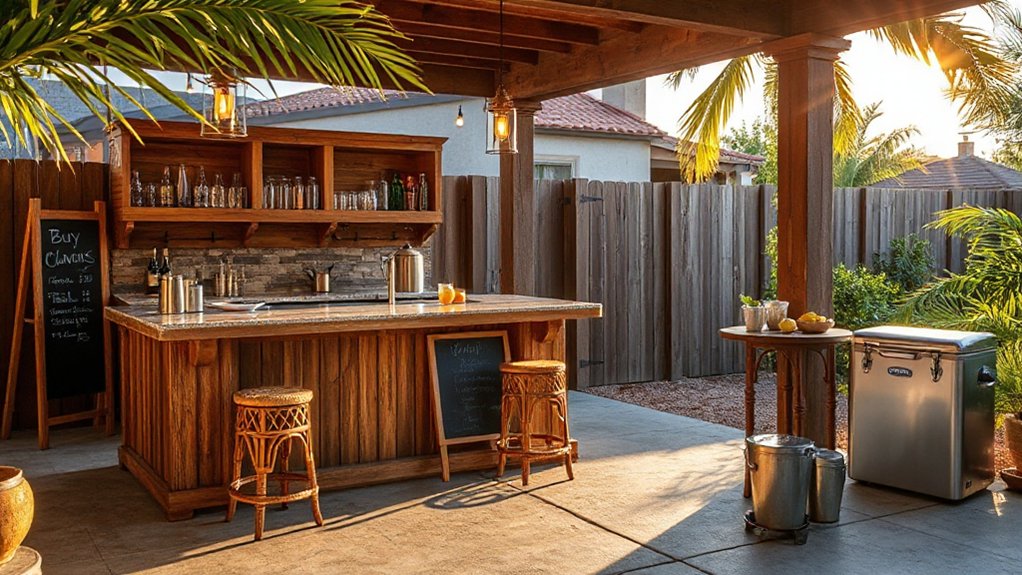
When deciding between buying or DIYing an outdoor bar for summer, start by defining your priorities: cost, time, and customization. You weigh upfront expense against long-term maintenance and potential upgrades.
A prebuilt unit delivers quick deployment, predictable dimensions, and integrated features, but may lack targeted storage or routing for your grilling tips.
DIY offers tailored workflow, movable components, and material control, yet demands design rigor, tooling, and risk assessment.
In either path, assess garden furniture compatibility to make certain of cohesive aesthetics and stability under load.
Consider weather exposure, UV resistance, and finish durability to minimize upkeep.
If you lean DIY, plan modular sections for future resizing.
If you prefer buy-in, choose modular options with easy reconfiguration.
Your choice affects usability, durability, and overall outdoor entertaining efficiency.
Choose a Weather-ready Setup and Materials
Choose weather-ready materials and sturdy, outdoor-ready fixtures from the start to minimize maintenance and downtime.
Prioritize weather-resistant surfaces and corrosion-resistant hardware that withstand sun, rain, and humidity.
This setup keeps your bar functional year-round with minimal upkeep.
Weather-Resistant Materials
Selecting weather-resistant materials is essential for a durable outdoor bar. You’ll choose a weather-ready setup that endures sun, rain, and temperature swings without frequent upkeep.
Opt for Rain resistant furniture built from solid teak, eucalyptus, or powder-coated aluminum, ensuring joints remain tight and fasteners resist corrosion.
For surfaces, select non-porous, UV-stable materials like marble-look quartz or high-grade polymer composites to minimize staining and fading.
Use UV protective finishes on exposed wood to slow graining and color loss, paired with sealants that resist moisture intrusion.
Prioritize fasteners and hardware with stainless steel or ceramic coatings to prevent rust.
Plan for drainage and self-waling gaps to avoid pooling.
Confirm warranties cover sunlight exposure, moisture cycles, and impact from seasonal cleaning regimes.
Durable Outdoor Fixtures
Prioritize corrosion-resistant fasteners, powder-coated or stainless components, and sealed electrical housings to protect outlets and lighting.
For tables, choose solid-surface or treated wood with rot inhibitors and a protective veneer. For fixtures, integrate gaskets and drainage to prevent standing water.
Mounts should be vented to reduce heat buildup, with flexible conduit runs to accommodate movement.
Tie the scheme to interior design and landscaping goals, ensuring color, texture, and form harmonize with your outdoor spaces.
Finally, document maintenance intervals and simple repair steps to preserve performance and aesthetics over time.
Plan the Layout for Flow: Bar, Seating, and Conversation Zones
Consider how you position the bar for efficient service and clear sightlines. Then cluster seating to encourage interaction without blocking flow.
Establish distinct conversation pathways that guide guests from arrival to seating, while keeping traffic around the bar unobstructed.
Align bar placement, seating clusters, and movement routes to balance service efficiency with social comfort.
Bar Placement Flow
To establish a clear and efficient flow, position the bar as the anchored hub with direct sightlines to both seating zones and the conversation areas. You design sightlines that guide movement naturally, reducing backtracking and clutter. Guarantee service access remains unobtrusive yet responsive, so guests perceive quick, seamless interactions.
Implement clear pathways, avoiding cross-traffic through the cooking or prep zone. Use defined zones to minimize spillover and maximize acoustics for conversations.
- Align the bar to centralize views, traffic, and service paths.
- Zone seating and conversation areas to reinforce social clusters without crowding.
- Place garden plants and outdoor artwork to frame focal points without obstructing flow.
- Plan lighting and power drops to support operation and ambience after dark.
Seating Cluster Zones
How should seating clusters be arranged to optimize flow and social interaction? Position clusters to create clear arrival sightlines from the bar to seating without obstructing movement.
Use a primary triangle: bar, main seating, and secondary lounging near perimeters.
Place 4–6 person groups at 8–12 feet apart, with 6–8 feet of aisle between clusters for circulation.
Orient chairs toward conversational anchors, not faces, to reduce glare and feedback.
Define edges with low-profile elements like garden flora planters or narrow hedges, not tall barriers, to preserve sightlines.
Incorporate outdoor rugs to anchor zones, align furniture legs, and define paragraph breaks in open spaces.
Maintain accessibility, guarantee wheelchairs fit alongside seating.
Favor modular pieces for reconfiguration as crowds shift.
Conversation Pathways Design
With the bar, seating, and conversation zones defined, map clear pathways that guide guests without forcing routes through the main activity areas. You design circulation by placing primary routes at 90-degree angles from entry points, linking bar prep, seating clusters, and lounge corners while preserving sightlines to garden plants and outdoor art.
Maintain minimum widths for two-way flow and avoid bottlenecks near drink service. Use subtle elevation changes and material cues to indicate zones without visual clutter. Align paths with lighting and wind patterns to enhance comfort. Regularly audit for pinch points and reconfigure as needs shift.
1) Separate high-traffic from intimate seating with smart edging
2) Use color and texture to mark zones without signage
3) Position seating to face conversation anchors
4) Integrate plantings to enclose spaces gently
Stock Essentials: Drinks, Glassware, and Bar Tools
A solid outdoor bar starts with the essentials: drinks, glassware, and bar tools. You’ll stock a core selection that covers guests’ tastes without clutter.
For drinks, choose a balanced set: a few base spirits, liqueurs, a mixer lineup, and fresh fruit; keep non-alcoholic options handy.
Glassware styles should match the menu—highballs for long drinks, rocks glasses for spirits, coupe or martini glasses for cocktails, and wine stems for pours.
Bar tools must include a shaker, strainer, jigger, muddler, knife, and bottle opener, plus a durable ice scoop and tongs.
Emphasize efficiency: pre-measure, pre-chill, and label stations.
Apply mixology techniques, such as layering and texture control, to deliver consistent results.
Maintain cleanliness, rotation, and inventory checks to guarantee ready service.
Build a Sturdy Outdoor Bar Counter

You’ll start with a stable frame assembly to prevent wobble and guarantee long-term durability.
Apply weatherproof finishes to resist UV, rain, and temperature swings without peeling or fading.
Set the counter to an ergonomic height for comfortable, efficient use from prep to service.
Stable Frame Assembly
To guarantee a stable frame, start by laying out the base supports on a flat, level surface and secure them with corner braces and long screws. You’ll create a rigid foundation that resists racking under load. Precision helps prevent wobble and aligns the top rail for a clean look.
- Align all verticals plumb, then lock with cross-bracing to maximize torsional stiffness.
- Verify each joint with square checks and tighten hardware to manufacturer torque specs.
- Use exterior-grade fasteners and treated lumber to endure outdoor conditions.
- Mark anchor points for future disassembly, avoiding hidden gaps that invite movement.
Keep garden aesthetics in mind while planning seating sightlines, and consider mild outdoor heating placement to balance weight distribution and stability.
Weatherproof Finishes
Weatherproof finishes protect the bar counter from moisture, UV exposure, and temperature swings while preserving a clean, professional appearance. You choose a finish that resists water intrusion and staining without cracking under sun or freeze-thaw cycles.
Apply primer designed for exterior surfaces, then a durable topcoat with UV inhibitors and mildew resistance. Consider epoxy or polyurethane systems for hard-wearing counters, or solid deck stains for a more natural look.
Confirm adequate ventilation during application and allow full cure before use. Maintain by cleaning with mild soap and water; recoat every 2–4 years as needed.
Coordinate with garden lighting and outdoor furniture layouts to minimize glare and ensure consistent aesthetics across the entertaining area. This approach sustains longevity and visual coherence.
Ergonomic Counter Height
Choose an ergonomic counter height that suits the primary user group and the intended bar workflow. You’ll optimize comfort and efficiency by aligning work surfaces with expected tasks, reach zones, and seated vs. standing use.
For outdoor bar ergonomics, pin down a height that reduces strain across frequent tasks like prep, serving, and cleanup, while accounting for weatherproof materials and wind exposure.
- Determine target user height and seating options to fix a practical baseline.
- Allow clearance for stools, leg space, and foot traffic without compromising stability.
- Integrate drawer and shelf access at reachable angles to minimize bending.
- Reassess periodically for equipment additions, gloves, or seasonal changes.
This ergonomic counter height supports durable performance, improves workflow, and helps preserve user posture outdoors.
Keep Drinks Cold: Cooling and Ice Strategies
Keep drinks cold from the start with a layered cooling plan that combines passive ice retention, active chilling, and smart serving. You implement passive retention with insulated bases, pre-chilled bottles, and wrapped ice packs in a dedicated bin so ambient heat is minimized before service.
Active chilling uses a compact cooler or kegerator with a circulating ice slurry and targeted air flow to reduce temperature quickly, while backup packs handle peak demand.
Smart serving relies on portioned, pre-chilled beverages and rapid top-offs to prevent temperature spikes at the bar. Consider outdoor aesthetics when selecting coolers to complement decor, and prioritize beverage selection that travels well and stays cold longer.
Maintain consistent ice generation, monitor temps, and rotate stock to avoid warm exposures.
Create Warm, Safe Lighting for Ambiance
Soft, warm lighting sets the mood without compromising safety; start by selecting low-glare fixtures that distribute light evenly and reduce harsh shadows. You’ll create a welcoming, functional atmosphere around the bar area with controlled illumination and minimal glare, enabling quick visibility without fatigue.
Use a layered approach that combines practical task light with ambient glow from decorative sources, like fire pit accents and string lights, to balance light levels.
1) Position low-profile, dimmable fixtures around the bar perimeter to control brightness precisely.
2) Use warm-toned LEDs (2700–3000K) and shielded bulbs to minimize glare near guests and the fire pit.
3) Integrate string lights overhead for gentle, uniform coverage and scene depth.
4) Implement weather-rated weatherproof controls and outlets; maintain clear cables and moisture protection.
Add Seating and Shading for Comfort
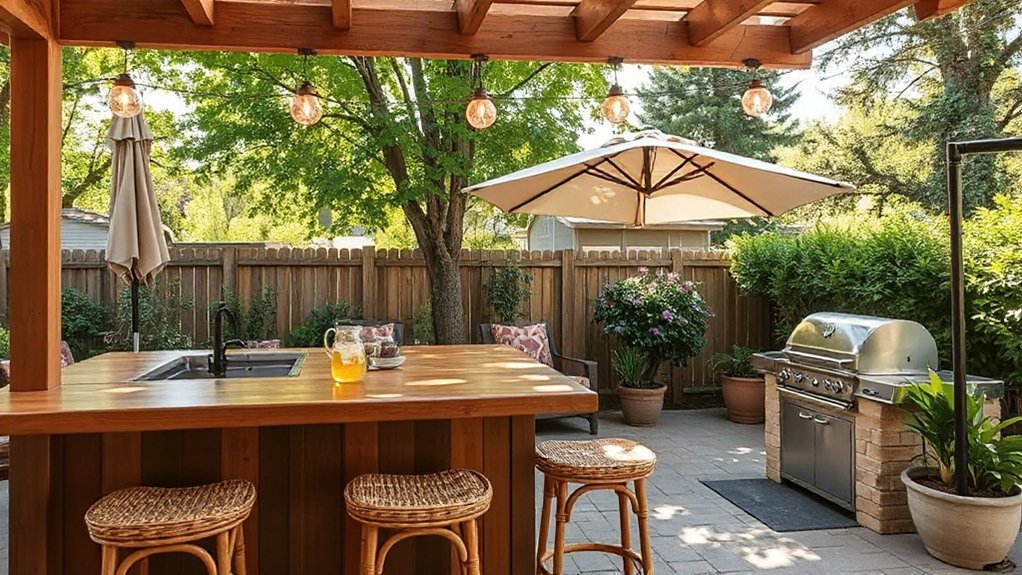
To guarantee comfort and usability, add seating and shading that tolerate outdoor conditions and encourage extended use. Choose weatherproof pieces with modular seating for flexible layouts and easy cleaning.
Position shade where sun exposure peaks, using durable umbrellas, pergolas, or fixed awnings that resist wind. Opt for cushions in high-performance fabrics; select quick-dry materials to minimize maintenance.
Assure sightlines to the bar and exits remain clear, and provide accessible pathways around furniture.
Incorporate plant arrangements to soften edges, improve microclimates, and reduce glare. Integrate landscaping ideas with low-maintenance greenery and planters that double as barriers for flow control.
Record seating capacity, material finishes, and warranty details for longevity and predictable performance.
Regularly inspect joints, fabrics, and shading mechanisms before seasonal use.
Power, Water, and Sanitation: What You’ll Need
A well‑equipped outdoor bar requires reliable power, clean water, and proper sanitation to operate safely and efficiently. You’ll rely on a compact, weather‑rated electrical setup, protected outlets, and a transfer plan for outages.
Water comes from a recirculating system or a clean, accessible supply with filtration and easy sanitation. Sanitation means hands‑free stations, waste disposal, and surface materials that resist mold and bacteria.
You’ll also consider pest control to protect perishables and preserve hygiene, especially in warm evenings.
- Power sources and circuits optimized for outdoor use
- Water filtration, recirculation, and backflow prevention
- Pest control measures and rodent/mly deterrents
- Sanitation stations, waste handling, and surface sanitation
Budget Smarter: Stylish Upgrades on a Shoestring
Even on a limited budget, you can achieve a stylish outdoor bar with smart, cost-efficient upgrades that look and perform like more expensive setups. You’ll prioritize form and function, selecting modular components you can reconfigure season to season.
Use durable, low-maintenance materials—powder-coated metal, weather-resistant polywood, or concrete accents—to maximize lifespan without frequent replacement. Mount storage beneath the bar for glassware, tools, and mixers, and install a compact, energy-efficient cooler to preserve beverages.
For aesthetics, integrate garden landscaping elements that frame the bar with minimal ongoing upkeep, and add outdoor art as focal points that don’t require daily care.
Emphasize clean lines, consistent lighting, and discreet power routing to maintain a professional appearance on a lean budget.
Weatherproofing and Maintenance You Can Count On
Weatherproofing isn’t optional—it’s essential for long-lasting outdoor bars. You’ll protect the structure and preserve function by selecting materials rated for exposure and applying proper finishes. Prioritize joints, seals, and drainage to prevent moisture buildup that invites warping or corrosion. Regular maintenance reduces repairs and extends life, keeping your setup looking sharp for seasons.
- Inspect annually for cracks, rust, and compromised fasteners; replace as needed.
- Reapply protective coatings and sealants on schedule, focusing on high-contact surfaces.
- Clean garden furniture and outdoor decor with appropriate cleaners to prevent residue buildup.
- Store or cover components during extreme weather to minimize UV and moisture damage.
DIY Decor Ideas to Elevate the Space
Outdoor décor is the finishing touch that elevates your space after you’ve weatherproofed the bar. You’ll implement DIY accents that don’t compromise durability or flow. Begin with weather-resistant textiles and simple silhouettes to reduce maintenance while improving ambience.
Choose planters that double as seating or rail accents, and select compact automations for lighting to extend usability. Incorporate interior design principles—contrast, texture, and focal points—to guide attention without clutter.
Use gardening tips to maintain greenery: drip irrigation, proper drainage, and seasonal pruning, ensuring year-round importance.
Opt for modular decor that adapts to party size and weather changes. Document finishes, color palettes, and material compatibility to streamline reconfiguration and future upgrades.
Finalize by testing setup under typical evening conditions for consistency and safety.
Quick-start Checklist to Launch This Summer
To launch this summer efficiently, use a concise quick-start checklist that covers setup, safety, and usability.
- Assess site layout: designate an outdoor cooking zone, seating, and a stable prep area; guarantee stable surfaces for glassware and tools.
- Safety protocols: verify wiring, gas lines, and fire-resistant mats; implement a spill plan and first-aid access.
- Equipment readiness: pre-assemble bar, chillers, and prep stations; test lighting for dusk use.
- Usability boosts: integrate seasonal plants for scent and color; label ingredients and cordon off high-traffic paths.
This approach minimizes risk while maximizing efficiency, enabling reliable operation through long evenings.
Outdoor cooking, seasonal plants, clearly labeled ingredients, and a streamlined workflow support consistent service.
Frequently Asked Questions
How Do I Enforce Safety Around a DIY Outdoor Bar?
Yes, set up sturdy, weatherproof barriers and non-slip flooring; supervise kids near alcohol; store glassware safely. Seating arrangements promote visibility of bartenders; Lighting options guarantee step-free paths, illuminated exits, and clearly marked hazards.
What Permits or Codes Apply to Outdoor Bars?
Yes—permits and codes vary by jurisdiction, but expect building, electrical, and plumbing compliance; outdoor lighting must meet voltage and wet-location standards, and Bar countertop materials require radiant heat resistance and food-safety surfaces. Check local authorities for specifics.
Can I Build a Bar on a Balcony or Deck?
Yes, you can, but make certain balcony or deck load limits and railing clearance. Consider balcony design constraints and local permits. Install weatherproof electrical, secure components, and use sturdy deck furniture to support a compact bar setup.
How Do I Protect Electronics From Weather Exposure?
Use weatherproofing materials like gasketed seals, IP-rated enclosures, and proper cable glands; choose electronic enclosure options with UV resistance. You’ll seal joints, elevate units, and employ drip loops to prevent water intrusion and corrosion.
What’s a Quick Way to Hide Storage and Clutter?
Yes—use storage solutions like hidden shelving and roll-top cabinet panels to conceal clutter. You’ll streamline access, minimize visual noise, and achieve clutter concealment quickly while maintaining a clean, technical look for your outdoor setup.
Conclusion
You’ll wrap the project with a practical punch: precise planning, plainspoken procurement, purpose-driven placement. Peruse options, pick functionality, and push durability with weather-ready materials. Keep the layout logical, flow-focused, and guest-friendly. Stock smartly, store stuff safely, and sanitize swiftly. Budget bravely but don’t skimp on sturdiness; shield surfaces, seal seams, and safeguard seams. Finally, finalize fixtures, forego fuss, and celebrate your summer soirées with a slick, sturdy, stylish outdoor bar that delivers year after year.