


About 1 in 4 adults over 65 fall each year, and many injuries happen at home you think you’ve outgrown. You’ll want safe paths, wide doorways, and non-slip floors that stay put as you move through routines. Imagine grab bars where you actually need them and a kitchen that’s adjustable and visible at a glance. There’s more to evaluate, like maintenance and budget, before you decide what to implement first. Let’s map your priorities together.
Why Your Home Should Adapt as You Age: Key Benefits
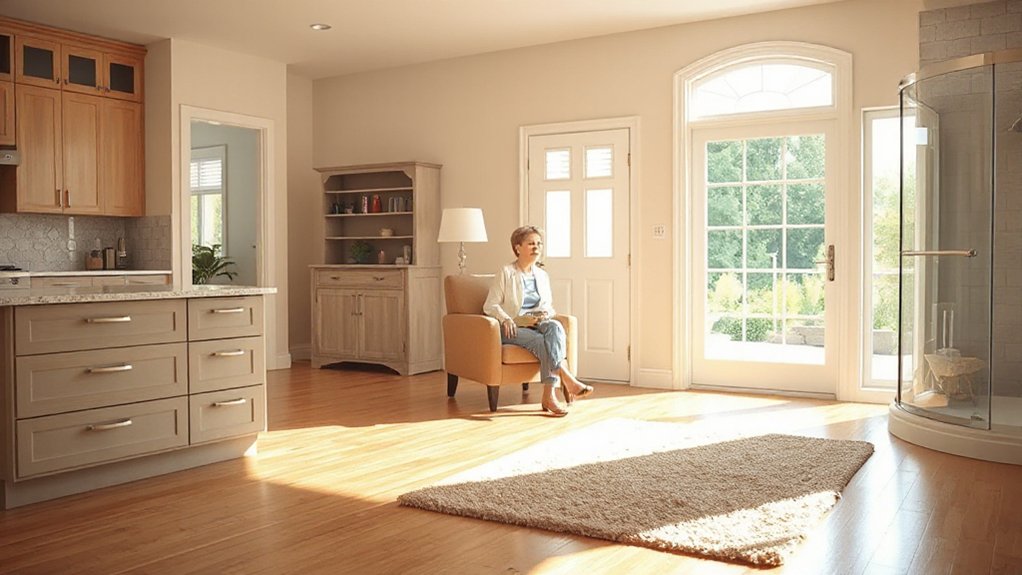
As you age, your home should support independence and safety, not hinder it. Adapting your space yields practical benefits that keep you in control. With thoughtful home customization, you reduce daily friction and prevent accidents, empowering you to perform everyday tasks confidently.
You’ll experience fewer constraints on mobility, fewer trips and stumbles, and longer intervals between costly repairs caused by wear and awkward layouts. By designing for aging, you reinforce your routines and preserve dignity, allowing you to stay connected to your hobbies, guests, and responsibilities.
Embracing lifestyle adjustments now helps you prioritize safety without sacrificing comfort. The payoff includes sustained autonomy, lower caregiver dependence, and a smoother transition if needs shift.
Start with clear goals, budget, and a practical plan, then implement gradually.
How to Assess Your Living Space for Aging-In-Place Needs
Begin with a clear, room-by-room assessment to identify what won’t support aging in place. You’ll map circulation paths, noting tight corners, threshold gaps, and surfaces that lack traction.
Check lighting levels, switch and outlet placement, and the accessibility of storage. In kitchens and baths, gauge counter heights, grab bar needs, and the reach to commonly used items.
Look at stairways, hall widths, and the floor plan’s flexibility for future rearrangements. Consider home organization: can you group essentials by task and reduce clutter to improve safety and efficiency?
Evaluate interior decor for non-slip rugs, contrasting colors to aid depth perception, and furniture layouts that support easy navigation. This audit guides practical upgrades without dictating style, ensuring both safety and comfort.
Threshold-Free Entryways: Safer Doors Without Barriers
Threshold-free entryways remove a common trip hazard and simplify both daily use and future renovations. You’ll gain smoother passages between rooms with fewer step-ups, making wheelchair or walker access more practical.
When evaluating doors, look for flush thresholds or ramped sills that maintain a single plane across entry points. Install a threshold free system by selecting a door jamb with a low-profile seal and a weather-tight sweep, guaranteeing barrier free movement indoors and out.
Choose actuators or lever handles instead of knobs for easier use, especially if grip strength is limited.
Plan for universal design: verify clear width, hinge placement, and compatible hardware. This approach supports aging in place without compromising aesthetics, durability, or energy efficiency.
Threshold free solutions empower safer, more accessible homes.
Non-Slip Flooring: Reducing Falls With Smart Materials

Smart flooring materials can dramatically cut fall risk by improving traction without sacrificing durability or comfort. You’ll benefit from non-slip options that stay quiet and easy to clean, even in bathrooms and kitchens. Look for surfaces with smart textures that channel moisture away and provide consistent grip, not just at first step but across footfalls.
Choose innovative coatings that resist wear, scrapes, and staining, so you don’t trade safety for longevity. Installation should maintain seamless progressions between rooms, minimizing trip hazards. Consider textured vinyl or ceramic with micro-etched patterns, plus groutless designs for easier maintenance.
Prioritize tested, non-slip ratings appropriate for wet areas and encased underlayment that dampens impact. Pair flooring with sturdy footwear and regular cleaning to sustain grip, reducing fall potential through practical, proactive choices.
Wide Doorways and Open Plans for Easy Navigation
Wide doorways and open plans simplify navigation by reducing bottlenecks and turning passages into fluid living space. You gain safer movement by avoiding tight corridors that trap you at corners or doorways. Keep widths at least 32 inches for doors and 36 inches for primary paths, and favor swing options that don’t require extra clearance.
An open layout helps you monitor rooms at a glance, especially when assisting others or managing daily tasks. Plan sightlines to minimize abrupt turns and clutter. Decorative accents can define zones without crowding spaces, while aesthetic considerations guide furniture scale, rug placement, and lighting.
Use flexible furniture, wall-mounted shelves, and clear floor zones to preserve open usability while maintaining style. Prioritize practical flow over ornamental excess.
Step-Free Transitions Between Rooms for Fluid Movement
Step-free shifts keep the momentum going from room to room, reducing the risk of trips and nudging you toward safer, smoother movement. To create seamless progressions, plan for door thresholds that are flush with floors and eliminate abrupt steps.
Choose barrier free pathways that align living, dining, and work zones, minimizing detours and encouraging natural flow. Use small, consistent door widths and avoid sudden changes in floor height between spaces.
Consider gradual ramps where necessary and make certain lighting is uniform to highlight level changes. Keep high-contrast edge cues, but avoid visual clutter.
Label zones clearly so you remember to enter and exit without hesitations. Prioritize consistent surface textures, reducing friction and enhancing grip during movement across rooms.
Accessible Bathroom Upgrades That Fit Any Style
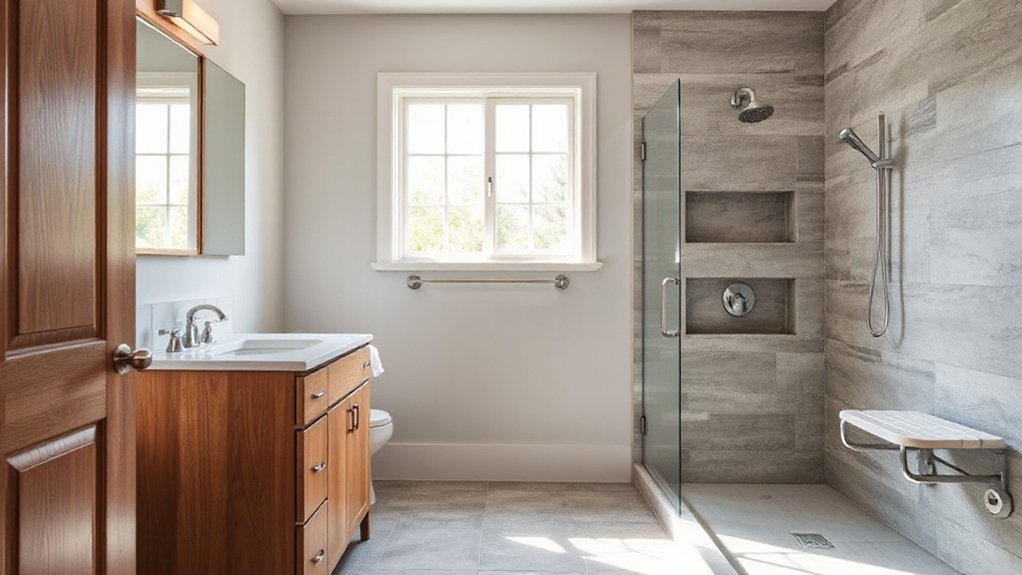
Install a comfortable vanity height, accessible outlets, and slip-resistant flooring that complement your decor. Prioritize adjustable shower benches and stable, textured thresholds that blend with modern aesthetics.
Select stylish fixtures—fixtures that look like standard hardware but perform with reduced effort. Use concealed grab bars where possible to maintain clean lines and avoid visual clutter.
Plan lighting that reduces glare and eases progressions between tasks. The goal is harmony: practical safety without sacrificing style, ensuring long‑term independence.
Walk-In Showers and Grab-Bar Essentials for Safety and Comfort
A walk-in shower reduces tripping risks with a low threshold and non-slip surfaces you can trust.
Grab-bar placement matters: position bars where you steady yourself while entering, turning, and drying off to support every step.
We’ll explore how to balance safety with comfort, choosing accessible configurations that fit your space and routine.
Walk-In Shower Safety
Are you maximizing safety in your shower without sacrificing comfort? Start with a level, slip-resistant floor and a low-threshold entry to minimize trips. Install a curved or fixed shower door, or a curtain that fully seals to prevent splashes.
Plan a shower design that keeps controls within easy reach and labeled temperature indicators so you don’t have to guess water temperature. Choose a thermostatic mixer to maintain a steady, comfortable output and reduce scald risk.
Invest in a handheld shower head with a long hose for versatile bathing and transfers. Add grab bars near the entry and on the shower wall for stable transfers and support.
Ensure seating options are sturdy, non-slip, and compliant with your space. Regularly inspect tiles and caulk for moisture intrusion.
Grab-Bar Essentials Access
Grab bars are a practical cornerstone of safe, independent shower use. In this section, you’ll focus on grab-bar essentials that support stability without crowding your space.
Choose grab bars with appropriate diameter, texture, and mounting hardware for reliable traction and long-term use. Position bars at key access points: near the shower entrance, along the back wall, and by the soap niche or bench if present.
For walk-in showers, install vertical and angled bars to assist connections and reduce twisting movements. Prioritize corrosion-resistant finishes and secure anchoring into studs or reinforced backing.
These access point upgrades simplify entry and exit, minimize fall risk, and promote confidence. Remember to document placement and maintenance, and test each bar monthly.
Grab bar essentials empower safer, more autonomous routines.
Raised and Adjustable Counter Heights for Comfort and Accessibility
Raised or adjustable counter heights remove barriers for seated and standing users alike, letting you work comfortably without bending or reaching awkwardly. With thoughtful height options, you align tasks to your posture, reducing strain and improving focus during meals, prep, or cleanup. The goal is steady, efficient movements that feel natural, not strained.
When selecting features, prioritize stability, smooth adjustability, and clear height markings for quick re-cues. Note that counter height adjustments support ergonomic countertops by accommodating varied tasks and bodies, from wheelchairs to standing briefings.
Pair with accessible storage to minimize excess reaching and bending.
- Choose a practical range for your needs
- Use locking mechanisms to prevent drift
- Favor sideboards and bases with sturdy supports
- Mark presets for quick transitions
- Ensure surfaces resist spills and clean easily
Safer Kitchen Layouts: Low-Threshold Access and Easy Controls
Start with clear, unobstructed paths and a low-threshold entry to the kitchen, so wheels, walkers, or standing users can move through without tripping or squeezing around obstacles.
Center the layout on efficient circulation: an open triangle between sink, stovetop, and refrigerator minimizes steps and reduces reach.
Use wide doorways and clear floor space to accommodate assistive devices.
Position frequently used appliances within easy reach and at comfortable heights, supporting safe and quick access.
Choose appliance placement that minimizes bending or twisting, and install controls at accessible heights with large, tactile or backlit interfaces.
Favor continuous counter space, slip-resistant surfaces, and lever handles.
Integrate fridge and dishwasher entrances for open, single-motion access.
Emphasize Kitchen aesthetics while prioritizing function and ergonomic safety.
Lighting That Improves Visibility and Reduces Hazards

Good lighting is a practical extension of a safe, open kitchen layout. You’ll notice how better lighting reduces missteps and makes tasks easier to perform without straining.
Prioritize ambient illumination that evenly fills rooms, minimizing shadows in hallways and near stairs. Use a mix of sources to create depth and visual contrast for edges, steps, and thresholds.
Dimmed options help preserve night vision while preserving safety. Position lights to illuminate work zones without glare on surfaces or screens.
Install simple controls at reachable heights and test placements during busy tasks to confirm effectiveness.
- Guarantee even ambient illumination across spaces
- Add task lights at counters and desks
- Create visual contrast for steps and thresholds
- Use glare-free fixtures with adjustable brightness
- Place switches within easy reach at doors
Smart Home Features to Support Independence
Smart lighting cues guide you to tasks without fumbling for switches, especially at night. Use voice-controlled routines to simplify daily chores and reduce dependence on others.
Accessible security alerts keep you informed and connected, so you can respond quickly to potential issues.
Smart Lighting Cues
- Use gentle path lights that activate with motion to mark stair edges and hallways.
- Program ambient cues to signal room shifts, like from kitchen to living area.
- Enable bedside lights that gradually brighten as you wake.
- Set dusk-to-dawn and occupancy schedules to prevent dark thresholds.
- Pair lighting scenes with key activities for consistent, predictable cues.
Voice-Controlled Routines
Use voice commands to turn lights on before you step into a room, adjust the thermostat for comfort, or start a favorite playlist without reaching for controls.
Routine automation lets you chain actions, so a single request can prepare your evening: dim lights, lock doors, and close blinds.
Choose reliable platforms with clear feedback, and test conversational phrases that you actually use.
Keep routines straightforward, using concise commands and fail-safes to prevent unintended activations.
Accessible Security Alerts
Do you want alerts that you can trust without fuss? Accessible Security Alerts keep you informed without scrambling for details. You’ll benefit from clear, actionable notifications that suit mobility needs and cognitive load, with reliable delivery across devices.
Focus on redundancy, visibility, and fast response, tying alerts to your emergency preparedness plan. Guarantee alerts integrate smoothly with your security system to avoid silos and delays.
Choose formats you can hear, see, or feel, plus location-aware cues for indoor and outdoor events. Prioritize simple acknowledgement, escalation paths, and documented battery life.
Regular tests confirm performance, and a central dashboard clarifies status at a glance.
- Clear, multi-channel alerts
- Redundant notification paths
- Security system integration
- Visual and audible prompts
- Regular testing and documentation
Reliable Grips and Handrails Throughout the Home
Reliable grips and handrails aren’t just conveniences—they’re safety essentials that help you move confidently at home. You’ll want sturdy, properly located supports in key areas: entryways, stairs, bathrooms, and corridors.
Prioritize smooth, continuous grip surfaces and avoid sharp edges or protrusions that snag clothing or cause trips. For grip strength, choose textured materials or rubberized coatings that reduce slip risk and accommodate varying hand sizes.
When planning, map routes you use most and guarantee consistent spacing between rails for two-handed support on stairs. Handrail installation should meet local codes, with mounting into solid backing and appropriate height adjustments.
Regular checks keep fasteners tight and rails stable, preventing wobble. Consider dual rails for steeper stairs to maximize stability and confidence.
Non-Slip Outdoor Surfaces and Safe Entry Points

- Textured paving with good drainage
- Non-slip coatings for floors and ramps
- Level thresholds or gentle ramps
- Sturdy, moisture-absorbing mats
- Clear, well-lit outdoor paths and entrances
Outdoor pathways, entrance safety
Furniture Layouts That Prioritize Easy Movement
To keep movement smooth and safe, arrange furniture to create clear, wider pathways that accommodate walkers, canes, or wheelchairs. Start with a simple, logical flow: place anchored pieces against walls, leaving central corridors unobstructed.
Prioritize furniture arrangement that supports frequent routes between entry, seating, and essential surfaces. Choose low-profile chairs with easy-to-grab arms and assure cushions don’t protrude into walkways.
Keep major furniture within reach of power outlets and lighting without stretching or twisting. Use open-backed consoles or slim, movable storage to preserve space while maintaining function.
Define zones with area rugs that won’t trip you up and avoid clutter that blocks sightlines. This approach boosts space utilization, reduces maneuvering effort, and enhances confidence in daily routines.
Temporarily Adaptable Solutions for Aging in Place
When you’re aging in place, temporary adaptations can bridge the gap between today’s needs and tomorrow’s comfort. You’ll benefit from quick, reversible fixes that keep you independent without committing long-term. Use portable options that travel with you, and choose tools you can deploy during busy periods or when guests visit.
Prioritize setups that support remote working and travel planning, so you stay productive and prepared. Think modular arrangements, temporary rails, and nonpermanent grips that install without tools. Focus on affordable, low-effort upgrades you can remove later without damage.
- Portable grab bars and nonpermanent rails
- Temporary doorway widening adapters
- Lightweight, adjustable desks for remote work
- Removable non-slip mats and ramp options
- Travel-ready home checklists and planning aids
Maintenance Priorities to Keep Mobility Upgrades Reliable

Regular upkeep is essential to keep mobility upgrades dependable long-term; when you spot wear early, you prevent failures that could limit mobility.
Start with a simple inspection routine: test handrails, check thresholds, verify non-slip surfaces, and confirm that ramps move smoothly.
Schedule preventive maintenance for mechanical parts, such as adjustable seating, stairlifts, and grab bars, following manufacturer guidelines.
Prioritize durable components and easy-access replacements to minimize downtime.
Document signs of wear, corrosion, or looseness, and address them promptly to sustain reliability.
Align maintenance tasks with durability considerations, focusing on materials suited to your environment and user needs.
Coordinate a yearly professional checkup to catch subtle issues before they escalate, ensuring upgrades remain safe, functional, and comfortable for everyday use.
Budgeting and Funding Options for Mobility Remodels
How can you make mobility remodels affordable without sacrificing safety or quality? You can map a practical plan that stretches dollars without risking results. Focus on prioritizing needs first, then layer in cost-saving choices that don’t compromise safety. Use clear financial planning to compare upfront costs, long-term savings, and potential tax benefits. Look for grants, rebates, and low-interest loans, and don’t overlook community programs or nonprofit resources.
Coordinate with contractors about phased remodeling to spread costs. Document specifications, warranties, and maintenance implications so you know what you’re guaranteed.
- Establish a prioritized scope and timeline
- Compare contractor bids and material options
- Leverage government assistance and grants
- Explore financing with favorable terms
- Track costs, benefits, and updates for future needs
Frequently Asked Questions
How Do I Prioritize Improvements for Aging in Place?
Prioritize safety first: assess fall risks, improve lighting, and widen doorways. Then add essential accessibility features like zero-step entries and grab bars. Create a budget, phase renovations, and consult pros for home safety and accessibility features.
What Costs Are Typically Involved in Mobility Remodels?
“Costs vary, but you’ll pay for planning, professional labor, permits, and durable materials.” You’ll budget for home automation integration and flooring upgrades, plus potential permits, passage strips, and system maintenance, while ensuring accessibility and safety throughout the remodel.
Are There Grants or Funding Options Available?
Yes, there are grants and funding options available. You should start with a barriers assessment to identify needs, then explore funding sources like grants, low-interest loans, or nonprofit programs to cover mobility-improvement costs.
How Long Do Mobility Upgrades Last Before Replacement?
Upgrading with adaptive technology lasts 5–15 years, depending on use and maintenance, and you should schedule safety assessments every 12–24 months to catch wear early and plan replacements before performance declines.
Can I Implement Temporary Solutions Before Permanent Changes?
About 30% of homes see sudden falls declined with temporary fixes; you can implement Temporary installations while planning permanent changes. DIY modifications help test fit, save cost, and refine accessibility before a full, professional upgrade.
Conclusion
In the end, adapting your home isn’t a luxury—it’s a practical step to stay independent. Think of your space like a well-tuned piano: every note (threshold, light, grip) plays in harmony to prevent slips and stumbles. For instance, a single grab bar can avert a fall in the bathroom, saving injuries and peace of mind. Start small, plan smart, and gradually upgrade to keep everyday life safe, comfortable, and doable.