
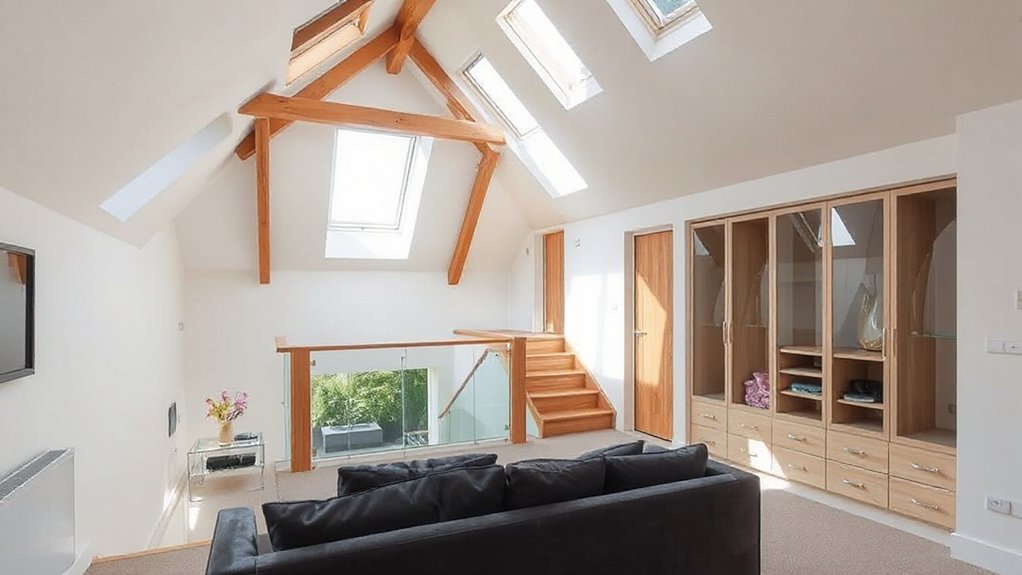

Did you know that a well-planned semi-detached loft can add up to 40% more usable space without expanding your footprint? You’ll want to evaluate headroom, party-wall constraints, and roof shape before you draw up plans, then pick dormer styles and skylights that boost light and height without sacrificing privacy. Keep an eye on structure, ventilation, and finishes, and you’ll uncover the practical details that turn an attic into a bright, comfortable living area—or you might find there’s more to figure out than you expected.
Why Semi‑Detached Loft Conversions Make Sense

Semi-detached loft conversions make sense because they maximize space without extending your footprint. You gain usable rooms above without sacrificing your yard or street appeal, and you often preserve the home’s original character.
The layout flexibility suits evolving needs—home offices, guest suites, or a stylish retreat. By reconfiguring the upper level, you avoid disruptive extensions and keep construction costs contained.
Prioritize structural efficiency: reinforce joists, plan for weatherproofing, and optimize stair access for flow. Practical details matter: plan natural light, ventilation, and acoustic comfort to maintain daily livability.
In styling, decorative accents add personality without clutter, while lighting fixtures anchor zones and elevate mood. Choose durable finishes, easy maintenance, and space-saving storage to sustain long-term value.
Assess Feasibility: Headroom, Party Wall, and Roof Space
You’ll start by checking three feasibility anchors: headroom, the party wall, and usable roof space. You’ll assess practical limits before you commit to plans, balancing structure, costs, and comfort. Roof insulation matters here, helping you keep heat in cold winters and out during warmer months, while party wall considerations protect both homes and future resale value.
- Headroom score: measure available height, slope, and potential ceiling tweaks.
- Party wall: clarify shared-wall rights, access, and notice periods before any boundary changes.
- Roof space: evaluate existing truss layout, potential skylight or dormer impact, and eaves clearance.
- Insulation strategy: choose materials, thickness, and ventilation to optimize energy efficiency.
Prioritize documented measurements, clear consent, and a phased plan to avoid costly rerouting.
Choose Dormer Styles to Maximize Height
To maximize height and usable space, choose dormer styles that suit your roofline and local planning norms while minimizing structural impact. You gain headroom by matching dormer profiles to your roof pitch, avoiding awkward junctions that waste space.
Start with a lean-to or mono-pitch dormer if your roof has a gentle slope. Consider gabled or hipped variants for steeper pitches to preserve exterior proportions.
Prioritize beams, insulation, and waterproofing in the build brief to prevent future scapes. Your choice should balance interior volume with exterior aesthetics, so pick dormer styles that feel proportionate to the home’s façade.
Check planning guidelines early, especially height limits and fire safety, then specify materials that resist weathering.
Align roof pitch, structural supports, and glazing to maximize daylight and volume.
Brighten With Skylights and Roof Windows
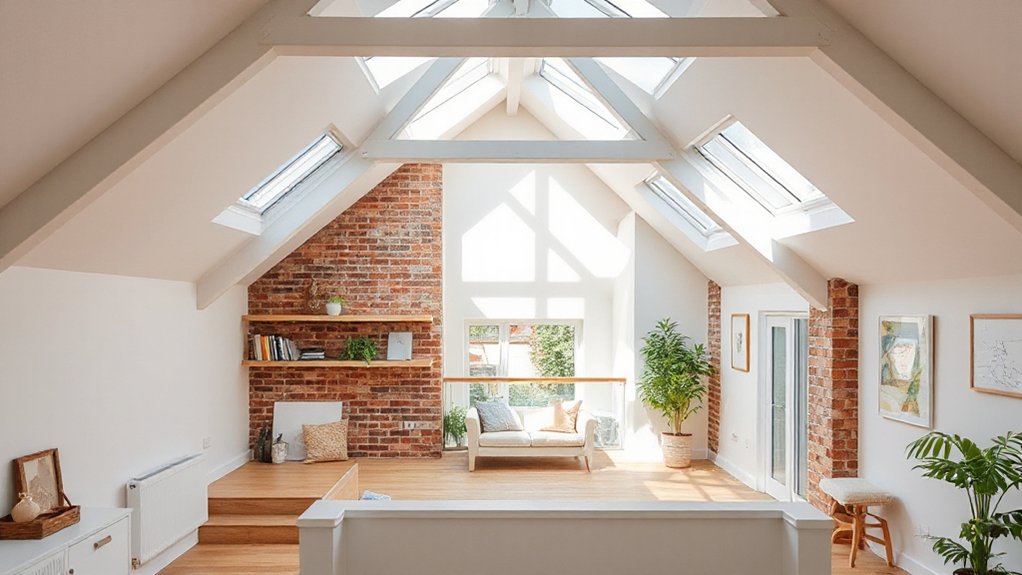
Skylights and roof windows offer a straightforward way to flood a semi-detached space with daylight without sacrificing wall space for storage or furniture. You’ll gain bright, even illumination that flatters room scales and makes ceilings feel higher, boosting perceived space and airiness.
To maximize impact, plan placement with traffic flow and exterior aesthetics in mind.
- Align skylights with eaves for glare control and even light across the room.
- Choose low-profile roof windows for a sleek, modern look that complements garden integration.
- Use dimmable LEDs and reflective finishes to temper brightness without clutter.
- Consider automatic blinds or rain sensors for comfort and energy efficiency.
Layout That Preserves Privacy on Shared Walls
Shared walls in semi-detached homes demand thoughtful layout to preserve privacy without sacrificing light or flow. You design around sightlines, opting for staggered zones and solid-to-void progression that minimize direct line-of-sight between rooms.
Consider offset stairs, triple-glazed or laminated glass where you must connect spaces, and acoustic insulation that dampens sound transfer without creating a cave-like feel. Use tall, slim partitions or built-in shelving to break proximity while keeping openness.
Position private spaces away from common corridors, and orient windows to avoid parallel backs-to-backs along shared walls. Garden landscaping around the exterior can enhance perceived distance and privacy, while roof maintenance guarantees long-term reliability of skylights that feed light without inviting noise.
Prioritize airflow, storage, and clean sightlines to sustain a calm, modern loft.
Zone the Loft: Bedroom, Office, and Play Areas
After establishing privacy along shared walls, you’ll want to map a clear flow within the loft by zoning three practical zones: a serene bedroom, a productive office, and a playful area for kids or hobbies.
Start by defining each zone with subtle partitions and aligned sightlines to maximize space. Use vertical storage and soft edges to keep the loft cohesive and calm. Incorporate creative lighting to differentiate zones without heavy fixtures, and select interior decor that links textures across areas for a unified feel.
- Serene bedroom zone with skylight glare control and drawer storage
- Productive office zone featuring a compact desk, task lighting, and magnetic wall
- Playful area with flexible furniture, soft rug, and easy-access toy rotation
- Circulation that remains open, guiding movement smoothly between zones
En‑Suite Master Up Top: Design Essentials

Think through how your ensuite masters orientation affects morning routines and privacy up top, from doorway placement to bed alignment for easy access and views.
Then lock in top-level comfort details—underfloor heating, soundproofing, and a climate-controlled zone that stays consistent no matter the season.
Finally, consider practical finishes and fixtures that read modern and calm, like smart lighting, tactile textures, and a compact but luxurious layout that keeps circulation smooth.
Ensuite Master Orientation
If you’re aiming for a functional and stylish en-suite master upstairs, start by prioritizing flow and privacy. You’ll want orientation that minimizes foot traffic through sleeping zones and maximizes morning light.
- Place the doorway away from the bed to reduce wake-ups and glare.
- Align fixtures along a single wall for a clean, efficient run and easier plumbing.
- Position the shower or tub to capture morning light without compromising privacy.
- Use pocket or barn doors to save space and enhance the sense of luxury decor and historical architecture.
Focus on materials that weigh well yet feel light, such as warm woods and subdued tiles.
Precision detailing and timeless finishes keep the space current without dated accents.
Top-Level Comfort Details
Even on a compact upper level, you can make the en-suite master feel expansive by choosing comfort-focused details that balance warmth and practicality. Start with ceiling-height mirrors and floating vanities to visually stretch the space without crowding it.
Prioritize warm, tactile materials—soft textiles, a pebble bath mat, and a matte-finish faucet finish—to invite lingering relaxation.
Implement strategic storage: recessed shelves in the shower niche and cabinetry that tucks under the eaves.
For lighting, combine decorative lighting with layered layers—wall sconces, a dimmable central fixture, and under-vanity LEDs—to sculpt mood and function.
Choose color schemes that soothe yet read modern: warm neutrals punctuated by charcoal accents or muted blues.
Keep lines clean and hardware cohesive for a calm, upscale feel.
Smart Storage for Low-Height Rooms

Smart storage is essential in low-height rooms, where every inch counts and awkward gaps waste real estate. You’ll maximize space by choosing compartments that fit tight profiles and hidden cavities, keeping floors clean and usable.
- Use under-eave drawers that slide out on rollers, so you access every inch without lifting loads.
- Install shallow wall shelves at varying depths to create staggered storage for books, boxes, and shoes.
- Fit pull-out garment rails inside narrow wardrobes to double hanging space without widening the footprint.
- Choose modular boxes with lids that stack neatly, turning awkward vertical lines into organized storage zones.
Smart storage works best when you plan around traffic flow, preserving headroom while maintaining a tidy, modern look for low height rooms.
Energy Basics: Insulation, Ventilation, and Heat
You’ll want to start with solid insulation to cut heat loss and keep upstairs comfortable, focusing on effectiveness and continuous coverage.
Next, tune ventilation and heat management to balance moisture, air quality, and energy use without drafts or excessive noise.
We’ll cover practical tweaks, current best practices, and how to pair insulation with ventilation for steady, efficient drafts-free warmth.
Insulation Effectiveness Basics
Is insulation really the backbone of an energy-smart retrofit? You bet, and you’ll feel the difference when you tune your envelope for efficiency. Here’s a practical snapshot of insulation effectiveness basics that keeps your loft comfortable and costs predictable.
- Prioritize thermal barriers that pause heat flow, especially around eaves and gaps.
- Choose proven insulation materials with high R-values and durable performance.
- Seal first, insulate second—address leaks and draughts to maximize every layer.
- Match materials to zones (roof, walls, floor) for balanced comfort and dew-point control.
Focus on continuous, gaps-free installation, meticulous detailing around windows, and compliant thickness. Stay current with local codes and product data sheets to optimize energy savings without over‑specifying.
Ventilation and Heat Management
Ventilating a loft and managing heat aren’t afterthoughts; they’re part of the same energy plan you’ve started with insulation.
In practice, you’ll pair continuous soffit vents with a balanced extract to control humidity without drafts. Prioritize a ridge vent or tall passive stack to favor warm air escaping, especially in summer’s peak.
Use a fan-assisted system only where natural convection falls short, and seal drafts around hatch lids and skylights to prevent heat gain.
Consider heat-recovery ventilators for steady comfort year-round, reducing chases’ noise and energy waste.
Historical context reminds us older semi‑detached homes rely on tighter envelopes; today, neighborhood influence shapes retrofit choices—styles, trees, and wind patterns dictate vent placement and operability.
Keep airflow predictable, maintainable, and aligned with local heritage aesthetics and climate realities.
Safe, Flexible Access: Stairs and Ladders
Stairs and ladders are the lifeline of a loft conversion, so prioritize safe, flexible access from day one. You want routes that feel sturdy, convenient, and adaptable to how you live upstairs.
Plan for clear headroom, non-slip treads, and easy adjustments if you reconfigure spaces later. Focus on safety railing and ladder stability as non-negotiables.
- Choose a staircase with balanced rise and run for comfortable daily use.
- Add a robust safety railing that you can grip from all angles.
- Select a ladder with locking hardware and anti-slip feet.
- Design a door or hatch that stays weather-tight yet easy to open.
Prioritize modular, retrofit-friendly options to keep the look clean and contemporary.
Soundproofing for Semi‑Detached Living
To cut noise between semi-detached spaces, start with solid insulation and airtight seams, then layer resilient channels to decouple framing.
Focus on high-density mineral wool, double-stud or staggered stud framing, and careful gasketing around doors and gaps.
Track results with simple tests and adjust: add mass, seal leaks, and upgrade finishes where needed to keep living areas quiet and comfortable.
Noise Reduction Techniques
When you’re aiming to quiet a semi-detached home, start with a practical plan that targets the most common sound paths: walls, floors, and ceilings. You’ll boost comfort by focusing on musical acoustics and soundproof barriers that work in real living spaces.
1) Seal gaps and joints at joints where noise sneaks through, using acoustical sealant and resilient channels.
2) Add mass-loaded vinyl or similar barrier behind walls to dampen mid- to high-frequency noise.
3) Install floating floors or decoupled underlayment to reduce impact sound transmission.
4) Use dense door sweeps and solid-core doors to minimize sound leaks at entry points.
Plan ahead with a clear ceiling and wall layout to maximize effectiveness without overcomplicating the build.
Insulation and Sturdy Framing
Use staggered stud walls or resilient channels to decouple surfaces, reducing vibration transfer between rooms. Opt for continuous exterior sheathing and a well‑sealed roofline to curb outside noise infiltration.
Frame assemblies should meet or exceed local noise requirements, and you’ll test for airtightness with a blower door to confirm performance. Pair this with quiet doors and appropriate flooring underlayment to minimize impact sounds.
When planning garden landscaping and interior decor, choose lightweight, sound‑absorbing finishes and place greenery to soften outdoor echoes.
Permits, Trusses, and Structural Checks
Securing the right permits, coordinating truss planning, and arranging structural checks are non-negotiable steps before you lift a loft’s footprint on a semi-detached home. You’ll navigate the permit process early, so your project stays compliant and avoids costly delays.
Prioritize structural integrity during design reviews and engage a qualified engineer to validate load paths, connections, and deflection criteria.
Below are essential actions to keep you on track:
- Confirm scope with your local authority and gather required documents.
- Have a structural engineer stamp plans and verify truss sizing, spans, and hanger details.
- Schedule a pre-construction inspection to document existing conditions.
- Plan ongoing checks during build to ensure compliance and future stability.
Lighting and Ventilation Strategies

You’ll prioritize Natural Light Maximization with thoughtfully placed skylights and high-performance glazing to keep rooms bright without adding heat.
Optimize Ventilation Flow by pairing passive vents with automated operable windows and a balanced extract system to reduce humidity and odors.
Add Acoustic Comfort Strategies through decoupled ceiling zones and vibration-minimized fixtures to maintain calm spaces without sacrificing daylight or airflow.
Natural Light Maximization
Two quick wins to maximize natural light in a semi-detached loft are prioritizing wide, unobstructed floor-to-ceiling windows and optimizing rooflight placement. You’ll keep lines clean and glare down with strategically placed glazing, minimizing interior shadows.
- Plan plant integration by placing tall, slim planters near windows to catch reflected light and soften edges without blocking sightlines.
- Align exterior aesthetics with rooflights’ shapes and frames, choosing minimal profiles that harmonize with the roofline.
- Use light colors and reflective surfaces inside to bounce daylight deeper into rooms.
- Schedule careful shading options (externally mounted screens or adjustable fins) to control glare while preserving daylight.
Ventilation Flow Optimization
To pair brighter loft spaces with breathable comfort, focus on ventilation flow optimization alongside lighting. Start by mapping Airflow patterns and identifying Ventilation zones across your attic and eaves.
Place operable skylights or roof vents to encourage cross‑ventilation, then pair them with intake vents near cool zones to draw fresh air through the space.
Use a stacked strategy: upper intake, mid‑space circulation, lower exhaust, with ducted or lintel‑level grills guiding airflow unobtrusively. Keep door openings minimal to maintain pressure differentials that feed the flow.
Install a compact ceiling fan to boost movement without drafts. Consider a smart vent system that adjusts to occupancy and external temperatures.
Seal gaps around chimney breast, joists, and insulation joints to preserve efficiency and comfort.
Acoustic Comfort Strategies
Acoustic comfort hinges on pairing thoughtful materials with smart layout choices that tame sound transfer throughout a semi-detached loft. You’ll balance light, airflow, and quiet by choosing materials with inherent damping and by positioning sources away from shared walls.
- Implement soundproofing techniques at the source—matting under silent flooring and gasketed joints—to minimize leakage.
- Use acoustic panels on party walls and ceiling to absorb mid-to-high frequencies without darkening the space.
- Prioritize adjustable lighting and cross-ventilation that don’t require noisy fans or vents near sleeping zones.
- Plan a zoned layout with quiet zones adjacent to shared walls and lively zones near external facades for better control of sound and temperature.
Materials and Finishes for Semi‑Detached Lofts
Choosing the right materials sets the tone and durability of your loft. You’ll want finishes that endure daily use while reflecting your style. Prioritize low-maintenance options like engineered timber, aluminum-clad windows, and moisture-resistant plaster for walls.
For floors, consider wide-plank engineered wood or luxury vinyl that mimics real timber but resists humidity and wear.
Insulation choices influence comfort and energy bills—opt high-performance batts or spray-foam with a vapor barrier to reduce temperature swings.
In regards to decorative finishes, keep a cohesive palette—soft neutrals with bold accents—to age gracefully.
Material durability matters, so confirm fire ratings, environmental impact, and supplier warranties.
Select durable, compatible fixings and sealants to prevent squeaks and drafts, ensuring a polished, long-lasting finish throughout your semi-detached loft.
Real-Life Loft Transformations: Case Studies and Ideas
Real-life loft transformations offer tangible guidance for semi-detached homes, showing how thoughtful geometry, sturdy stair placement, and smart daylight can dramatically expand living space without compromising exterior lines. You’ll see how small tweaks create big impact, from rooflights that bathe zones in morning glow to mezzanines that extend usable floors without widening footprints.
Practicality drives these cases, highlighting calm circulation, durable finishes, and scalable storage. Embrace adaptable layouts that suit daily habits and occasional guests, all while keeping a cohesive facade.
- Study case-driven layouts, prioritizing stair efficiency and daylight
- Note how lighting and color pair with Artistic decor and Vintage furnishings
- Compare low-profile built-ins with open shelving for clutter control
- Track budget-conscious swaps that yield high-impact results
Frequently Asked Questions
How Much Does a Semi-Detached Loft Conversion Typically Cost?
A semi-detached loft conversion typically costs between £20,000 and £50,000, depending on size and fittings. You’ll prioritize interior lighting and building insulation, balancing style with practicality, ensuring energy efficiency and durable finishes throughout the project.
What Planner or Architect Credentials Are Required?
You’ll need a qualified architect or chartered designer, with RIBA or CABE credentials, for planning, design inspiration, and material selection. Your project benefits from coincidence—your needs align with their expertise, ensuring compliant, trend-conscious, practical loft conversions.
Can I Build Without Planning Permission or Approvals?
You can’t build without planning permission in most cases; you must align with Building regulations and obtain approvals for structural modifications. Check local rules, guarantee a safe structure, and hire pros to verify permits, inspections, and compliance before starting.
How Long Does a Typical Loft Conversion Take?
A typical loft conversion takes about 6–12 weeks, depending on scope. You’ll plan ventilation systems early and finish with interior design details. You’ll coordinate trades, stay on schedule, and adjust materials to keep pace and trends.
Will My Insurance Cover Loft Conversion Work?
Your insurance might not automatically cover loft work; check policy details and notify your provider. Insurance implications depend on the contractor you hire and meets requirements. Stay suspenseful: verify coverage, then secure a qualified contractor and documented approvals.
Conclusion
You’ll maximize space, you’ll boost light, you’ll sharpen comfort. You’ll plan with headroom, you’ll respect the party wall, you’ll choose dormers that heighten height. You’ll brighten with skylights, you’ll vent for freshness, you’ll design for privacy. You’ll verify permits, you’ll check trusses, you’ll defend structural soundness. You’ll finish with durable materials, you’ll tailor finishes, you’ll celebrate efficiency. You’ll create a semi‑detached loft that’s practical, stylish, and ready for modern life.