
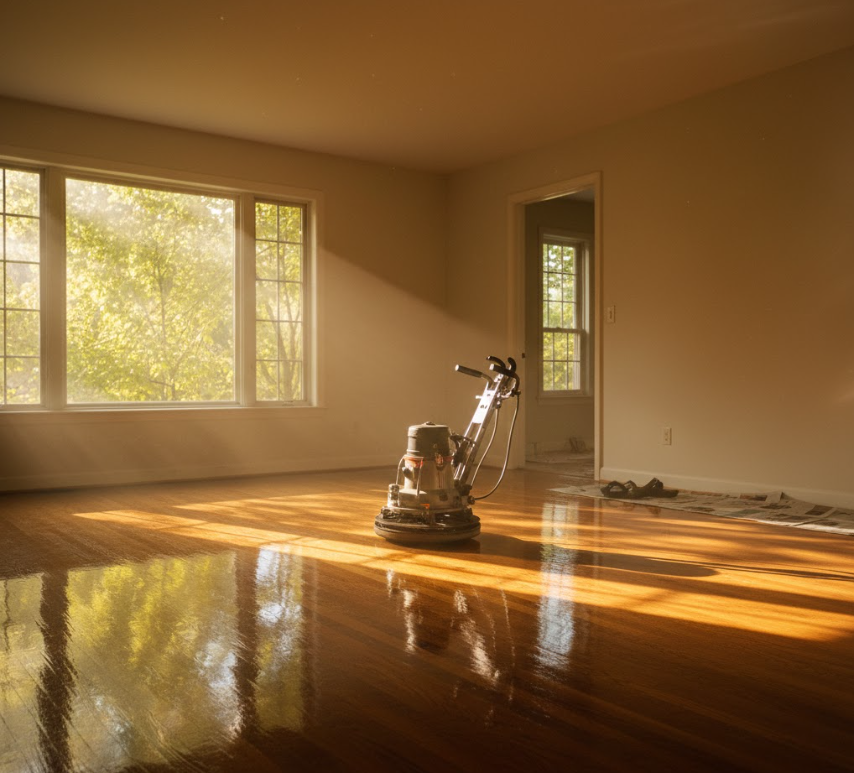

Over the weekend I helped my neighbor strip a century-old living room floor and watching the grain reappear was like seeing the house breathe again – you’ll get that thrill too when you tackle your floors; refinishing isn’t magic, it’s method, but it does transform spaces. Want to save money and add value? I’ll walk you through sanding, staining, sealing, timing, and common goofs in plain terms so you can do it right and feel proud of the result.
Why Bother Refinishing Your Floors Anyway?
Ever wondered if sanding and recoating will actually pay off for your home? If your floors show scuffs, faded finish or traffic lanes where the stain’s gone, refinishing can restore color and surface in a day or two, often for $2-$5 per sq ft; solid hardwood usually withstands 3-4 full refinishes while engineered depends on veneer thickness. You’ll get a like-new look, longer lifespan, and fewer spot repairs down the road.
The Benefits You Didn’t Know About
Did you know refinishing can improve indoor air quality and cut maintenance? By stripping old finishes and applying low-VOC water-based poly you often reduce off-gassing, and water-based coatings dry in about 24 hours versus oil-based at 48-72 hours. You also increase abrasion resistance, hide UV-faded planks, and buyers tend to give better offers when floors look fresh – small changes, big perception shifts.
When’s the Right Time to Refinish?
Not sure when to sand instead of spot-repair? If finish is worn to bare wood in traffic lanes, stains soak in, or scratches catch your fingernail, you should lean toward a full refinish; households with kids or pets often need this every 3-7 years, low-traffic places might stretch to 7-12. Don’t wait until boards are warped or rotten though – that’s replacement territory.
Sizing up specifics helps: solid planks can usually handle 3-4 sandings removing roughly 1/32 to 1/16 inch each time, while engineered floors with a 3 mm veneer may only take one pass. If gaps, cupping, or water damage affect large areas, fix structural or moisture issues first. If the wear goes to bare wood across large areas, you should refinish. Typical job costs and dry times vary, so get a couple of estimates and inspect veneer thickness before you commit.
What’s the Deal With Tools and Supplies?
An 18-inch drum sander rents for about $50-70 a day and will cover a 300-400 sq ft room in roughly an hour, so rental math matters. If you buy, expect $300+ for a decent edger and $400-800 for a good contractor-grade floor sander, plus abrasives (36, 60, 80, 100 grits), poly, brushes and respirators. You’ll decide fast whether to rent, buy, or mix-and-match based on room size, budget and how many rooms you’ve got on the list.
The Must-Haves for a DIY Project
Plan on at minimum: a drum or orbital floor sander, an edge sander, 36/60/80/100 grit discs, a shop vacuum with HEPA bag, a N95 or better respirator, tack cloths and 1-2 gallons of water-based polyurethane (covers ~350-400 sq ft per gallon). Add a lambswool applicator or foam brush for smooth coats, and a set of sanding screen for the finish pass. These items get you from raw wood to sealed floor.
Tools You Might Already Have
Chances are you own a decent drill, a circular saw, and a shop vacuum already – all useful: the drill for board repairs, the saw for cutting replacement planks, and the vacuum for dust control. A random orbital sander you’ve used on furniture can handle corners or small spots, but it won’t replace a floor sander on big rooms. Use what you’ve got to shave costs, just know the limits.
For more detail: your 5-inch random orbital sander shines for stair treads, door thresholds and small patch sanding, and 80-120 grit discs are the sweet spot there. A cordless drill with a screwdriver bit speeds up removing trim and baseboards, and a wet/dry shop vac with a fine filter makes cleanup between grit changes way faster. Swap in hand-sanding blocks for tight spots and keep extra shop-vac bags and respirator filters on hand.
My Step-by-Step Guide to Refinishing
| Prepping Your Floors – It Matters! | Clear furniture, sink nails, fill gaps, and check moisture with a meter – aim for under 12% before you sand; a 300 sq ft room usually takes 2-4 hours to prep if you work steadily. |
| Sanding – The Tough Love Part | Strip old finish with a drum or orbital sander using a grit progression like 36-60-100-120, edge-sand by hand, vacuum between passes, and wear a respirator and dust containment. |
| Staining – Adding Your Personal Touch | Test stains on scrap or hidden boards, use pre-conditioner on softwoods, apply stain with a rag or brush, wipe after 5-15 minutes to control tone, then wait full dry time before sealing. |
| Sealing – Protecting Your Hard Work | Pick water-based for quick dry (2-4 hrs) or oil-based for deeper ambering (8-12 hrs), apply 2-3 thin coats, sand 220 between coats, and allow 7 days light cure, 30 days full cure. |
Prepping Your Floors – It Matters!
You want the finish to last, so prepping sets the stage: pull all furniture, remove threshold strips, drive nails below the surface and fill gaps with a flexible wood filler, then vacuum and tack to get dust out of cracks. Use a moisture meter – if the boards read above 12% or differ more than 3% from the subfloor, delay work until levels stabilize. For example, in humid climates you may need 48-72 hours of dehumidifying before sanding.
Sanding – The Tough Love Part
You remove the old finish so the new one can bond to bare wood, and that means being aggressive but careful: rent a drum or heavy orbital, start with 36-40 grit to strip, follow with 60-80 to flatten, finish at 100-120 for smoothness, and hand-sand edges and corners. Expect 1-2 days for a 300 sq ft room if you’re doing edges solo, and always use dust containment and a NIOSH-rated respirator.
Keep the sander moving or you’ll gouge the floor – never linger in one spot. Overlap passes about 50% so you avoid ridges, and always sand with the grain when possible; cross-grain cuts show up in the finish. For edges use an edger and hand-sanding blocks with 80-120 grit; vacuum and tack between grits to check progress under good light. If you spot cupping or deep stains, address those with spot-sanding or wood filler before the final pass.
Staining – Adding Your Personal Touch
You pick the mood here, so test samples first: try a 2×6 scrap, apply pre-stain conditioner on pine or birch, then stain with a rag, brush, or foam applicator and wipe excess after 5-15 minutes to hit the tone you want. Gel stains work well on vertical or softer woods, and note that darker colors may need two thin passes; always let stain dry fully – typically 8-24 hours – before sealing.
Choose a color range and test in different light – north-facing rooms read darker. If you want uniformity, thin coats and wiping toward the same board end reduces lap marks. For deeper tones do multiple light coats rather than one heavy coat, and sand very lightly with 220 grit between stain lifts if you get raised grain. Water-based stains dry faster but can look different under clear coats, so pair products on a sample board to see the final effect.
Sealing – Protecting Your Hard Work
You lock in the look and add wear resistance: pick water-based poly for low odor and quick drying (2-4 hours between coats) or oil-based for a warmer amber tone and longer open time (8-12 hours). Apply 2-3 thin coats with a high-quality brush or lambswool applicator, sand lightly with 220 grit between coats, and plan on 7 days before light use and about 30 days to fully cure.
Work in thin, even passes and keep a wet edge to avoid lap lines; bubbles mean you were applying too fast or overworking a spot, so slow down. Coverage runs roughly 400-600 sq ft per gallon depending on wood porosity, so a 300 sq ft room usually needs a quart to a gallon per coat. Control temperature and humidity – aim for 65-75 F and moderate RH – and use rosin paper or felt pads during the cure to protect the floor while it hardens.
Common Mistakes You’re Gonna Want to Avoid
Rushing the Process – Seriously, Don’t!
Some people assume you can blast through sanding and finishing in a weekend and call it done, but that’s how you end up with splotches, bubbles, and a finish that peels in months. You need to follow grit progression – start coarse to remove old finish (36-60), move to 80, then 120-150 for a smooth base – and vacuum/tack between passes. Wait 24-48 hours between coats of finish, and give full cure up to 30 days for heavy traffic. Patience saves you redoing the whole floor.
Choosing the Wrong Stain – Ugh, This Can Ruin Everything
You might think stain is just “pick a color you like,” but wood species react wildly – pine can blotch, oak drinks stain evenly, maple goes blotchy unless conditioned. Test at least 3 samples on scrap or in a closet, try both oil and water-based stains, and note that a wet sample can look 20-30% darker once dry. Gel stains sit on top and hide inconsistencies, so use those on softwoods or patched sections.
Many assume one swatch proves the final look, yet lighting, finish sheen, and aging change everything-so test properly: stain a 6×6 inch area, apply your chosen sealer, then view under morning and evening light for 48 hours. Also try a conditioner on maple or cherry to avoid splotching, and compare oil vs water-based topcoats since oil can amber over time while water stays clear. If you have mixed species in a room, plan separate stain strategies or use a gel overalls for uniformity.
What’s the Cost of Refinishing?
When my neighbor refinished their 1,000 sq ft bungalow they were quoted $3,000 to $6,500 – that showed me how much variance there is. Pros usually charge about $3 to $8 per sq ft for sanding, staining and two coats of finish; DIY can run $200 to $600 for sander rental and supplies plus your weekend labor. Stain choice and finish type (oil vs water-based), plus any board repairs, can swing the final bill, so plan for a range not a single number.
DIY vs Hiring Pros – Is It Worth It?
A friend borrowed a drum sander and gouged a plank, then paid $200 to replace it – you learn fast. You can rent a sander for $50 to $80 a day and spend $100 to $300 on pads and finish, but pros charge $3 to $8 per sq ft and usually finish in 1-3 days with warranty. If you’ve got time, steady hands and patience do it yourself; if you value speed, evenness and fewer headaches, hire pro help.
Hidden Costs to Keep in Mind
A client accepted a $1,200 quote and ended up paying another $800 for repairs and moving – surprises add up. You should budget for furniture moving ($200-$600), subfloor or board repairs ($200-$1,500), disposal fees ($50-$200) and moisture testing or dehumidifier rental ($100-$300). Don’t assume the quote is all-in.
When I refinished my own 800 sq ft place I underestimated stair work and matching stain – it added up quick. Stairs are usually priced separately and can tack on $200 to $1,000 depending on count and complexity; transition strips run $20 to $100 each; custom board replacement can be a few dozen to several hundred dollars per board if species are rare. You might need to vacate for 24 to 72 hours for fumes or pay for air-scrubbers; hotel nights at $100+ can sneak into the bill.
Plan for an extra 10 to 25% contingency.
Maintenance Tips for Those Freshly Refinished Floors
Sealing isn’t the only thing that keeps your finish looking new; everyday choices actually matter more than you think. Sweep or dry-mop daily to remove grit, use rugs at entries, and control humidity to slow cupping and gaps. Quick checklist:
- Humidity: keep 35-55%
- Felt pads on furniture legs
- Microfiber mop only – no soaking
- Recoat high-traffic areas every 3-5 years
Thou set a simple routine now and the floors will pay you back for years.
Cleaning Hacks You’ll Thank Me For
Surprising but true – a barely-damp microfiber mop beats heavy cleaners for longevity; too much water softens finish and swells boards. Use a pH-neutral wood cleaner diluted per label, spot-clean scuffs with a soft cloth and mineral spirits if needed, and vacuum with a brush head weekly. And if you get oily spills, sprinkle baking soda, rub gently, then wipe – works faster than scrubbing and it’s cheap. You’ll save time and avoid sanding sooner.
Protecting Your Investment
Oddly, the wrong rug will grind your finish faster than bare floor – small coarse mats trap grit. Place coarse mats at exterior doors plus non-slip thin rugs in high-traffic zones, and rotate rugs monthly to avoid uneven fading. Trim pet nails every 2-3 weeks and use furniture sliders when you move things – those moves add up. You’ll notice less wear and fewer touch-ups when you set these habits.
For more detail – keep humidity steady with a humidifier or dehumidifier; a swing between 20% and 60% will cause gaps or cupping within a season. Manufacturers suggest recoating rather than full sanding for moderate wear; a light screen and coat every 3-5 years in busy homes saves you hundreds compared to refinishing. You can test an inconspicuous spot first to see how a touch-up coat looks before doing an entire room.
Summing Up
You now have all the essential knowledge on how to refinish hardwood floors like a professional without the eye-watering costs. With proper preparation, patience, and attention to detail, you can transform worn-out floors into a stunning feature that adds serious value and beauty to your home.
With this in mind, the recent surge in DIY floor makeovers and eco-friendly finishes has people sanding and sealing their own hardwood… you can do it too if you prep right and pick the right finish. It’s messy, but worth it. Want to save money and nail that pro look? Follow grit progression, test stains, go slow with edges. And don’t skimp on ventilation or cleanup, you’ll thank yourself later.
FAQ
Q: How should I prepare the room before refinishing hardwood floors?
A: If you breeze through prep you’ll pay for it later – dust gets everywhere, finish won’t stick right and you could spend days cleaning up. Good prep saves time and gives you a way cleaner, more professional result, so it’s worth the little extra effort up front.
Start by clearing the room completely – remove furniture, curtains, rugs, outlet covers, and anything else that will collect dust. Seal off doorways and vents with plastic and painter’s tape so sanding dust doesn’t travel through the house; tape along baseboards too, it helps.
Seal vents and doorways before you sand.
Vacuum and tack the floor with a sticky microfiber cloth after a light sweep to pick up fine grit, and shut off your HVAC or block returns – you don’t want the system blowing dust into other rooms. If you can, humidity and temp should be steady – extreme humidity makes sanding messy and finishes cure funny. Rent the right gear if you’re sanding – better tools = fewer headaches.
Q: Do I need a full sand or will screening and recoating work?
A: This matters because screening vs full sanding is the difference between a cheap afternoon refresh and a multi-day project that strips the whole floor down – and you don’t want to overdo it or underdo it. Picking the right route saves you money and time, and keeps your floors healthy.
Screening and recoating is basically abrading the existing finish and applying a new topcoat – it’s fast, cheaper, and great if the finish is mostly intact with only light scratches. Think: dullness, small scuffs, or fading but no deep gouges – that’s a good candidate for screening.
If the finish is torn, cupped boards are present, deep gouges or multiple old finishes build up, then it’s time for a full sanding.
A full sand gets rid of old stain and finish variations and lets you start fresh with stain or a new look – but it’s dustier, more labor and needs skill to avoid sanding through edges or creating dips. If you’re unsure test a small area first; you can always escalate from screening to sanding but you can’t put the original finish back once it’s gone.
Q: Which finish should I choose and how do I apply it for long-lasting results?
A: The finish you pick shapes how the floor looks and how it wears – it’s not just about sheen, it’s about durability, maintenance and how the color reads over time. Choose with use in mind: kids and dogs? heavy traffic? Think practical and aesthetic.
Water-based polyurethane dries fast, stays clear and yellowing is minimal – great if you want the wood’s true color, and you can recoat quicker. Oil-based gives a warmer amber glow and is tougher in some cases but it yellows and takes longer to cure – pros and cons, you decide. There are also hardwax oils and penetrating oils that feel more natural but need more upkeep – so ask yourself how hands-off you want to be.
Don’t rush the curing time.
Apply thin, even coats with good quality applicators – lambswool or microfiber pads for poly, and clean rags or brushes for oils. Sand lightly between coats with fine-grit sandpaper or a buffing screen to knock down dust nibs, vacuum and tack before each coat. Keep temp and humidity stable, ventilate well but avoid strong drafts that cause bubbles. Follow the manufacturer’s wait times – walking early might be tempting, but proper cure gives you real longevity.