
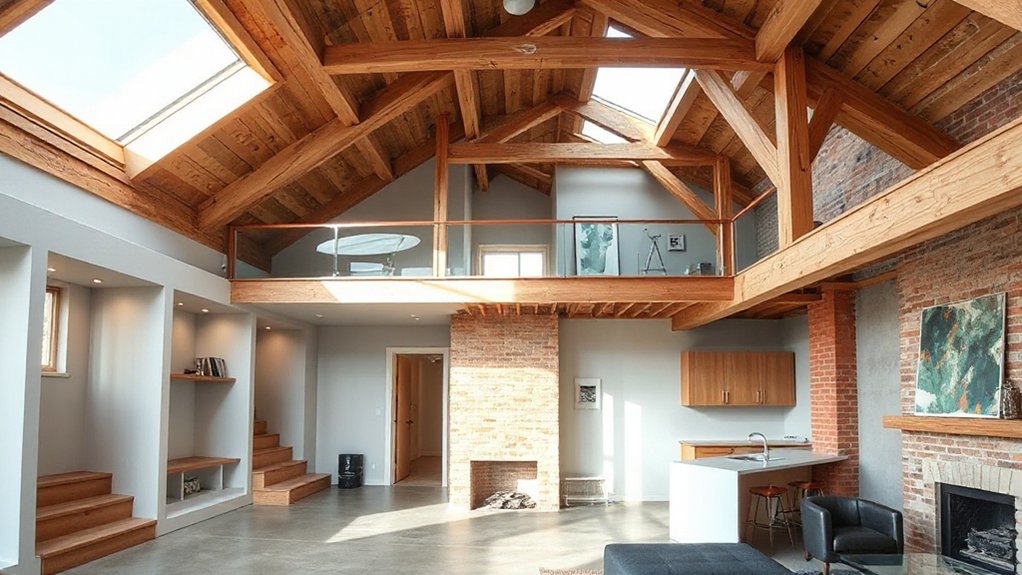

Does the idea that your attic can double as usable space hold up against real-world limits? In practice, loft styles like dormer and mansard boost headroom and light, but you’ll hit constraints in structure, insulation, and access. You’ll want a practical plan that balances layout, storage, and safety while considering budget and code. The next steps show how each approach actually affects square footage and daily use—and why some choices pay off more than others.
Choosing Your Loft Style: A Practical Decision Framework
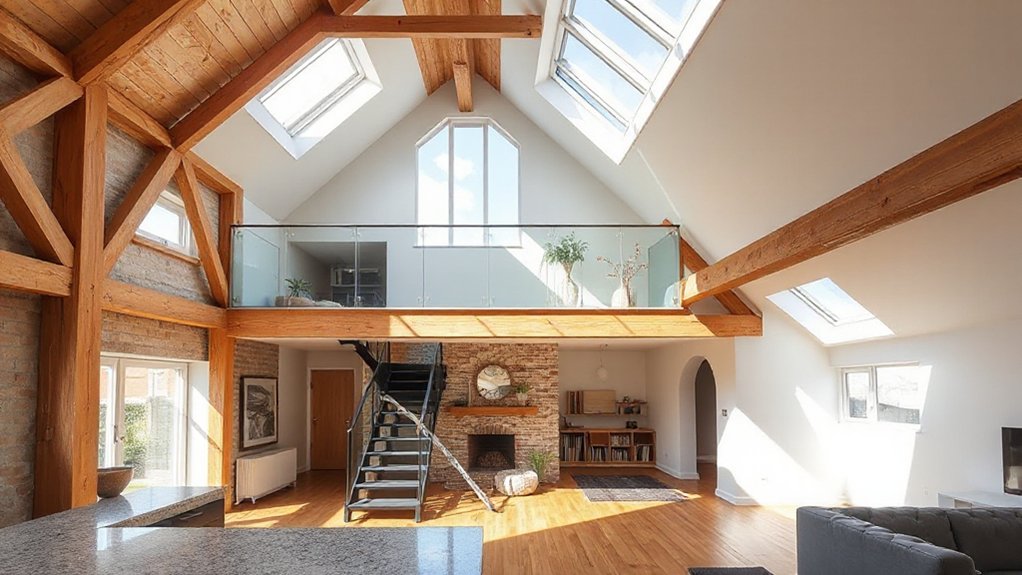
Choosing your loft style starts with a practical assessment of purpose and constraints. You’ll map how you’ll use the space, the structure you’re modifying, and any site limits.
Begin by listing requirements: headroom, egress, accessibility, lighting, and potential future needs. Prioritize options that meet safety and code expectations while minimizing disruption to existing systems.
Check building permits early to avoid delays, and align design choices with compliance timelines.
Evaluate insulation materials for thermal performance, moisture control, and cost. Consider how roof pitch, dormers, or stairs affect usable area and ventilation.
Translate functions into measurable criteria: storage capacity, work zones, and living areas. Document constraints, then test options against your budget and schedule.
Final selections should balance practicality, flexibility, and long-term value.
How Loft Footage Fits Your Home: Square Footage Boosts Explained
Ever wondered how much loft square footage actually adds to your home’s usable area? The answer hinges on how you convert attic space into functional space without shrinking existing rooms. Square footage boosts come from usable floor area, not just raw loft size, so you must optimize headroom, access, and layout to realize the gain.
Key metrics to track include floor-to-ceiling height, partition efficiency, and eave clearance, all influencing usable area per code. Practical upgrades, like improved insulation and a watertight roof, preserve livability and prevent energy loss.
Loft insulation enhances thermal comfort and reduces heating demand, while roof waterproofing prevents leaks that could erode usable space. Plan conversions with precise measurements, ensuring structural compatibility and long‑term durability.
The Loft Layouts You’ll Actually Use: Which Works Best
Flexible loft layouts let you tailor space for everyday use, from compact work nooks to open living zones.
In practice, prioritize configurations that minimize wasted area and maximize natural light, so the layout supports your real routines.
We’ll compare practical use cases to help you pick the design that actually fits how you live.
Flexible Loft Layouts
Consider a central spine for services and storage, reducing dead zones and improving future rework options. When selecting room shapes, favor simple geometry to minimize awkward corners and wasted area. Use vertical strategies—mezzanines or lofted storage—to reclaim floor area without shrinking usability.
Finish decisions should support rapid changes: neutral pallets, durable surfaces, and ergonomic details. Integrate decorative accents and color schemes to unify diverse functions while preserving clarity and legibility.
Practical Use Cases
A practical loft layout works when it matches real daily rhythms, not just theoretical space. You’ll prioritize flows that minimize steps between key zones—sleep, work, and welcome areas—without sacrificing natural light or ventilation.
Consider a flexible living area that doubles as a home office with discreet storage and durable finishes aligned to high-traffic use. For sleeping quarters, use partial walls or mezzanine partitions to preserve openness while ensuring privacy.
Historical architecture informs detailing, but your decor should stay lean; opt for modular pieces and concealed cable routes to preserve sightlines. Interior decor choices, in turn, should reinforce function: durable surfaces, smart lighting, and acoustic control.
Test layouts for daily routines, then refine for scale, accessibility, and timeless appeal.
Dormer Extensions: Light, Space, and Style Gains
Dormer extensions immediately boost light, usable space, and curb appeal by projecting a windowed structure from your roof plane. You gain headroom in loft zones and create a functional floor area that can be fully habitable, not wasted attic.
Position and window count affect daylight distribution, ventilation, and perceived room size, so plan with precise measurements and a clear sightline to exterior views.
From a technical standpoint, dormers add structural load attention, flashing detail, and insulation considerations to prevent heat loss.
Aesthetically, they blend with historical architecture cues while supporting modern interior decor needs. Choose materials that align with the primary roof to maintain continuity.
Confirm compliance, structural assessment, and waterproofing, then integrate the new frontage into circulation, lighting plans, and furniture layout for maximum utility.
Mezzanine Vibes: Height and Cost on a Shoestring

Mezzanine spaces can be a cost-savvy way to add usable height and storage without a full floor or roof alteration. With careful planning, you’ll maximize headroom where it counts while keeping budget in check. You’ll balance structure, access, and climate while targeting practical gains in usable area.
- Loft insulation strategy: prioritize mineral wool or high-performance boards for reduced heat loss.
- Access and clearance: choose a compact staircase or ladder that preserves floor area.
- Ventilation strategies: plan passive and mechanical options to avoid damp and condensation.
- Finishing touches: opt for lightweight, modular storage and rail systems to keep costs down.
Result: brighter, taller zones without overhauling the roof structure or utilities.
Vaulted Ceilings: Drama Without the Footprint
Vaulted ceilings offer drama and spatial impact without increasing the building’s footprint, making them a practical upgrade when you want an airy feel without expanding walls. You’ll gain perceived height, airflow, and light diffusion without enlarging exterior dimensions.
Use decorative beams to emphasize vertical scale and add a grounded focal point; guarantee beam spacing aligns with structural supports and ceiling height. Choose color schemes that amplify openness—light neutrals or cool tones reflect better daylight and reduce cave effect in lower zones.
Address HVAC and insulation early, as volume increases influence comfort and efficiency. Account for potential glare and acoustics with appropriate finishes and soft textures.
Plan detailing for drafts and moisture, especially in garages or unconditioned spaces. Finally, pair vaulted ceilings with purposeful ceiling lighting to maintain balance and rhythm.
Skylight Nook Ideas for Bright, Small Rooms
Skylight nooks transform small rooms by injecting daylight and visual depth without enlarging footprints. In practice, you leverage geometry, placement, and furnishings to maximize brightness and usable space. Focus on glare control, framing, and scale to avoid visual clutter while sustaining function.
Use wall-washed paint and low-profile storage to reflect light and retain openness. Consider built-in seating with integrated storage to keep floors clear, and align a desk or reading alcove with the window for natural task lighting. Install adjustable blinds for seasonal brightness.
Choose skylight sizes and angles that minimize heat gain and maximize even illumination.
- Skylight nook ideas for seating and storage
- Bright small rooms achieved with reflective surfaces
- Strategic wall color and finish choices
- Window placement and glare management
Master Suite Loft: A Private Retreat Upstairs

A master suite loft transforms the upstairs level into a private retreat by combining sleep, study, and relaxation into a single, self-contained zone. You’ll plan zoning with clear boundaries: a sleeping alcove, a compact workspace, and a sitting area for wind-down moments.
Prioritize sound control, using solid-core doors and insulated partitions to preserve quiet. Storage should stay visible in purpose, with built-in wardrobes and under-eave drawers that maximize headroom.
Lighting must be layered: task lighting at the desk, ambient fixtures for mood, and dimmable cues for late-night retreating. Consider vintage decor accents to add character without clutter, pairing antique textures with modern finishes.
Color schemes should emphasize light neutrals with restrained contrast, enhancing perceived space and ensuring cohesive flow between sleeping and work zones. This layout keeps the loft functional, orderly, and restful.
Open-Plan Loft Living: Kitchen to Lounge, Seamlessly
An open-plan loft integrates kitchen and lounge into one cohesive flow, prioritizing clear sightlines, efficient zoning, and uninterrupted movement. You’ll design progressions with defined zones, durable surfaces, and integrated storage that keep clutter absent while preserving airy scale.
Kitchen equipment should be compact, well-vented, and recessed to maintain openness; lounge seating remains flexible for gatherings. Incorporate Vintage charm and Industrial aesthetics through materials like exposed brick, steel frames, and warm timber accents that age gracefully.
Acoustic planning reduces noise transfer between zones, and lighting layers emphasize depth without breaking the space’s cohesion. Seamless integration hinges on proportion, scale, and accessible circulation.
- Clear sightlines and smart storage
- Compact, vented appliances
- Materials: brick, steel, timber
- Flexible furniture for flow
Home Office Loft: Productivity at a Higher Level
A home office loft should optimize your ergonomics and workflow, starting with an ergonomic workspace setup that supports long work intervals without strain.
Prioritize natural light optimization to reduce eye fatigue and boost focus, using placement, glazing, and adjustable shading to control glare.
This discussion will explore practical layouts and equipment choices that pair comfort with productivity.
Ergonomic Workspace Setup
To optimize a home office loft for productivity, start with an ergonomic setup that aligns your body with work tasks and reduces strain. You’ll prioritize posture, desk height, and monitor position to support long sessions without fatigue. Focus on ergonomic furniture and ergonomic design to sustain comfort and efficiency.
Implement practical zoning for typing, drafting, and breaks, ensuring each area minimizes awkward reaches and twisting.
- Adjustable chair with lumbar support and breathable upholstery
- Height-adjustable desk and monitor at eye level
- Keyboard and mouse positioned to keep wrists neutral
- Document stand and task lighting aligned with work streams
This setup promotes consistent rhythm, reduces discomfort, and enhances focus, enabling higher output while preserving health. Maintain simplicity and adjust based on feedback and task changes.
Natural Light Optimization
Natural light directly influences productivity in a home office loft, so optimize window placement, glazing, and shading to maximize daytime illumination without glare.
You’ll benefit from a precise layout that pairs operable skylights with side windows to balance brightness and reduce hot spots. Choose glazing with low E coatings and appropriate solar control to maintain color fidelity and comfort.
Establish a daylight-first routine: align desks to perpendicular windows and employ task lighting only where needed. Color schemes should favor neutral bases with cool accents to minimize perceived glare and maximize contrast for readability.
Material choices matter: light, matte finishes reflect rather than absorb, while durable, impact-resistant frames endure daily use. Track blinds or automated shades integrate seamlessly with smart controls for consistent, flicker-free illumination.
Storage-First Loft Solutions That Maximize Space
If you’re maximizing space in a loft, start with storage-first solutions that fit your layout and routine. Prioritize built-in storage, under-elevation drawers, and modular units that tuck along walls and eaves. Use vertical shelving to free floor space without clutter, and designate multi-purpose furniture to reduce duplication.
Choose concealed hardware and shallow profiles near stairs to minimize obstruction. Integrate decorative lighting and loft flooring considerations into storage design to avoid seams and glare at night. Maintain clear sightlines for safety and flow, ensuring access to key zones remains uninterrupted.
- Built-in drawers under gable walls and stairs
- Multi-functional ottomans with hidden compartments
- Wall-mounted cabinets, open shelving, and cubbies
- Slim, modular wardrobes aligned with traffic paths
Insulation and Ventilation for Comfortable Lofts

Proper insulation and ventilation are essential for comfortable loft spaces, preventing heat loss in winter and overheating in summer while maintaining indoor air quality. You’ll prioritize continuous insulation to minimize thermal bridging at walls, floors, and roof intersections, reducing heat leakage and cold spots.
Use a vapour-permeable, airtight membrane to manage moisture, paired with a well-sealed gap layout around penetrations to deter condensation risks. In climate zones with high temperature swings, consider a radiant barrier or reflective sheathing to reduce summer heat gain without compromising insulation value.
Ventilation should be designed for balanced airflow, integrating passive soffit vents with an efficient mechanical system that uses humidity and CO2 sensors. Confirm lead times for air seals and ducts align with construction phases to maintain moisture management integrity.
Access and Safety: Stairs, Rails, and Code Compliance
You’ll assess stair safety, railing design, and code compliance to guarantee reliable access.
I mean, you’ll verify handrail heights, edge protections, and obstacle-free paths while coordinating with local building codes.
This discussion starts with practical checks you can apply to meet safety standards and minimize risk.
Stair Safety Compliance
- Confirm tread depth, riser height, and uniform rise for predictable footing
- Guarantee handrails are continuous, graspable, and mounted within code height ranges
- Check landings, headroom, and clearances to avert collisions
- Plan for non-slip surfaces and clear visual contrast on steps
Railings And Codes
You must verify that balcony design details meet local building codes and project requirements, ensuring continuous handrails on at least one side and a graspable profile within reach ranges.
Material choices should resist impact and corrosion, with proper detailing around posts, balusters, and fasteners to prevent snagging.
Inspect fire safety considerations, including rated corridor separation, fire-rated assemblies, and escape route clarity from the loft.
Document compliance with inspections and labeled amendments.
Plan for future renovations by preserving accessible egress and maintaining guard continuity.
In practice, align rail design with both balcony design intent and stringent fire safety criteria to minimize risk.
Budget-Savvy Loft Upgrades That Pay Off
When budgeting loft upgrades, prioritize high-impact changes that don’t require major structural work. You’ll get more usable space, better light, and faster ROI by selecting upgrades that combine function with visual impact. Focus on finish details, efficient layout, and durable materials that age well.
Align choices with artistic decor and historical preservation where appropriate, preserving character while modernizing usability.
- Optimize lighting layers: recessed, task, and ambient to transform depth and perceived square footage
- Upgrade insulation and air sealing for comfort and energy savings
- Implement portable, non-structural storage solutions to reclaim floor space
- Select durable, period-faithful finishes that respect history yet meet daily needs
Frequently Asked Questions
How Long Does a Typical Loft Conversion Take From Start to Finish?
Typically, a loft conversion takes 6–12 weeks from start to finish. You’ll inspect site progress, plan insulation and services, guarantee loft insulation and ventilation systems meet code, coordinate trades, and approve milestones as you progress.
What Is the Average Cost per Square Foot for Loft Conversions?
You’ll pay about £150–£2,000 per square foot on average, with most projects landing around £200–£400. Design ideas and material costs heavily influence totals, so plan for variability. You quantify risks, timelines, and budget early.
Are Permission Requirements Different for Attached vs. Detached Homes?
Yes, permission requirements differ: attached homes often require more complex permits, while detached homes may have relaxed rules. You must check Building permits and zoning restrictions, confirm compliance with setback, height, and occupancy limits before starting any work.
How Long Do Loft Conversions Add to Home Resale Value?
Loft conversions typically boost resale value by a moderate amount, often 10–20% depending on quality. You’ll gain interior design flexibility and storage solutions, plus usable living space that appeals to buyers seeking practical, well-executed upgrades.
What Maintenance Is Required After a Loft Conversion Is Completed?
Your loft needs regular checks: roof insulation stays effective, and ventilation systems keep air quality safe. Inspect seals, clean vents, and test alarms. If drafts appear, reseal quickly to prevent moisture, mold, or heat loss.
Conclusion
You’ve mapped out the loft you need, weighted every option, and balanced light, headroom, and storage. With careful planning—dormers for space, mezzanines for height, and smart storage—you’ll gain square footage without crowding the core home. Prioritise ventilation, insulation, and safe access to keep comfort constant. When you finish, you’ll feel like you’ve added a whole new floor to your house—an architectural upgrade that pays back in daily usability and real-world value. Your loft, finally, works as hard as you do.