
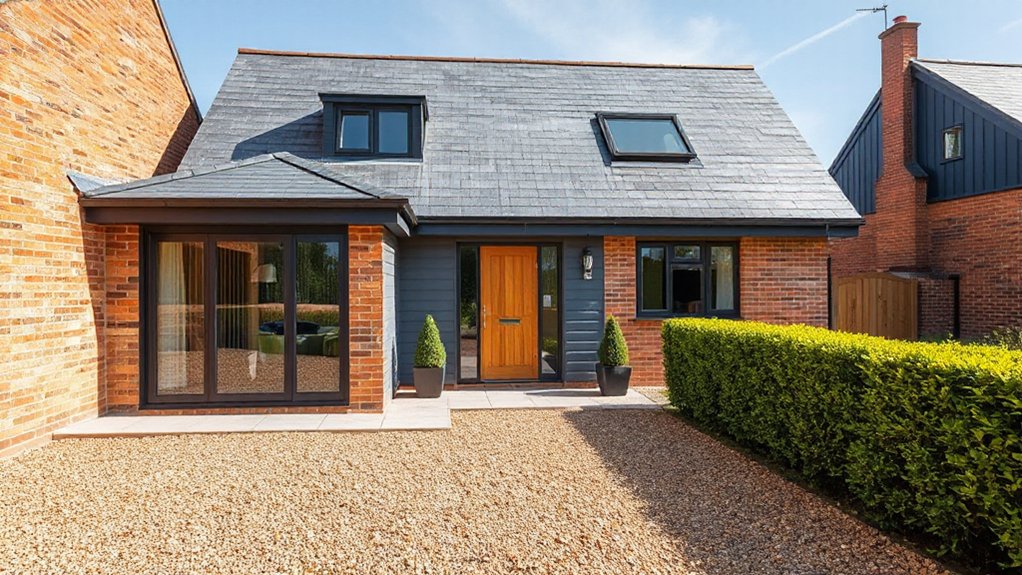

Like a time capsule with a pulse, a 1970s detached property can be upgraded without losing its soul. You’ll want a plan that preserves character while boosting light, heat, and flow, using period-inspired materials and smart tech that don’t shout. Start by mapping your goals, budgeting for key upgrades, and sketching layouts that honor the era. Curious how small changes open big comfort? Let’s outline practical steps that keep the charm intact while delivering modern living.
Identify Your 1970s DNA and Define Modern Goals

To modernize a 1970s detached home, start by mapping its DNA: note the original layout, built-in features, and materials that define its character. Then pinpoint what you want to keep and what to reinvent.
You’ll assess circulation, room adjacencies, and the places where light naturally streams in, marking elements worth preserving for Architectural preservation. Then translate those findings into clear goals: prioritize flow improvements, energy efficiency, and contemporary comfort without erasing the past.
Consider how to honor Historical significance through sympathetic upgrades—reusing brick, preserving timber, or restoring vintage fixtures where feasible. Document constraints, retrofit opportunities, and potential risks.
Your plan should balance nostalgia with practicality, ensuring modern comforts slot into the 1970s shell without erasing its identity.
Set a Realistic Budget for Modern Upgrades
Set a realistic budget by clarifying scope first, so you know what’s essential and what can wait.
Prioritize essential upgrades—like insulation, updates to heating, and core systems—then map those costs against a contingency fund for surprises.
Allocate a clear buffer and track spend as you go, keeping you aligned with trend-aware improvements without overreaching.
Establish Realistic Scope
Charting a 1970s detached property means grounding your plan in a realistic, well-figured budget from the start. Establish scope by prioritising what truly adds value, balancing desire with practicality, and aligning with architectural styles while respecting historical preservation.
You’ll avoid scope creep by defining clear deliverables, timelines, and cost caps. This mindset keeps decisions focused and measurable, so you don’t overextend your resources. Stay flexible on finishes but firm on essential structural and mechanical updates that protect the home’s integrity.
- Define non-negotiables (structure, systems, insulation) with cost ranges and acceptance criteria.
- Map out phased upgrades that respect leverage points and future-proofing, avoiding backtracking.
- Document decisions in a living brief to track changes against budget and time.
Prioritize Essential Upgrades
Focusing on upgrades that matter most saves time and money while delivering real value. You establish a realistic budget by listing must-haves first—heating, insulation, wiring, and windows—then assign caps for each category to keep requests achievable.
Prioritize improvements that enhance daily comfort and energy efficiency, aligning with historical preservation and aesthetic consistency. Set clear milestones, with itemized costs and suppliers, so you can compare quotes without scope creep.
Track potential DIY savings vs. contractor work, but avoid compromising safety or code compliance. Build in a modest contingency only where essential, and avoid over-spending on cosmetic fixes that don’t support function.
Document decisions, revisit estimates quarterly, and reallocate funds as priorities shift. This disciplined approach keeps your plan focused, credible, and ready for progress without derailing style or history.
Allocate Contingency Funds
Allocating contingency funds isn’t optional—it’s the safety net that keeps your renovation on track without derailing your budget. You’ll set a realistic financial cushion from the outset, then factor it into each line item so you’re not surprised by overruns.
This is where budget planning meets practical foresight, ensuring you cover unexpected twists—like material delays or code changes—without compromising core upgrades.
- Define a clear contingency percentage (10–20%) based on project risk, then attach it to each task.
- Track spend weekly, adjust scope before splurging, and document changes for future reference.
- Separate contingency from the main budget to maintain transparency and discipline.
This approach anchors your project in reliable contingency planning, reducing stress and keeping modernisation on schedule.
Plan Layouts for Better Flow
Open your plans with a clear path for movement, prioritizing direct routes between key zones like kitchen, dining, and living areas. Aim for circulation-friendly layouts that reduce dead ends and awkward passages.
Use wider doorways and cohesive sightlines to feel spacious. Stay trend-aware by testing furniture placement in a real-time floorplan, noting how open flow changes daily use and accessibility.
Plan for Open Flow
To create a truly modern flow in a 1970s detached property, start by envisioning a connected downstairs that blends living, dining, and kitchen spaces into one versatile zone with clear sightlines and minimal doors. You’ll gain flexibility through an open plan design that directs traffic with furniture arrangement and defined zones.
Use consistent materials and color to unify surfaces, while keeping storage built in to reduce clutter. Prioritize sightlines to the garden or outdoor area, enhancing the sense of space.
Consider soft zones with rugs and lighting to balance open space with coziness.
- Open plan design cues that connect zones without walls
- Furniture arrangement that creates traffic paths and focal points
- Storage and lighting that maintain order and ambiance
Circulation-Friendly Layouts
Prioritize sightlines from entry to living spaces, so lighting and tones guide movement naturally. Use a corridor-less zone concept where primary rooms connect directly, reducing interruptions and awkward detours.
In practical terms, align door positions with furniture arrangement to avoid pinch points; keep main pathways at least 900mm wide for comfortable passage, and widen around dining areas.
Zone active tasks near high-use anchors, like the kitchen, while keeping seating areas adjacent but subtly separated.
Regularly test flow by walking the route, adjusting furniture and openings to maintain smooth, intuitive movement.
Light It Right: Layered Lighting Strategies
Layered lighting isn’t just about brightening a room; it’s about defining zones and mood with purpose. You’ll combine ambient illumination, task clarity, and accent layering to transform a 1970s footprint into a modern, usable space.
Start with ceiling-mounted fixtures for even base light, then add floor lamps or wall sconces to soften corners. Use dimmers to shift atmosphere from daytime to evening, ensuring energy efficiency stays in check. Choose lamps with warm color temperatures to preserve the home’s character while feeling contemporary.
- Ambient illumination: central ceiling lights with warm dimming for everyday use.
- Task layering: focused desk or counter lighting where you cook, read, or work.
- Accent layering: wall washes or framed-art highlights to sculpt depth and interest.
Improve Natural Light: Windows and Doors That Work

You’ll start by sizing windows and doors to maximize light without compromising privacy or security.
Prioritize wider openings, strategic glazing, and slim frames to reduce visual clutter while boosting daylight.
We’ll weigh practical constraints like wall depth, insulation, and interior flows to guarantee every opening feels brighter and more purposeful.
Maximise Natural Light
To maximise natural light, start with the layout: open up key sightlines and choose windows and doors that capture daylight from multiple angles. You’ll optimize Sunlight diffusion by balancing glazing areas with reflectors and light shelves, while prioritising Window placement for consistent brightness across rooms.
- Align primary living spaces toward the sun path, using wide, low-profile glazing and transoms to pull light deeper without glare.
- Use interior sidelight and corner windows to create multi-directional daylight, reducing dark corners and improving perceived space.
- Choose doors with glass inserts or slim frames that maintain flow while maximizing light transfer between rooms.
Door and Window Sizing
Prioritize proportionate openings—oversized doors or narrow windows can feel unbalanced in a 1970s layout. Think about door aesthetics that blend new with old, using slimline frames or timber accents to reduce visual weight.
For window installation, align sill heights and transom options to the room’s activity zones, boosting perceived height and openness. Consider glazing choices (low-E, tinted) to curb heat while keeping views.
Finish with hardware that’s practical and stylish, ensuring hardware aligns with your overall design, not just function.
Energy Upgrades for a Warm, Welcoming Home

Smart, energy-efficient upgrades start with a clear plan: seal gaps, upgrade insulation, and choose heating systems that balance comfort with cost. You’ll create a warmer home without blowing your budget by prioritising airtightness, then layering insulation in walls, loft, and floors.
Select a heat source that suits your climate and daily routine, like a high-efficiency boiler or heat pump, paired with smart controls to avoid energy waste.
Use eco-friendly solutions and aesthetic enhancements to keep the look cohesive with your 1970s character. Prioritise materials and products with high R-values, low global warming potential, and minimal maintenance.
Focus on measurable gains: comfort, reduced bills, and reliable warmth across rooms.
- Seal and insulate thoroughly
- Opt for efficient heating with smart controls
- Choose eco-friendly, aesthetically integrated fixtures
Timeless Materials and Finishes for a 1970s Home
When updating a 1970s detached home, choose timeless materials and finishes that honor its character while delivering modern practicality. You’ll prioritize durable, low-maintenance options with a tactile quality that ages gracefully.
Consider wood veneers or solid ash for warmth, combined with matte ceramic tiles in kitchens and hallways for easy care. Favor neutral palettes with accent hues drawn from mid-century palettes to support a cohesive era feel.
Introduce textural contrast through brick or tile, not overdone ornamentation. For hardware, opt for brass or satin nickel fittings to echo period aesthetics without shouting retro.
Wood doors, paneling, and simple profiles maintain authenticity. Integrate vintage charm subtly, and steer toward a Retro revival through understated patterns, clean lines, and purposeful lighting.
Kitchen and Bath Refreshes Without a Full Remodel
Kitchens and bathrooms are prime candidates for a refresh that preserves the 1970s character while boosting daily practicality. You can upgrade without a full remodel by focusing on finishes, islands, and hardware that read cohesive but refreshed.
1) swap cabinet hardware and add under-cabinet lighting to enhance task visibility without gutting the layout.
2) introduce vintage fixtures and retro color schemes through tile accents, sinks, and faucets that nod to the era while staying within modern efficiency standards.
3) refresh countertops with a durable, low-maintenance material and install a slim, open-shelf display to mix storage with display space.
This approach keeps bones intact, reduces disruption, and delivers a refreshed, collectable feel.
Outdoor Spaces That Extend Living Areas
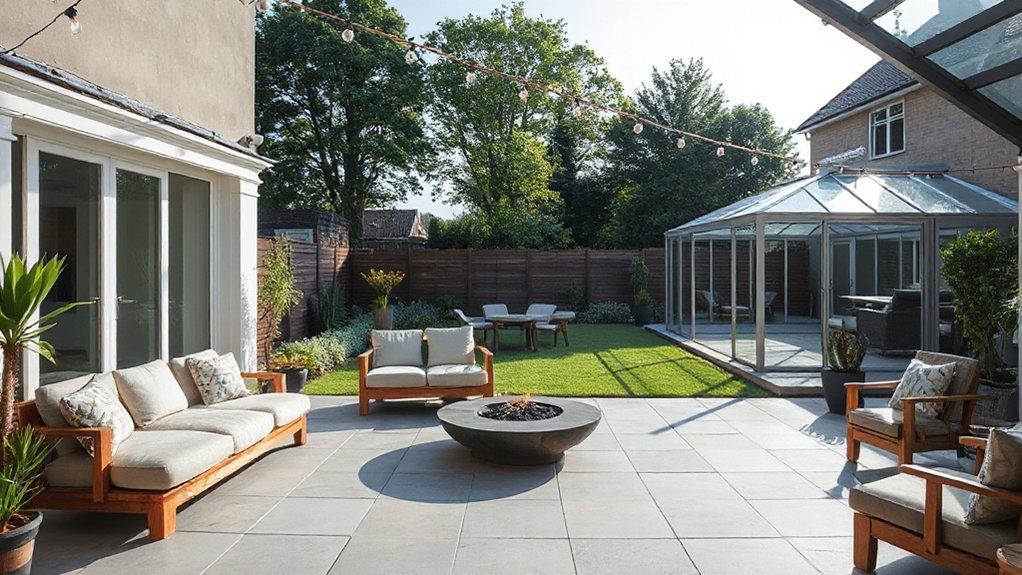
Choose durable, weather-resistant surfaces and cohesive color schemes that tie interior materials to exterior cues. Define zones for cooking, lounging, and dining, then select low-maintenance outdoor furniture that fits your scale and climate.
Integrate soft lighting, shading, and weatherproof textiles to extend usability after dark. Consider built-in planters or vertical greenery to soften edges and improve privacy without crowding the space.
Keep storage nearby, and choose modular pieces you can reconfigure as needs evolve. Aim for timeless rather than flashy, so the space ages gracefully.
Smart Tech Without Overkill
Smart tech should simplify, not complicate. You’ll get practical gains without a gadget overload by focusing on essential, simple systems that fit your 1970s home’s rhythm. Prioritize intuitive controls, reliable connectivity, and clear benefits like energy savings and safer living.
Use voice control sparingly for lighting, climate, and scenes, so daily routines feel effortless rather than gimmicky. Choose devices that integrate with a single hub or app to avoid multiple ecosystems.
Automated security should deter risk without creating stress—consider a discreet camera setup, smart door sensors, and remote monitoring that’s easy to review. Keep wiring minimal and standards current to preserve resale value.
1) Start small with a single, robust hub and a core set of devices
2) Opt for voice control for routine actions, not every function
3) Prioritize automated security features tied to a clear alert plan
Finishing Touches That Honor Preservation and Your Style
To finish your renovation with respect for the past while keeping current taste, start with finishes that celebrate the home’s era and your personal style. Choose preservation techniques that feel authentic yet functional, like period-correct plaster textures or durable, retro-inspired tiles in kitchens and baths.
Pair these with contemporary materials for longevity, such as sealed hardwood or refined concrete that echoes the era’s palette. Focus on stylistic accents that unify rooms—architraves, crown molding, and door hardware in brushed nickel or aged brass.
Keep lines clean to avoid a museum vibe; balance ornate details with minimalist furniture. Prioritize lighting that highlights character features, using warm LEDs and dimming controls.
Finally, document finishes for future repairs, ensuring your homage remains timeless and practical.
Frequently Asked Questions
How Can I Repurpose 1970S Features Without Losing Charm?
To preserve retro charm while repurposing, you modernize thoughtfully: restore architectural integrity, keep original lines, accents, and materials, then blend contemporary finishes, smart lighting, and energy upgrades without overwhelming vintage features. Prioritize cohesive palettes and functional, detail-oriented improvements.
What Quick Wins Boost Resale Value Most?
You should know: homes with a 10-15% kitchen upgrade see resale boosts; quick wins include fresh paint, refurbished floors, and smart thermostats. Historic preservation with contemporary contrast elevates value and buyer appeal, guiding practical, trend-aware decisions.
Which Sustainable Upgrades Fit a Period Home Best?
You should choose eco friendly insulation and solar powered lighting, prioritizing period-appropriate aesthetics alongside modern efficiency. You’ll seal drafts, upgrade loft and wall cavities, install discreet solar lighting, and pair sustainable materials with authentic detailing for lasting appeal.
How to Source Period-Appropriate but Modern Fixtures?
Start sourcing smartly: seek vintage fixtures, then swap with modern alternatives, smoothly. You’ll shortlist reputable salvagers, study certifications, and verify fittings, finishes, and provenance, ensuring sustainable, stylish style without sacrificing period-perfect practicality.
What Common Mistakes Derail Modernisation, and How Avoid Them?
You’ll avoid common missteps by prioritizing architectural harmony and historical accuracy, aligning new details with existing lines and materials, resisting trendy overhauls, budgeting for authentic fixtures, and testing light, scale, and proportion before finalising any decisions.
Conclusion
You’re well on the path to a timeless refresh that respects the 1970s soul while embracing today’s comforts. By balancing thoughtful layouts, layered lighting, smarter windows, and subtle upgrades, you’ll boost light, flow, and efficiency without ripping the character out. Keep the palette neutral, lean on period textures, and layer outdoor living with durable finishes. Ready to see it all come together? Can you imagine the cozy, modern home that still whispers of its era with every detail?