
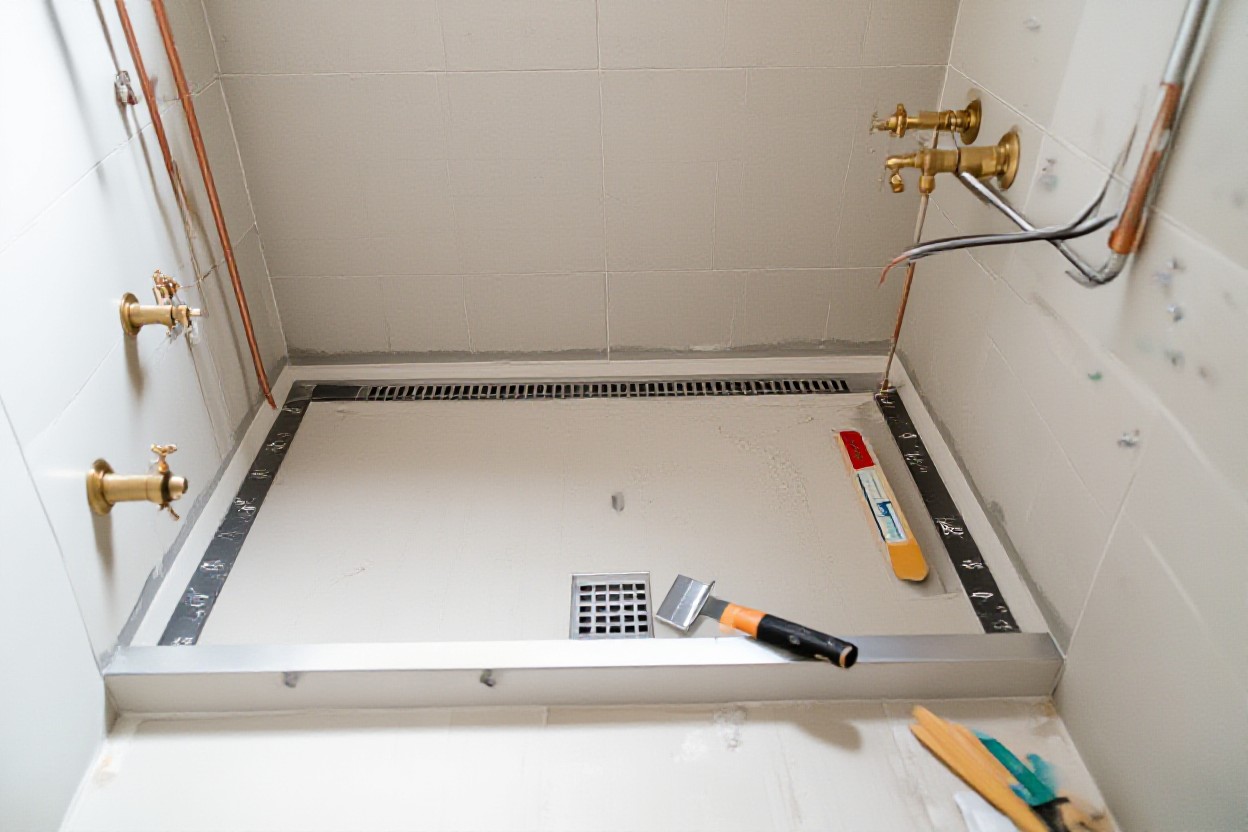

There’s this moment when you’re staring at your outdated tub thinking, “Yep, this has gotta go,” and that’s usually when the idea of a walk-in shower really kicks in. You want something that feels modern, easier to clean, maybe a bit spa-like, but building it from scratch sounds like a big leap, right?
In this guide, you’ll walk through the whole process step by step so you actually know what’s happening behind those tiles. From planning the layout to waterproofing and finishing touches, you’ll see how each stage fits together – and why it matters for your daily showers.
Why I Think You Should Consider a Walk-In Shower
Picture walking into your bathroom at 6 a.m., half awake, and instead of wrestling with a sticky shower curtain or a clunky door, you just step into a clean, open space that feels like something from a boutique hotel. That simple change in how you enter your shower shifts the whole vibe of your morning, and when you factor in easier cleaning, better accessibility, and the way an open layout can bump resale value, a walk-in starts to feel less like a luxury and more like the smart move for your everyday life.
The Benefits of Going Walk-In
From a practical standpoint, you gain a ton: fewer moving parts to break, no moldy curtain to swap every few months, and a layout that works whether you’re 25 or 75. Real estate data shows updated walk-in showers can add up to 5% perceived value in buyers’ eyes, which is wild for a single project. Plus, you get better ventilation, less humidity build-up, and room to actually turn around without bumping your elbows every time you drop the shampoo.
What Makes Them So Great for Your Space
What really changes the game is how a walk-in opens up the footprint you already have, even if your bathroom’s barely bigger than a closet. With clear glass or a partial wall, your eye travels straight through instead of slamming into a bulky tub wall, which instantly makes the room feel wider and brighter. You also get way more layout options: linear drains along the back wall, a flush entry with no curb, even a hidden niche that fits full-size bottles so your ledge doesn’t turn into a cluttered mess.
In a tight 5×8 bathroom, swapping a standard 60 inch tub for a 48 inch walk-in with a frameless panel can visually stretch the room enough that it feels like you added a window, especially if you run the same floor tile right into the shower so it all reads as one continuous surface. You also free up wall space for a floating vanity or a slim storage cabinet, which is gold in older homes with tiny linen closets. If you go with light-colored tile, a clear glass panel, and a low-profile linear drain, the whole layout suddenly feels intentional instead of just “where the builder stuck the tub” back in 1987. And when you pair that with a well-placed LED strip or a recessed light over the shower, you don’t just gain function, you get a legit focal point that anchors the entire bathroom design.
Here’s What You’ll Actually Need to Get Started
Instead of wandering the aisles guessing, you want a tight, realistic list that matches what you’re actually building. You’re talking cement backer board, waterproofing membrane, a proper shower pan system, quality thinset, grout, and a drain kit that fits your layout. Add in a not-so-fancy but solid set of tools so you’re not borrowing every weekend. When you dial this in up front, you cut wasted time in half and avoid those annoying “one more trip to the store” runs.
Essential Materials and Tools
Rather than grabbing random stuff, you’ll want fiber-cement backer board, a liquid or sheet waterproofing system, a pre-sloped pan or mud bed materials, and a compatible drain assembly. Pair that with a mixing drill, notched trowels (1/4 and 1/2 inch), a tile saw, spacers, a level, and a rubber float. Toss in screws rated for cement board and mesh tape. With just that core kit, you can frame, waterproof, and tile a legit walk-in shower from raw studs.
Extra Supplies You Might Want to Consider
Instead of only thinking about “bare minimum”, you can bump your shower into that custom-feeling zone with a few add-ons. Think recessed niches, a corner footrest, LED-ready junction boxes, or heated floor mats tied into the same zone. Silicone in matching grout colors, layout lasers, and leveling clips will make your tile lines look way tighter. These extras aren’t mandatory, but they can save hours and make the final result feel way more high-end.
Some of the best upgrades are the ones you barely see but feel every single day. A prefab niche, for example, might cost 40 to 80 bucks, yet it saves you a ton of fussy framing and waterproofing at a weak spot. Tile leveling clips can turn a wavy wall into a clean, hotel-style surface, especially on larger format tiles like 12×24. And if you live in a colder climate, heated floor mats under the bathroom tile (not in the actual shower floor usually) can make that first step out of the spray go from “ugh” to “ok, this is nice” pretty fast.
My Take on Planning the Perfect Layout
Think of your layout like a tiny floor plan puzzle where every tile, drain, and opening has a job to do. You want a clear path in, enough elbow room to actually turn around, and smart placement of the shower head so water stays where it belongs. Aim to group wet areas together, keep storage in the “dry zone,” and leave space for a low-profile threshold or curbless entry. When in doubt, sketch two or three versions – the best layout usually shows up on paper before you start framing.
Sizing It Up: How Much Space Do You Really Need?
Think small studio bathroom vs compact hotel suite – both work, but they feel totally different in the shower. Bare minimum, you should hit around 36 x 36 inches, but 42 x 60 inches starts to feel properly comfortable, especially if you’re planning for aging in place or a bench. Check your local code for required clearances in front of the shower opening, usually 24 inches or more. If you’ve got a long but narrow room, consider a 30 x 60 walk-in along one wall, it feels way bigger than the numbers suggest.
Designing for Style and Comfort
Style without comfort gets old fast when you’re standing barefoot on cold tile, so you want both working together from day one. Tile size, grout color, glass height, even the shape of your niche all change how the space feels – a 3 x 6 subway tile gives that classic vibe, while big 24 x 24 tiles read modern and a bit more spa-like. If you like long, hot showers, plan for a larger bench or at least a corner footrest and put the valve where you can turn it on without getting blasted. Little choices like a slightly sloped bench, a hand shower on a slide bar, and a 3/8 inch frameless glass panel at 80 inches tall add up to a space you actually enjoy using every single morning.
Because comfort lives in the details, you want to think through how your body actually moves in the shower, not just how it looks on Pinterest. So picture yourself stepping in: your hand should naturally land on the valve at about 44-48 inches high, with the shower head sitting around 80 inches, maybe bumped to 84 if you’re tall. Many pros keep the bench at 17-19 inches high and about 14-16 inches deep, deep enough to sit without feeling like you’re falling forward, and they angle it slightly for drainage so water doesn’t pool under you. And if you really want that “hotel spa” feel, pair warm 2700-3000K recessed lighting on a dimmer with a matte fixture finish and a single accent wall of patterned tile – it’s a simple combo that looks way more expensive than it actually is.
Seriously, Let’s Talk About the Plumbing
You know that friend who tiled an amazing shower, then had to rip half of it out because a tiny hidden leak soaked the subfloor for months? That’s what you’re trying to avoid here. Your plumbing layout, pipe sizes, and drain location need to be nailed before you even think about setting that first tile. When supply lines, valves, and the trap are planned together, everything behind the wall stays drama-free while you enjoy those long, hot showers later.
Understanding the Basics
Picture opening the wall and actually knowing what every pipe is doing instead of guessing. You’ll be tying 1/2 inch hot and cold supply lines into a mixing valve, then running that to your shower head, maybe a handheld, sometimes a rain head. The slope of your 2 inch drain line (usually 1/4 inch per foot) leads into a P-trap, then into the main waste line. When those pieces line up, your shower drains fast, pressure feels solid, and you don’t get mystery temperature swings.
Common Plumbing Mistakes to Avoid
Think of the last project where someone said, “It’s fine, the inspector won’t even check that.” That mindset is how you get slow drains, weak pressure, and moldy walls. Undersized pipes, no blocking behind valve bodies, and drains that ignore the 1/4 inch per foot slope rule are all ticking time bombs. If you skip test caps, air tests, or a simple 15-minute flood test of the pan, you’re basically betting your framing on luck instead of verifying the system.
One of the sneakiest issues is installing the mixing valve at the wrong depth so the trim sticks out like a sore thumb or sits too deep, and then you’re shaving tile to make it fit – super annoying. Another big one is mixing different metals without proper dielectric unions, which can lead to corrosion over a couple of years even if day one looks perfect. A lot of DIYers also forget to strap and support vertical runs every 4 to 6 feet, so when you turn the water on, the pipes bang around in the wall and eventually wear through. And if you’re tapping into an older 1/2 inch line that already feeds two bathrooms, that “small shortcut” might drop your shower pressure every time a toilet flushes, so planning the load on your existing system is just as important as gluing any single joint.
The Real Deal About Shower Walls and Flooring
A lot of people think walls and floors are just about looks, but in a walk-in shower they’re doing the heavy lifting for waterproofing, safety and daily comfort. You’re dealing with constant moisture, thermal movement, and soap scum that’ll find every weak spot. So you want materials that have a low water absorption rate, a proper slope of at least 1/4 inch per foot, and surfaces that don’t turn into an ice rink when you’re shampooing. Get those details right and your shower feels solid, drains well, and doesn’t start failing in 3 years.
Choosing the Right Tile or Material
Most folks think bigger tiles automatically mean easier cleaning, but in a wet area your grout joints actually help with grip and movement, so it’s not that simple. On floors, you’re usually better off with 2×2 or 3×3 inch porcelain tiles that have a DCOF rating of 0.42 or higher, or even pebble sheets if you like that spa vibe. For walls, large-format porcelain, ceramic, or solid surface panels cut way down on grout and are less likely to absorb water than natural stone. Just make sure every piece is rated for wet areas, not just “bathroom safe”.
Tips for Proper Installation
People often assume tile is waterproof on its own, but that’s exactly how showers fail and start leaking into ceilings below. You’re really building a waterproof box first, then adding pretty stuff on top, which means a properly sloped pan, continuous waterproofing on walls and floor, and movement joints in the right spots. Use a quality modified thinset, back-butter large tiles, and keep a 1/8 inch gap at all changes of plane so your silicone has somewhere to live instead of cracking grout.
- Use a flood test on the pan for at least 24 hours before tiling.
- Keep wall tiles level off a ledger board instead of resting on the floor.
- Maintain consistent grout joints with spacers and check with a straightedge.
- Caulk vertical corners and floor-to-wall joints with 100% silicone, not grout.
- After all that, clean thinset out of joints as you go so grouting is actually possible.
On installation, a lot of DIYers think “if it looks straight, it’s fine”, but your shower will rat you out the first time water pools along a low spot or grout cracks along a high ridge. You want that floor perfectly sloped at 1/4 inch per foot to the drain, no flat spots, and you want your wall tiles stacked off a dead-level ledger so the whole layout doesn’t wander by the time you hit the shower head. Use a laser level or at least a long bubble level, mix thinset to a creamy peanut butter consistency, and pull the first few tiles back up to check for at least 95% coverage. And yeah, it feels slow at first, but the pros are obsessive about this stuff for a reason.
- Dry lay a few rows to test your pattern and avoid skinny slivers at the ceiling or edges.
- Use a notched trowel sized to your tile and comb in one direction for better adhesion.
- Beat tiles in with a rubber grout float to avoid hollow spots and lippage.
- Wipe thinset off faces and joints before it skins over, especially with textured tile.
- After tiles set, scrape any ridges from joints with a utility knife so grout packs in fully.
How to Bring Your Walk-In Shower to Life
Your shower really feels finished the day you step in, hit the water, and everything just works the way you pictured it. This is where your tile pattern, hardware style, and layout all finally show off, so you can see whether that matte black trim, linear drain, and glass panel combo actually plays nice together or needs a tweak. Aim for that first test run to feel like a mini spa day, not a construction inspection.
Adding Finishing Touches
Once the last tile is set, you get to have fun with the details that make it yours: a teak stool, a 12-inch rainfall head, or that brushed brass valve you kept saving on Pinterest. Mix in silicone-free accessories that screw into blocking you added earlier so they don’t rip out later. Even a $40 wall niche light or a simple hanging plant can instantly make the whole space feel high-end.
What About Lighting and Ventilation?
A client once told me the best money they spent was a $200 fan-light combo that stopped their mirrors fogging up in 30 seconds flat. You want a dedicated, wet-rated recessed light in the shower, ideally on a separate dimmer, and a fan sized at about 1 CFM per square foot of bathroom floor. When you pair that with a 4000K LED strip or sconce outside the glass, the whole room feels bright but not harsh.
Most people underestimate how fast steam builds up, so start by sizing the fan properly: if your bathroom is 80 square feet, you’re aiming for at least an 80 CFM unit, and if your ceilings are over 8 feet, bump it another 20-30 percent so moisture actually gets out instead of hanging around on your grout. Go for a fan rated around 1.0 sones or less, since a loud box humming over your head ruins that spa vibe pretty fast, and wire it to a timer switch so it runs 20 minutes after every shower without you having to think about it. For lighting inside the shower, choose a wet-location rated recessed can with a sealed LED trim, sit it roughly centered on the main standing area, and keep the color temp around 3000K to 4000K so your tile doesn’t look weird or washed out. And if you’ve got a window nearby, use it: a small awning window with obscure glass and a tilt feature can punch out humidity like crazy while still giving you privacy.
Conclusion
With this in mind, about 60% of bathroom remodels now include a custom shower, so you’re not just following a trend – you’re building real value into your home and your day-to-day routine. By planning your layout, getting the waterproofing tight, and dialing in the drain and tile work, you’ve basically created a spa that fits your life instead of the other way around.
So if you’ve made it this far, you know you can absolutely pull this off, even if it takes some weekends and a bit of trial and error. And that first hot shower in a space you built with your own two hands?
That’s going to feel ridiculously good.