


Plan a weekend-ready raised bed by choosing a sunny, level spot and a long, shallow bed for fast warming. Use affordable, rot-resistant lumber, pre-cut panels, and corrosion-resistant fasteners; line the interior with breathable fabric. Assemble square corners, level the frame, and add a dry, well-drained floor. Fill with a loamy mix, starter compost, and a balanced fertilizer, then mulch lightly. Water deeply, monitor pests, and stage plantings to fit your climate—you’ll be set for productive soil by Sunday, with more tips ahead.
Choose Location and Bed Style for a Weekend-Worthy Raised Bed
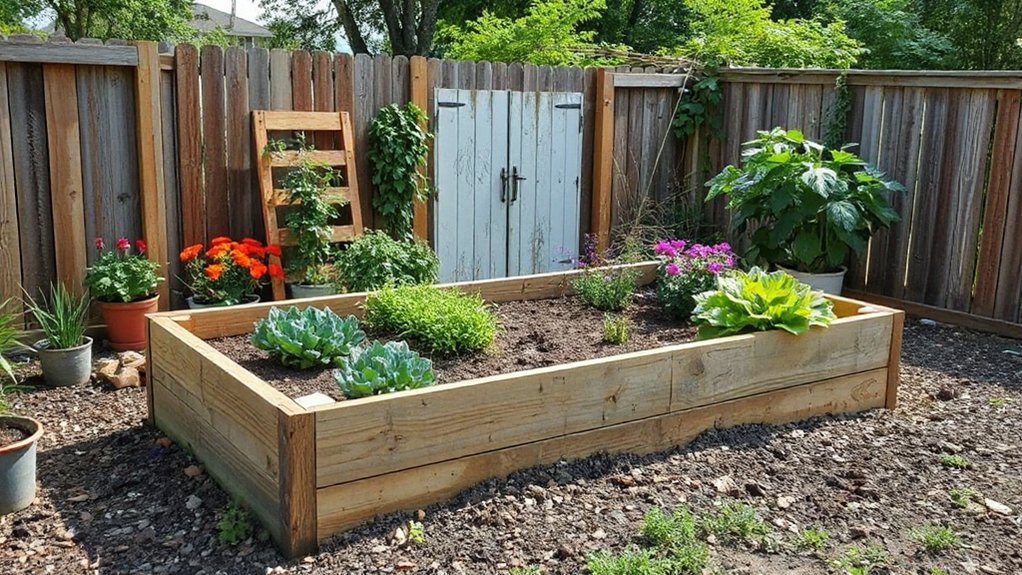
Choosing the right location and bed style is the foundation of a successful raised bed. You’ll want sun exposure that matches your intended crops, at least 6 hours daily, with a water source nearby for convenience.
Select a level site to minimize soil drainage issues and shifting. Consider bed height for knees and back—access should be comfortable during weeding and harvests.
Opt for timber, stone, or durable composite, ensuring corners stay square for stability and clean lines. Prioritize garden aesthetics: a tidy, bordered bed integrates with paths and containers, reducing soil erosion and improving accessibility.
For pest control, place beds away from dense vegetation and known pest corridors; a raised edge can deter some ground-dwellers.
Finally, draft a simple layout that you can build this weekend.
Size, Shape, and Performance Criteria to Meet Your Climate
Size, shape, and performance criteria must align with your climate to keep soil warm, moisture steady, and crops productive. Choose bed dimensions that suit sun exposure and wind patterns—longer, shallower beds warm quickly in cool climates; deeper beds favor heat retention in short growing seasons.
Shape should minimize edge exposure and maximize insulation: box or trench designs work well, with snug joints to reduce thermal loss.
Select soil mixes that balance drainage and nutrient-holding capacity for your conditions, and calibrate watering to seasonal rainfall.
For plant selection, pair crops with your heat or shade profile, staggering harvests to reduce pest pressure and nutrient drains.
Implement proactive pest control by timing plantings, physical barriers, and resistant varieties to sustain yields.
Affordable, Durable Materials for a Quick Build
You’ll start with affordable lumber that’s sturdy enough for years of use. Prioritize durable options, like pressure-treated or naturally rot-resistant wood.
Choose fasteners and coatings built for outdoor use. We’ll outline quick assembly tips that keep the build solid without sacrificing longevity.
Affordable Lumber Choices
Are you looking for lumber that’s both affordable and durable for a quick build? You’ll balance cost with longevity by choosing treated pine, cedar, or composite boards that resist rot without breaking the bank.
Look for green-graded lumber free of excessive knots, warped edges, or moisture damage. Compare flush-mowned or tongue-and-groove styles that simplify assembly.
Treat the frame with a food-safe sealer if you plan to grow edibles. Favor fasteners that resist corrosion in outdoor conditions.
Plan for proper drainage and a level base to prevent warping. Consider budget-friendly options like existing pallets that meet safety standards, but avoid toxic treatments.
This aligns with garden pest control and composting techniques, ensuring a durable, economical build without compromising soil health.
Durable, Fast Assembly
Seeking a quick-build that lasts, choose materials that pair durability with fast assembly. For a raised bed, opt for rot-resistant timber like cedar or treated lumber rated for ground contact, or sturdy concrete blocks.
Use pre-cut boards or modular panels to minimize cutting and measurement errors. Fasteners should be corrosion-resistant—galvanized screws or stainless steel—paired with impact drivers for speed.
Lining the interior with a breathable landscape fabric reduces weeds and rot risk while maintaining soil health.
Fit corner brackets or corner posts to reinforce joints without bulky hardware.
Plan for drainage by spacing bed sides and a loose, well-drained soil mix.
Consider garden aesthetics and plant selection to maximize impact with minimal changes to structure.
Efficiency and durability align for reliable weekend completion.
Must-Have Tools and a 30-Minute Site-Prep Plan
You’ll start with an essential tools checklist to cover your basic needs and prevent mid-project runs for replacement parts.
Next, follow quick site-prep steps that you can complete in about 30 minutes, keeping setup tight and focused.
Use time-saving hacks to streamline the process without sacrificing accuracy or safety.
Essential Tools Checklist
To tackle a raised-bed project efficiently, assemble a concise Essential Tools Checklist and a 30-minute site-prep plan that you can follow start-to-finish today. You’ll need a tape measure, spirit level, square, handsaw or circular saw, drill, driver bits, hammer, nails, screws, and a serrated knife for clean edges.
Include a shovel, garden hoe, rake, wheelbarrow, pry bar, and work gloves for safety. Have a box of fasteners, galvanized staples, and landscape fabric on hand.
For site prep, clear debris, mark dimensions, check level, and position fabric before framing. Keep a watering can or hose, mulch, and a repair kit nearby.
Consider garden pests and watering techniques as you plan, so tools support quick adjustments without backtracking.
Quick Site-Prep Steps
With a tight toolkit and a sharp plan, you can prep a raised-bed site in 30 minutes. Gather essentials first, then move methodically: clear, level, and mark the bed location to support garden aesthetics while keeping paths unobstructed.
Pack a compact purifier-style hose bib, stirrup hoes, a level, and a sturdy tape measure to guarantee uniform depth and straight sides. Focus on pest prevention by removing debris that harbors insects and laying a clean base for soil.
- Compact level and string line for alignment
- Shovel, rake, and hoe for grading and surface prep
- Garden gloves and eye protection for safety
- Soil test kit or pH strip for baseline
- Protective fabric or mulch for initial mulch alignment
Time-Saving Prep Hacks
When you’re tight on time, a focused 30-minute site prep hinges on a handful of must-have tools and a simple sequence: quick sweep to clear debris, fast-leveling to establish a true footprint, and precise marking to align the bed with paths and borders.
You’ll grab a sharp square, a carpenter’s level, a measured chalk line, a utility knife, and a sturdy tape. Begin with debris removal, then quick-level the footprint, and finish with exact layout for corners.
Use a compact hoe for minor trenching and a hand rake for final smoothing. Plan composting techniques for on-site amendments and establish pest management boundaries before soil goes in.
This disciplined prep prevents rework and accelerates planting windows.
Weekend Build Plan: Frame, Floor, and Fasten for Speed
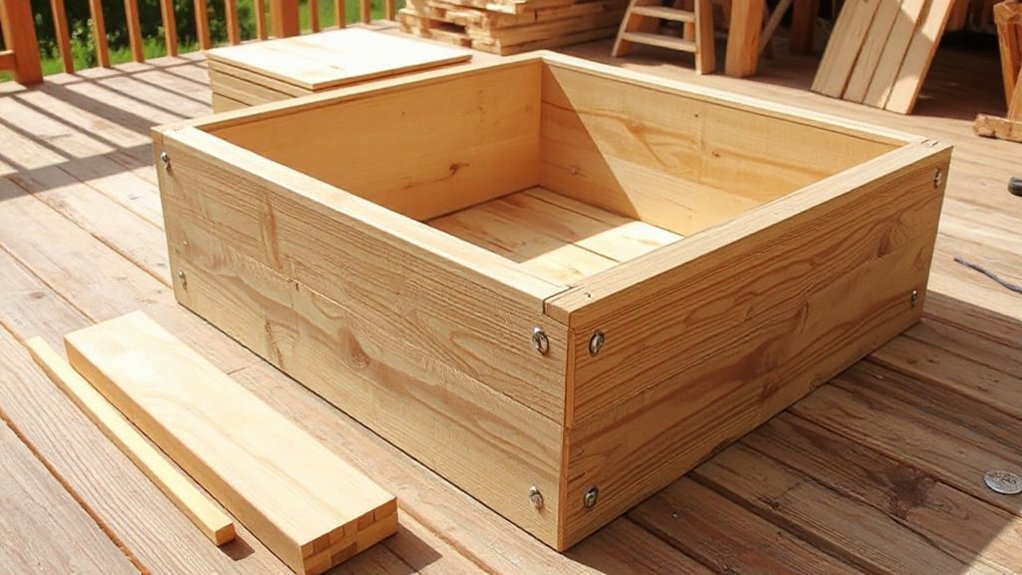
Once you’ve prepped the site, start with the frame to set the bed’s dimensions and guarantee square corners. You’ll assemble a rigid frame, using treated lumber, and verify plumb edges with a level. Install a floor that’s flat and dry, then secure with corrosion-resistant screws to prevent wobble.
Fasten joints tightly to resist wind and heavy loads, and double-check dimensions before attaching any trim. Clamp the sides, then drive corner screws in a star pattern for uniform stress distribution.
- Cut precisely and pilot drill to prevent split boards
- Use washers to distribute fastener load
- Seal joints to minimize moisture ingress
- Add a simple lip for soil containment
- Test for rigidity and square alignment, adjust as needed
Garden aesthetics and pest management influence decisions on trim height, ventilation, and edge finishes.
Soil Mix and Planting Strategy for Fast Growth
A fast-growing soil mix starts with a balanced foundation: equal parts lightweight compost, aged mulch, and a well-draining soilless component to guarantee both nutrients and structure. You’ll blend these materials to create a loamy, moisture-retentive base that feeds roots without compacting.
Next, choose a targeted soil nutrients profile: include a balanced slow-release fertilizer or organic amendments that supply nitrogen, phosphorus, and potassium in steady amounts.
For planting density, space crops according to mature size and sun exposure; tighter spacing accelerates canopy cover but watch for crowding and disease risk.
Layer starter compost at the surface to boost early uptake, then mulch lightly to preserve moisture.
Monitor moisture daily, adjust irrigation, and prune as needed to sustain rapid growth and uniform emergence.
Quick-Start Maintenance to Keep the Bed Thriving
To keep the bed thriving after that fast-growth baseline, establish a simple, repeatable routine you can follow weekly. You’ll perform quick checks, adjust moisture, and refresh soil as needed. Prioritize two disciplines: compost management and pest control, keeping them tight and predictable.
- Inspect surface moisture; water deeply when the top inch feels dry
- Mulch lightly to retain moisture and suppress weeds
- Add small amounts of finished compost as a quarterly top-dress
- Scout for pests; remove or isolate affected leaves promptly
- Rotate a portion of crops or herbs to reduce disease pressure
Troubleshooting Hiccups and Pro Tips for a Smooth Weekend

Hiccups happen, but you can keep the garden weekend-ready with a sharp, repeatable plan. When you hit snags, diagnose quickly and adjust. First, confirm your bed’s level and irrigation timing; a minor tilt or misty, inconsistent watering can derail progress.
Use a simple six-step checklist: secure fasteners, sharpen tools, stock soil amendments, pre-welt liners, stage plants, and test water flow on a small section. Garden pests emerge as the most common setback—install barriers early, monitor nightly, and remove intruders before they establish.
For watering techniques, aim deep, infrequent soakings rather than shallow, daily splash. Keep a log of tasks and weather, so you know what to do next weekend. With discipline, you finish strong and stay on schedule.
Frequently Asked Questions
How Long Does the Bed Last With Basic Maintenance?
A raised bed lasts several years with basic maintenance; expect durable framing and soil longevity when you rotate crops and top off soil periodically. Follow maintenance tips like drainage checks, weed control, and organic matter replenishment for long-term performance.
Can I Build a Raised Bed Without Power Tools?
Yes, you can. Use DIY materials and simple tool alternatives, like hand saws, clamps, and a drill with battery bits. Prioritize sturdy joints, predrilled holes, and planning; you’ll build a durable raised bed without heavy power tools.
What Is the Best Drip Irrigation Alternative for Weekends?
Yes, use a simple dripline with a timer, but the best weekend alternative is rainwater harvesting and organic mulch to delay evaporation, stabilize moisture, and reduce maintenance while you’re away.
Are There Low-Cost, Eco-Friendly Soil Options?
Ironically, yes—you can cut costs with compost alternatives and natural fertilizers. You’ll learn practical, eco-friendly soil options that actually work, lowering waste while you nurture your garden; you’ll feel confident, precise, and environmentally responsible.
How Do I Protect Roots From Heat During Summer?
Use mulching techniques to insulate roots, and deploy shade cloths during peak heat. Water deeply in early morning, keep soil consistently moist, and monitor for heat stress. Replace mulch as needed to maintain cooling and airflow around roots.
Conclusion
You’ve got this—build a raised bed over one weekend with the plan you crafted. Pick a sunny, accessible spot, choose durable materials, and assemble quickly with a tight frame, solid floor, and secure fasteners. Fill with a balanced soil mix, mulch the surface, and plant promptly for fast growth. Anticipate weather hiccups, but stay steady. It’ll be as reliable as a well-toured garden path, guiding you toward harvests and satisfaction with every season.