
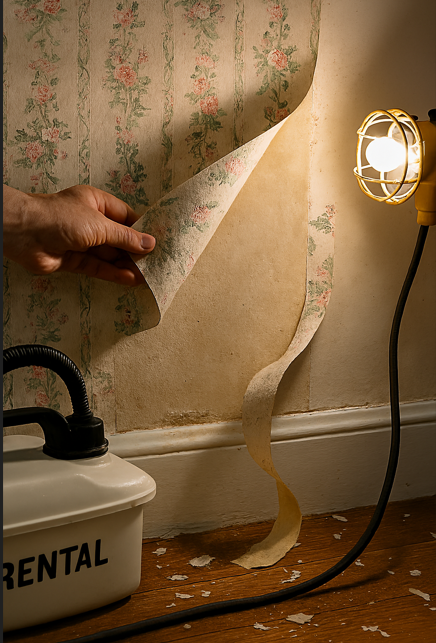

Knowing how to remove wallpaper properly is essential before you can redecorate, and while it’s never going to be the most glamorous DIY job, the right technique makes all the difference between a tedious afternoon and a week-long nightmare. Whether you’re dealing with modern strippable paper or layers of ancient vinyl that’s been painted over, understanding the correct approach will save your walls—and your sanity.
Many people think stripping wallpaper requires pro tools and a week of misery, but it’s often simpler than that. You’ll see how to tell vinyl from paper, when to soak and when to score, and which tools actually save time – yes, even on stubborn glue. Want to avoid drywall damage? You can. And you’ll walk away knowing the right method for your walls, ready to tackle the job without freaking out.
What’s the Deal with Removing Wallpaper?
Quick reality check
Ever wondered why some wallpaper peels off like a dream while other stuff seems glued for life? Vinyl over vinyl will fight you; in jobs I’ve done a steamer needed 2-3 passes to loosen it, whereas pre-pasted paper usually lifts after 10-15 minutes soaking. And if there’s backing paper or heavy adhesive you score first, then steam or apply a solvent like diluted fabric softener or commercial stripper. You’ll save time by testing a 2 ft square before committing – simple, quick, tells you everything.
My Go-To Methods for Peeling Off Wallpaper
Unlike one-size-fits-all guides, I pick a method based on the paper type, age of paste and wall condition: soap and water for modern strippable papers, vinegar or steamer for stubborn glue, and scoring plus a solvent for old vinyls. You’ll often start with a test patch the size of a tile to see how the paper reacts; on a 12×12 room that saved me hours. Mix tools and timing – a steamer for 10-20 minutes, or a 10-15 minute soak with solutions – and you’ll avoid extra sanding later.
The Good Ol’ Soap and Water Trick
Compared to chemical strippers, warm soap and water is gentler and cheaper, and it works great on modern strippable papers and loose seams. You’ll mix 1-2 tablespoons mild dish soap per gallon of hot water, apply with a sponge, let it sit 10-15 minutes, then peel with a plastic scraper; repeat if needed. I once cleared a 10×10 bedroom in about 90 minutes using only this method – minimal dust, minimal mess.
Vinegar – Seriously, It Works!
Where soap and water fails, vinegar often wins – especially on older paste and semi-stubborn vinyls. You’ll mix equal parts white vinegar and hot water, spray or sponge on, wait 10-15 minutes, then peel; score first if the paper is non-strippable. Don’t mix vinegar with bleach, and test a hidden spot to check paint adhesion.
Unlike commercial strippers, vinegar is non-toxic, costs pennies per use, and usually needs 1-3 applications on tough glue; I often reapply every 10 minutes until the backing loosens. For truly stubborn paste, follow vinegar with a steamer or use a scoring tool to let the solution penetrate – on old 1970s wallpaper I did three passes and finished with a light sanding before priming.
Got Stubborn Wallpaper? Here’s What to Try
You can get even the worst vinyl off without wrecking the wall. Use a mix of patience and method: scoring, a 1,500W steamer for big runs, heat guns for tricky spots, or a chemical stripper on baked paste. Want faster results? When I cleared 200 sq ft in an older home, scoring plus 30-45 minute steam passes saved hours. Expect 4-8 hours for a 12×12 room; test a patch first and have joint compound ready for repairs.
Heat Guns: Are They Worth It?
Heat guns can make short work of stubborn glue. Most consumer models run 300-600°F (150-315°C), and you’ll keep the nozzle 6-12 inches away while moving constantly so drywall doesn’t scorch. They’re excellent on vinyl and heavy paste – I removed a 6×8 foot wall panel in under 30 minutes. Still, practice on scrap, protect trim, wear gloves and eye protection, and ventilate the room.
A Chemical Approach: What You Should Know
Chemical strippers often beat tools when adhesive is baked on. Products like Citristrip, Dumond Smart Strip, or TSP solutions loosen paste in 15-30 minutes; enzyme-based strippers are gentler on drywall. You apply per label, rewet stubborn spots, then scrape and rinse. Use gloves, goggles, good ventilation, and check the MSDS for VOCs if you’re working in an occupied house.
But chemicals can ruin drywall paint and paper if you don’t prep properly. Test a small area first.
Neutralize and rinse well – warm water with mild detergent then a clear rinse – and let walls dry 24-48 hours before priming. For strong solvent or caustic strippers use a respirator with organic-vapor cartridges; citrus-based products still need good airflow. Keep kids and pets out until fumes clear.
Why I Think Planning Matters
With the recent surge in weekend DIY makeovers, planning matters more than ever. You save hours when you estimate 1-3 days per room, test a small patch first, and order or rent gear ahead instead of running to the store mid-job. Make a checklist – measure wall square footage, budget $20-80 for disposables and a possible steamer rental, note wallpaper type – and you avoid the usual backtracking and surprises.
Preparing Your Space for Action
Since more renters and weekend warriors are stripping walls, you need to protect what stays. Move furniture 3-4 feet away, remove outlet covers, hang plastic sheeting over doorways, and lay down 6-foot drop cloths or contractor plastic; tape seams with blue painter’s tape. Keep a trash bin and wet rags handy – dust and paste go everywhere if you don’t control the zone.
Gatherin’ the Right Tools – Don’t Skip This!
These days steamers and solvent gels are everywhere, but don’t get suckered in – the basics beat gimmicks. You’ll want a scoring tool, 2-3 inch and 6-inch putty knives, a flat scraper, a plastic scraper for delicate plaster, a steamer or 1-gallon spray bottle with hot water, heavy-duty gloves, safety goggles, a stiff-bristle brush, and a bucket of sponges. Expect to spend $30-150 depending on steamer choice.
For gear specifics think size and material – stainless steel blades resist rust, a 1/4 inch beveled scraper edge helps on stubborn paste, and a steamer rated around 1,000 watts will get through a 12×12 room in roughly 1-3 hours depending on paper type. For chemical removers use gel for vinyl or a diluted liquid (about 1:10 for light jobs), always test first, and keep spare blades and a paint scraper on hand for hidden glue patches.
What Happens When Things Go Wrong?
Often the worst thing you find isn’t just stubborn paste but mold, lead paint or drywall paper ripped off with the wallpaper – nasty surprises you didn’t bargain for. Homes built before 1978 may have lead paint, and water stains often hide mold colonies; adhesive can pull off the drywall face leaving 1/8-1/4 inch gouges. If walls feel soft or you smell mildew, stop and reassess before you make repairs worse.
Dealing with Damage – Yikes!
Scraping too hard usually makes the problem bigger, not smaller. You can patch nail holes and hairline tears with spackling, use joint compound for gouges up to 1/4 inch, and apply fiberglass mesh tape for cracks over 1/8 inch; sand with 120 then 220 grit and let compound dry 24 hours between coats. Prime with a stain-blocking primer so stains or tannins don’t bleed through your new finish.
Shoutout to Professional Help: When to Call It Quits
Sometimes the smartest move is to quit and call a pro – it’s often cheaper than a DIY nightmare. If you suspect lead (homes before 1978), see mold over 10 sq ft, face plaster delamination, structural cracks longer than 6 inches, or the job will eat more than a weekend or a few hundred dollars, bring in a specialist.
Pros will test for lead and mold, use HEPA vacs, commercial solvents and power tools, then skim-coat the wall for a uniform finish; they follow EPA RRP and mold-remediation guidelines.
Safety and proper testing matter.
Expect trades to bill roughly $50-100/hour; full-service removal plus repairs commonly run $2-8 per sq ft, while certified abatement can reach into the thousands.
Final Words
With these considerations, say you just bought an older house and your living room is buried in flaky, floral wallpaper – you can tackle this without calling a pro, you just need the right method for the wall, the paste and patience; start small, score and steam or use a chemical stripper based on the paper and wall type, and always patch as you go. Want faster results? Use a scraper and heat – but be gentle.
Take it slow – you’ll get there.