

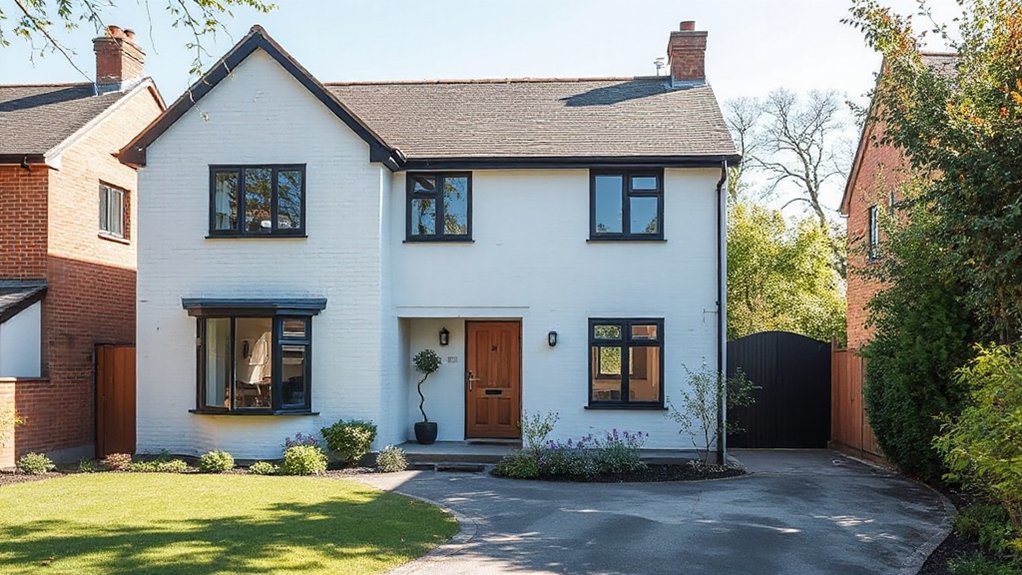
Take a real example: your 1980s detached house has punchy brickwork and boxy rooms, but you’re aiming for energy efficiency and modern comfort without losing its character. You’ll want a practical, phased plan that upgrades insulation, windows, and systems first, then refreshes finishes and layout to suit today’s living. The trick is to balance open feel with preserved features while boosting curb appeal, so you’ll keep momentum—and curiosity—without overwhelming costs or flow.
Why a 1980s Detached Home Still Elevates Value Today
There’s a lasting appeal to 1980s detached homes because they blend solid fundamentals with adaptable design. You’ll notice value persists because the era fused practical layouts with room for modernization, a mix that buyers still recognize.
From a Historical context perspective, these homes emerged during a shift toward open-plan living and efficient use of parcel space, making them feel contemporary even decades later. Architectural styles of the period favored straightforward silhouettes, brick or siding facades, and durable routines that resist rapid fashion cycles.
You benefit when evaluating resale potential since most 1980s structures offer solid insulation, confident framing, and flexible room adjacency. In short, the blend of sturdy construction and adaptable design keeps demand steady, reinforcing long-term value for disciplined buyers and investors alike.
Create a Practical, Phased Plan and Budget for Modernization
Start with a phased renovation roadmap that maps high-impact upgrades to your budget and timeline.
Prioritize budget-friendly upgrades that deliver visible gains now, while detailing longer-term changes for later phases.
Keep the plan precise, reusable, and adjustable as you refine costs and align with evolving needs.
Phased Renovation Roadmap
To tackle a phased renovation thoughtfully, you start with a clear, prioritized plan that aligns your budget, timeline, and design goals. Your roadmap breaks work into logical stages: structural, systems, then finishes, with clear dependencies and adjustable milestones.
Begin by auditing existing constraints—load paths, insulation, and moisture risks—so you avoid rework later. Allocate contingency, and set nonnegotiable target dates for permitting, trades, and inspections.
Assign vendors who can scale, and specify warranties, warranties, and handover criteria upfront. Schedule design reviews after each phase to confirm alignment with Vintage charm and Architectural symmetry, ensuring these elements guide decisions without stalling progress.
Track spend weekly, compare against a living baseline, and reassess priorities quarterly to stay on course. Maintain flexibility to adapt to market shifts and supply delays.
Budget Friendly Upgrades
A practical, phased plan for budget-friendly upgrades starts with a tight, itemized scope that prioritizes high-impact changes and ongoing value. You’ll target living spaces first, focusing on invigorating paint, updated lighting, and energy-efficient switches that modernize feel without a full overhaul.
Next, patch essential systems, selecting cost-effective fixes like draft reduction, insulation hits, and smart thermostat basics to cut ongoing costs.
For exterior appeal, balance vintage charm with low-cost improvements—painted timber accents, thoughtful cladding, and revitalized front entry—while preserving character.
Landscaping trends guide the yard’s modest improvements: native plantings, tidy borders, and drought-aware irrigation.
Schedule work in decisive phases, tracking budget vs. impact, then reuse furniture and repurpose materials where possible.
The result is a cohesive upgrade plan that remains affordable and refreshingly contemporary.
Balancing Open-Plan Living With Character: Design Criteria
Open-plan living can feel liberating, but it must still respect the home’s character by thoughtfully defining zones, preserving architectural details, and choosing materials that echo the 1980s shell.
You balance openness with structure by layering lighting, rugs, and furniture to create distinct, usable areas without cutting the space.
Prioritize sightlines that reveal vintage charm and architectural details, while integrating modern storage and durable finishes.
Use zones to support cooking, dining, and lounging, but maintain a cohesive flow with consistent materials and a restrained palette.
Consider sculptural furniture and built-ins to anchor the space.
Introduce texture through brick, timber, and fabric, and select window treatments that soften glare yet retain airiness.
This approach keeps openness practical, trend-aware, and timeless.
How to Reconfigure Circulation for Intuitive, Lived-In Flow
Start by defining clear circulation routes that guide you through the heart of the home without forcing detours. Aim for intimate room connections that feel natural—adjacent spaces should invite conversation and easy progression, not long walks.
Keep furniture and door positions aligned to sightlines and user flow, so the path itself becomes intuitive.
Clear Circulation Paths
You’ll identify pinch points, sightlines, and door swing conflicts, then redraw routes to create logical, unblocked flows.
Prioritise direct access between the kitchen, dining, and living areas, with clear progressions from entry to main living spaces.
Minimise corridor length by reconfiguring walls or removing unnecessary partitions, while preserving privacy for bedrooms.
Use subtle zoning cues—changes in floor level, ceiling height, or flooring—to guide movement without shouting.
Plan for practical details: ample storage along circulation, practical lighting at key junctions, and easy access to outdoor spaces.
Garden lighting, kitchen appliances, and task-focused lighting should support daily rhythms.
Intimate Room Connections
- Align sightlines with purposeful thresholds
- Use rugs and lighting to cue zones
- Optimize furniture placement for clarity and acoustics
Shell First: Why Insulation (Roof, Walls, Floors) Changes Everything
Insulating a 1980s detached house isn’t just about comfort—it’s the foundation of a modern, efficient rebuild. You’ll see immediate gains when you treat the shell first: secure continuous insulation, airtight detailing, and proper moisture control across roof, walls,, and floors.
Prioritize insulation upgrades that reduce thermal bridging and prevent cold spots, then couple with targeted air sealing to stop drafts at gaps around penetrations. In practice, you’ll plan for roof ventilation that balances moisture management with fresh air, while avoiding condensation on cold surfaces.
This approach stabilizes indoor temperatures, lowers heating loads, and improves acoustic performance. The result is a more predictable retrofit path, fewer surprises during amendments, and greater alignment with contemporary market expectations for comfort, efficiency, and long-term sustainability.
Upgrade Envelopes: Energy-Efficient Windows and Doors That Fit Style

Upgrading your envelopes starts with choosing energy-efficient window styles that suit the home’s character while cutting heat loss and drafts.
Pair those with secure door systems that don’t compromise on curb appeal or daily practicality, and you’ll gain both performance and peace of mind.
This balance of form and function sets the tone for the rest of your modernization.
Energy-Efficient Window Styles
Modern homes win with windows that balance performance and style, so start by choosing energy-efficient window styles that fit your 1980s shell without shouting retrofit.
You’ll prioritize low-U values, double or triple glazing, and good seals that keep drafts out while preserving natural light and curb appeal. Think slim frames that don’t dominate the façade and glass options that blend with existing brick or cladding.
Focus on window aesthetics that complement the era yet feel contemporary—balanced sightlines, muted profiles, and colors that echo the period without clashing with modern finishes. Emphasize daylighting strategies and ease of operation for daily use, all while cutting energy costs through sensible upgrades.
- Choose slim, unobtrusive frames with high-performance glazing
- Match colors and profiles to preserve the house’s character
- Prioritize airtight seals and easy maintenance for long-term comfort
Secure Door Systems
Secure doors are the practical complement to energy‑efficient windows, shaping both comfort and curb appeal as you modernise a 1980s shell. You’ll prioritise robust materials, airtight seals, and smart fit—so frames align with wall lines and exterior styling.
Consider multi-point locking, reinforced hinges, and weatherstripping that stops drafts without seen bulk. Choose doors with low U-values, thermal breaks, and compliant glazing options for entrances and back doors.
For style, pick finishes that echo brick or timber accents while keeping hardware cohesive with your interior mood.
Security enhancements matter: laminated or toughened glass, tamper-resistant screws, and reinforced strike plates deter intrusion.
Access control options—keyless entry, smartphone locks, or coded panels—offer convenient, trackable access for family and caretakers, enhancing daily flow and peace of mind.
Choose Low-Impact Heating and Cooling That Last

Choosing a low-impact heating and cooling system isn’t about chasing the latest tech—it’s about picking solutions that cut energy use, fit the home’s fabric, and stay reliable for years. You’ll prioritize energy efficiency and compatibility with smart technology, ensuring systems respond to real conditions rather than run on guesswork.
Focus on well-insulated spaces, efficient heat pumps, and balanced zoning to avoid overcooling or overheating. Look for durable components, straightforward maintenance, and proven performance in similar climates.
Design should minimize phantom loads and maximize night-time savings, with simple controls that you actually use. The goal is steady comfort, lower bills, and long-term resilience, not quick fixes.
- High-efficiency heat pumps with cold-climate performance
- Zoned systems and smart thermostats for precise control
- Durable, low-maintenance components and easy service access
Retrofit Electrical: Panels, Outlets, and Smart Basics
Upgrading your electrical panel and adding smart basics starts with evaluating load needs and futureproofing for devices you’ll rely on. Consider a panel upgrade to handle modern circuits.
Plus practical smart outlets that offer scheduling and energy monitoring without clutter. This is a flow from safe, compliant wiring to convenient, responsive living—keep it concise, code-compliant, and future-ready.
Electrical Panel Upgrades
When you retrofit an antique panel, you’re balancing safety, reliability, and future-proofing. Replace aging components, upgrade to a 200–amp or higher service, and guarantee proper grounding and AFCI/GFCI protection.
Plan layout to minimize wiring clutter while preserving practical access for future maintenance. Embrace updated breakers and modern bus bars, but respect vintage charm through discreet wiring routes and clean panel aesthetics.
Historic preservation-minded buyers value durability, so document sticker dates and replacement parts for provenance.
- Upgrade with code-compliant feeders and surge protection that hides behind the panel
- Use programmable AFCIs and smart-load monitoring for real-time efficiency
- Match panel enclosure finish to interior styling while maintaining accessibility and safety
Smart Outlet Basics
Smart outlets are a practical upgrade that fits neatly into a retrofit plan, letting you add controlled power, energy monitoring, and remote control without a full rewire.
You’ll want models with tamper-resistant shielding and built‑in surge protection to meet electrical safety standards while keeping a clean faceplate.
Choose outlets that support scheduling, automation scenes, and compatibility with your existing hub or voice assistant.
Plan placement near high‑use spaces—kitchens, living rooms, and home offices—for meaningful gains, and label circuits to prevent overloads.
Consider energy monitoring to track consumption and justify the upgrade.
Guarantee ground fault protection in damp areas and follow manufacturer instructions for wiring, strain relief, and faceplate installation.
Regularly test connectivity and update firmware to maintain reliability and electrical safety.
Refresh the Kitchen With Timeless, Durable Finishes
Start with durable, timeless finishes that can withstand daily use while still looking polished. In your kitchen refresh, pick materials that pair resilience with a refined look, so you don’t chase trends every season.
Consider classic white or soft gray cabinets, paired with stone or quartz countertops for a robust, low-maintenance surface. Use warm brass or matte black hardware to nod to vintage charm without shouting it.
Choose tile backsplashes with subtle patterns that echo architectural styles from the period. Prioritize lighting that brightens work zones and enhances texture.
This approach keeps the space practical, stylish, and resale-ready, while honoring the home’s history.
- Durable cabinetry and countertops that resist daily wear
- Subtle, period-inspired tile patterns and hardware
- Thoughtful lighting to highlight textures and lines
Modernize Bathrooms With Compact, High-Performance Fittings
A compact, high-performance bathroom setup delivers big on daily usability without sacrificing space or style. You optimise by selecting wall-hung toilets and slim-profile basins to free floor area while keeping accessibility clear.
Choose compact, dual-flush options and frameless glass showers to reduce visual bulk, then pair with concealed cisterns for a tidy, modern look.
Focus on proper heat and water efficiency with low-flow taps and thermostatic shower controls that maintain comfort without waste.
Install dense, moisture-resistant bathroom fixtures that are easy to clean and maintain.
For ambience, implement modern lighting—layered, including task, ambient, and mirror lights—to enhance safety and perception of space.
Finish with cohesive finishes and hardware in a coordinated metal or matte tone for a polished, scalable bathroom design.
Preserve Original Character With Contemporary Accents

Blending the old with the new is about careful restraint: preserve the house’s character while introducing contemporary accents that improve daily comfort.
You’ll balance the historical context with thoughtful updates, ensuring new elements respect architectural preservation principles. Start by selecting key original features to highlight—woodwork, stair details, or plaster walls—and frame them with modern, low-key additions.
Choose materials and colors that echo the era but stay clean, durable, and energy efficient. Integrate smart controls and lighting in a way that’s discreet, so the house remains legible as a 1980s home while feeling refreshed.
Prioritize clarity in layouts, avoid heavy overlays, and document changes for future preservation.
- Highlight original features with complementary contemporary touches
- Use era-appropriate palettes paired with modern materials
- Plan interventions that respect structure and integrity
Finishes Built for Family Life: Durability and Practicality
Durable finishes matter most when you’re raising a family in a 1980s home, so prioritize materials that stand up to heavy daily use without shouting their wear. You’ll want surfaces that tolerate spills, scratches, and high traffic, so choose hard-wearing woods, low-maintenance laminates, and scratch-resistant tiles.
Think practical layouts that minimize maintenance: wide hallways for easy cleaning, wipeable wall finishes in high-traffic zones, and durable upholstery fabrics that resist pilling.
For outdoor entertainment, opt for outdoor-rated materials that blend with indoors, like porcelain pavers or composite decking.
In balancing aesthetics with longevity, respect historical preservation cues where feasible—durable, authentic textures can echo the era without compromising resilience.
Pair rugged durability with thoughtful storage to keep busy family life orderly and stylish.
Sustainable Sourcing and Low-VOC Materials
When you’re sourcing materials for a modernized 1980s home, prioritize suppliers who disclose full ingredient lists and lifecycle data, so you can verify low emissions and responsible harvesting. You’ll want Eco friendly materials that don’t compromise durability, and you should favor those made from renewable resources to cut long-term footprint.
Look for low-VOC paints, formaldehyde-free composites, and finishes that meet strict indoor air quality standards. Request third-party certifications and traceability documents to ensure honesty in disclosure.
Consider local and recycled-content options to reduce transport emissions while supporting nearby economies. Stay practical and future-facing by documenting material sources and ensuring end-of-life recyclability.
- Source with full transparency and lifecycle data
- Choose low-VOC, non-toxic finishes
- Favor renewable resources and local, recycled content
Smart Tech That Adds Value Without Clutter

Smart tech should streamline living, not crowd it. You want devices that integrate with daily routines, not compete with them. Choose wireless, easily swapable systems that centralize control without dashboards sprawling across walls.
Prioritize discreet hardware: ceiling-mounted speakers, synchronized lighting, and thermostats that learn your patterns, then share energy data with you in plain terms. Aim for automation that saves minutes, like occupancy-triggered lighting and window shading that responds to sun angles.
Guarantee compatibility with existing plumbing and electrical layouts to avoid invasive retrofits. Think about garden landscaping and interior textiles as touchpoints the tech enhances, not clashes with.
Subtle sensors can monitor humidity or soil moisture, while a performance-focused hub keeps cables tidy and future-proof.
Boost Curb Appeal With Thoughtful Landscaping
A well‑kept approach to landscaping can instantly boost your home’s curb appeal while supporting energy efficiency and outdoor usability. You’ll shape a tidy, low‑maintenance foundation with evergreen structure, native plants, and smart irrigation to cut waste and water use.
Focus on real, visible improvements: define sightlines from the street, upgrade the driveway design with clean edges, and create welcoming, proportionate planting beds that frame the facade. Choose textures and colors that complement your 1980s architecture without overpowering it.
Keep maintenance practical with mulch, spacing, and seasonal tidy‑ups. Garden landscaping should enhance privacy and light, not overwhelm it, so test scale before planting.
- Optimize driveway design for smooth access and defined approach
- Select drought‑tolerant, low‑maintenance plant palettes
- Build layered planting beds that seasonally shift interest
Light and Color Strategies to Brighten 1980s Interiors
If you’re updating a 1980s interior, lighting and color choices should brighten rooms without overpowering their character. Begin with natural lighting: keep window treatments light and reflective, and opt for wide-pane or unobstructed glazing to maximize daylight.
Use cooler neutrals on walls to create airiness, then layer with warmer accents to avoid clinical stiffness. Color psychology matters; choose palettes that energize without shouting—soft blues, warm beiges, and restrained greens support calm, focused living.
Introduce luminance through strategically placed fixtures: recessed LED cans, sconces beside artwork, and a dimmable main pendant to control mood.
Finish with surface textures that bounce light—glossy tiles, lightly satin cabinetry, and mirrors in key zones. Maintain balanced contrasts, ensuring patterns remain subtle rather than dominant.
Resale-Friendly Tweaks That Pay Off in Today’s Market

To make 1980s detached houses appealing to today’s buyers, focus on clear, value-driven updates that don’t require major upheaval. You can boost resale by aligning updates with current preferences while respecting historical context and architectural styles.
Target kitchens and baths for efficiency, curb appeal, and durable finishes, then package spaces to feel modern yet authentic.
- Update fixtures and hardware to modern, timeless choices that nod to the era without overpowering the style.
- Improve lighting and storage with clean lines, under-cabinet LEDs, and smart solutions that don’t disrupt existing layouts.
- Refresh exteriors with a simple palette, quality siding, and landscaping that enhances curb appeal.
These tweaks deliver tangible ROI, appeal to trend-aware buyers, and respect the home’s architectural narrative.
Frequently Asked Questions
What Adds the Most Value to 1980S Detached Homes Today?
Upgrading kitchens and baths adds the most value. You should prioritize an exterior renovation with modern insulation and historic preservation details, then align landscaping and curb appeal, while preserving vintage character for a practical, trend-aware improvement.
How to Phase Modernization Within a Realistic Budget?
You should phase modernization by prioritizing costed steps, starting small and expanding. Track Historic preservation, energy efficiency gains, and ROI; reassess yearly, adjust pacing, secure permits early, and batch upgrades to avoid budget shocks while maximizing impact.
Can Open-Plan Layouts Compromise Original Charm?
Open-plan layouts can soften historic preservation, yet you preserve architectural integrity by subtlely preserving original partitions and sightlines. You’ll balance openness with heritage, ensuring contemporary flow without eroding the home’s character and timeless charm.
Which Low-Voc Materials Balance Cost and Durability?
You’ll want Eco friendly materials that balance durability and price, choosing Cost effective solutions like low-VOC plywood or bamboo flooring, with durable paints. These options stay practical, trend-aware, and long-lasting while keeping costs predictable for your project.
How to Future-Proof With Smart Tech Without Clutter?
Integrated security and energy efficiency, you future-proof with modular smart tech that scales. Imagine a single dashboard, a single cable cut, and you’re calm: you optimize usage, reduce clutter, and expand devices as needs evolve.
Conclusion
In wrapping up, you’ve got a practical path to modernize without erasing charm. Prioritize insulation, energy-efficient systems, and fresh, durable finishes while preserving original character. Phase projects to manage costs, natural light to brighten spaces, and smart tech to add value without clutter. Think curb appeal first, then interior upgrades. The result? A more comfortable, market-ready 1980s detached home that still feels like home — with a confident, future-ready glow. And yes, you’ll thank yourself later.
-appeal-