
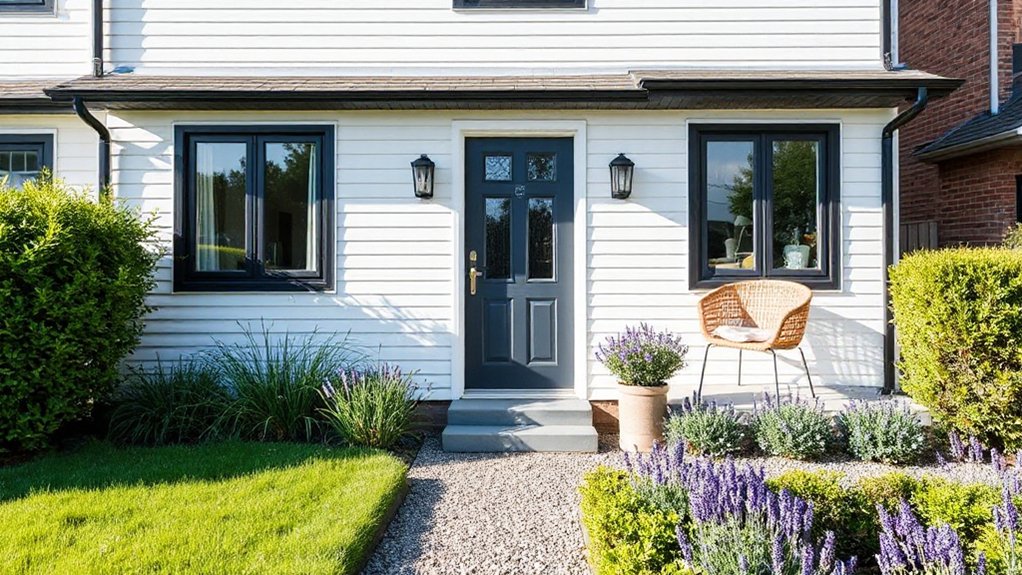

Nearly half of semi-detached homes suffer from minor, nagging gaps in comfort that don’t require major work to fix. You can start with practical, low-cost updates that breathe new life into both sides of the wall—think fresh neutrals, smarter lighting, and tidy outdoor entries—without disruption. Set a tight budget and a clear 6-week plan to track progress. But there are caveats and smart tradeoffs to weigh before you embark on this project.
Why Refresh a Semi-Detached Home Now: Common Pain Points and Payoff
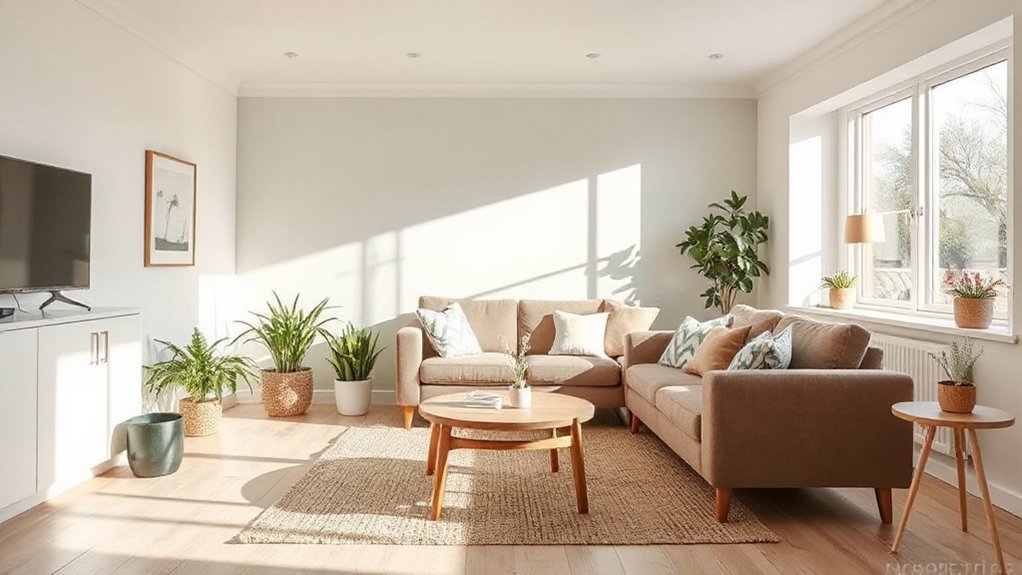
Revitalizing a semi-detached home now makes sense because shared walls magnify small issues into bigger problems if ignored. You’ll notice damp patches, drafts, or creaking floors sooner in a pair of homes, so addressing them early saves framing and insulation costs later.
Focus on practical payoffs: improved comfort, lower energy bills, and steadier resale value.
Historical preservation matters if you live near heritage areas—document existing features and plan updates that respect vintage details while boosting efficiency.
Zoning regulations may influence exterior changes, so verify allowed materials, setbacks, and any required approvals before buying supplies.
Prioritize high-impact, low-cost tasks first—air sealing, insulation, and quick cosmetic refreshes—that reduce disturbance, speed up gains, and keep your budget predictable.
Plan a phased refresh to avoid overextension and maximize lasting payoff.
Assess Your Space for Updates Without Major Demolition
Start by walking each room with a critical eye, noting what’s functional vs. what’s dated or worn, so you can plan updates without tearing things apart. You’ll map space division to see how rooms flow and where minor rearrangements yield better use without major trades.
Look for surplus walls you could remove or reconfigure, but focus on cosmetic or nonstructural tweaks first: paint, trim, lighting, and flooring options that don’t demand messy demolition.
Assess what you can swap in to improve acoustics and privacy, like door seals or simple room dividers. Consider noise insulation between zones—seal gaps, upgrade weatherstripping, and add soft-flooring where footsteps travel.
Prioritize updates that add perceived value without heavy disruption, and document costs for a practical, phased plan.
Set a Realistic Budget and a Practical Timeline (with a 6-Week Plan)
Set a realistic budget by listing must-haves vs. nice-to-haves and price-checking upfront so you don’t hit sticker shock.
Create a practical 6-week timeline that chunks tasks by room, material lead times, and contractor windows to keep costs predictable.
Track every expense as you go, and adjust plans quickly if a project overruns or you find a better value option.
Set Realistic Budget
Before you begin, define a realistic budget and a practical 6-week timeline you can actually stick to. List all essentials first, then identify optional upgrades you’ll defer if costs rise. Set a hard overall cap, plus weekly limits, and track every expense in real time.
Allocate 60–70% of funds to core updates (plumbing, wiring, insulation) and 30–40% to low-cost finishes that boost perceived value. When budgeting, include a 10–15% contingency for surprises.
Prioritize garden maintenance and energy efficiency upgrades that deliver long-term returns, like weather sealing, smart thermostats, LED lighting, and efficient appliances.
Compare quotes from at least two contractors and negotiate milestones. Create a 6-week pacing map with non-negotiables and adaptable tasks, so you stay focused, avoid delays, and finish within budget.
Create Practical Timeline
To create a practical timeline, start by translating your budget into a 6-week calendar with clear non-negotiables and flexible tasks. You’ll map costs to weekly actions, prioritizing essential fixes first, then cosmetic refreshes, while keeping legal considerations in mind.
Align tasks with realistic timeframes to avoid overcommitment, and build buffer days for contingencies. Focus on garden maintenance as a low-disruption anchor that preserves value without major work.
- Define weekly milestones tied to your budget, from planning to final touch-ups.
- Assign responsible people, clear deadlines, and minimum acceptable outcomes.
- Schedule inspections or permit checks early to avoid delays.
- Track spend weekly; adjust scope to stay within limits and avoid overruns.
Quick Cosmetic Upgrades That Deliver Big Impact
Want quick, noticeable changes without a full renovation? You can make a big impact with small, targeted upgrades.
Start with curb appeal: tidy your pathways, trim shrubs, and add low-cost outdoor lighting to emphasize angles and entry points. Outdoor landscaping needn’t be elaborate; a few drought-tolerant perennials can soften edges and boost first impressions.
Inside, swap dated hardware—knobs, pulls, and hinges—for brushed finishes that read fresh without a full replacement. Replace outlet and switch plates to bright white or matte black to sharpen contrast.
Refresh cabinetry with new doors or paint and upgrade lighting to brighter, cooler tones for cleaner spaces.
Prioritize energy efficiency: seal gaps around doors, add weatherstripping, and install efficient LED bulbs. Small investments, clear results, less disruption.
Color Strategies for Bright, Cohesive Walls in Small Spaces

Color choices can make small walls feel bigger and more cohesive, so start with a simple plan: pick a light, neutral base and repeat a complementary accent hue in trims, artwork, and furniture accents.
- Choose colors with solid undertones to support color psychology, favoring cool neutrals for calmness and warmth for coziness.
- Prioritize high-quality, matte, or eggshell finishes to improve paint durability and reduce glare in tight spaces.
- Limit two accent colors that echo furniture textiles or rugs, keeping flow seamless.
- Test swatches in various light and apply inexpensive edge-trim to prevent edge color bleed and maintain crisp lines.
Lighting That Transforms Mood and Perception
Lighting isn’t just about visibility; it reshapes mood, depth, and perceived space in a semi-detached home. You’ll gain instant impact by layering light: ambient overhead, task lighting at desks and counters, and focused accents on art or architectural features.
Choose warm, daylight-balanced bulbs (2700–3000K for warmth; 3500–4000K for task clarity) and avoid mixed temps that clash. Use dimmers on main fixtures to adapt mood per occasion, from bright mornings to cozy evenings.
Highlight pathways with low-level LEDs or wall sconces for safety without glare. Consider ceiling-height myths; reflectors and uplights can visually enlarge a room without adding fixtures.
For mood perception, pair lighting with color accents and textures—soft finishes in living spaces and brighter task zones for clarity and energy efficiency. Lighting ambiance becomes functional, inviting, and affordable.
Budget-Friendly Flooring Fixes and Surface Updates
If you’re updating a semi-detached home on a budget, start with the floor and surface tweaks that deliver the biggest impact per dollar. You’ll tighten the look with practical, low-cost options that refresh rooms fast, while keeping future updates in mind. Include garden landscaping cues to extend curb appeal and a sense of space, and mention attic insulation to curb drafts that undermine surface upgrades.
- Refinish existing hardwood or laminate with affordable coats to brighten rooms without full replacement.
- Peel-and-stick vinyl planks or tiles for quick texture changes that hide flaws and reduce prep time.
- Refresh floors with no-rail rugs or runner pads, pairing color with lighting to alter perception.
- Patch, seal, and repaint baseboards and surfaces to unify spaces and reduce noise.
Note: prioritize efficiency, coastal tones, and durable finishes.
Smart Storage Hacks for Tight Spaces (Under-Stairs, Closets, Corners)

Under-stairs nooks, tight closets, and awkward corners hide potential storage goldmines, so start tight: measure every space, then tailor solutions that fit without bulky furniture. You’ll maximize every inch with hidden compartments integrated into baseboards, risers, and shelves, so items disappear from sight yet stay accessible.
Go vertical with creative shelving: shallow, adjustable racks behind doors, corner recurves, and stackable bins that align with studs. Use pull-out organizers in narrow gaps for spices, cleaning supplies, or tools, and label clearly to prevent rummaging.
Recycle narrow shoe cubbies into entryway storage for keys and mail. Install hooks and magnetic strips along back walls to free floor space. Choose low-profile containers, and opt for modular systems you can expand as needs shift.
Layout Tweaks That Improve Flow in a Semi-Detached Home
You can boost flow by sizing doorways and removing bottlenecks to create smooth progressions between rooms. Consider open-plan connectivity with strategically placed sightlines and furniture pegs that don’t crowd pathways.
We’ll compare costs and impact of layout tweaks, so you can choose practical, budget‑friendly changes that feel bigger without major renovations.
Flow-Boosting Doorways
To boost flow in a semi-detached home, focus on doorway design that invites movement rather than blockers. You’ll maximize space without major remodels by choosing openings that feel generous and direct.
1) Swap heavy doors for slim, hollow-core or pocket options to preserve wall space and reduce drag on traffic.
2) Use consistent doorway widths (at least 30 inches) to support easy passage and improve doorway flow.
3) Add clear sightlines with minimal trim and avoid obstructive frames that interrupt passageway design.
4) Consider swing direction and door stops; recessed hinges or bi-folds can shrink wasted space while maintaining privacy.
These tweaks keep costs modest, improve circulation, and maintain a cohesive flow through key rooms.
Open-Plan Connectivity
Prioritize proportional furniture and consistent finishes to maintain flow. Add, not complicate: a shared rug that spans seating and dining improves coherence, while a single color family keeps passages smooth.
Integrate garden landscaping and outdoor lighting to extend living outdoors, making the seam between interior and exterior almost invisible. Choose affordable, modular pieces and layered lighting to adapt as needs evolve without major renovations.
Door and Trim Updates for Instant Polish
Door and trim updates are the quickest way to lift a semi‑detached entryway without a full renovation. You’ll get instant polish with minimal cost and mess, focusing on small, high-impact changes.
1) Swap door hardware for matte black or brass hinges, knobs, and a coordinating strike plate to refresh the look without repainting the entire door.
2) Clean, fill, and revarnish or paint trim with a fresh coat—trim painting in a neutral tone yields crisp edges and saves materials.
3) Tighten gaps with weather stripping and a new door seal to reduce drafts and improve feel.
4) Add a simple door viewer or upgraded knocker for practical updates that read as intentional design.
These steps deliver a refined entry without major work.
Kitchen Face-Lifts That Don’t Require Tearing Out (Budget Version)
You can modernize your kitchen with quick, budget-friendly upgrades that don’t involve a full gut. Start with surface-level changes like fresh paint, new cabinet hardware, and a peel-and-stick backsplash to refresh the look without tearing out.
Focus on cheap, high-impact updates that boost perceived value and workflow efficiency.
Quick Budget Upgrades
If you’re aiming for a fresh kitchen look on a tight budget, you can achieve noticeable impact without tearing out or remodeling. Quick Budget Upgrades focus on small, doable changes that look deliberate and cost-efficient.
1) Swap cabinet hardware with matte black or brass pulls to redefine the counters’ edge.
2) Add a peel-and-stick backsplash in a contrasting color or subtle pattern for instant depth.
3) Refresh lighting with under-cabinet LEDs and a brighter ceiling fixture to brighten work zones.
4) Repaint doors and frames in a cohesive shade, plus new hinges if needed, to unify the space.
Tip: integrate garden lighting and outdoor furniture ideas outside your kitchen area to extend the refreshed vibe and tie the home’s exterior to the interior feel.
Surface-Level Kitchen Refresh
Ever wondered how to give your kitchen a noticeable lift without tearing things out? Focus on a surface-level refresh that delivers impact without a full remodel. Start with decluttering and smart storage; reorganize for daily use, so you save steps and reduce countertop chaos.
Install open shelving or pegboard to display essentials and free up cabinet space, then group items by function to boost efficiency. Update hardware on existing cabinetry and add under-cabinet lighting to brighten work zones without major mess.
Consider affordable appliance upgrades—compact, energy-efficient models or a stylish microwave shelf—to modernize the space without overhauling layout. Finish with a neutral color refresh on walls and a few budget-friendly decor accents.
Kitchen organization and appliance upgrades can transform the feel with minimal disruption.
Bath Updates That Feel Premium on a Budget
A budget-friendly bath refresh can feel premium without breaking the bank, and it starts with smart, visible upgrades. You’ll gain impact with targeted changes that stay affordable, durable, and tasteful, pairing vintage charm with garden aesthetics.
- Swap hardware: brushed nickel or matte black handles, faucets, and towel bars for an instant upgrade.
- Refresh the tub and shower: regrout, reseal, or apply a prefabricated liner to revive shine without a full remodel.
- Update lighting: add a bright, warm fixture and mirror with built-in LED for ambiance and function.
- Use decals and paint accents: soft whites with pale greens or blues echoing garden tones, plus a subtle ceiling touch.
Textiles and Accessories to Elevate Texture and Warmth

Textiles and accessories are the easiest way to add warmth and texture without a full redo. You’ll gain depth by thoughtful Textile layering, combining rugs, throws, and cushions in coordinating but varied textures.
Choose neutral bases and inject color with a few decorative accents like velvet pillows or a woven wall hanging.
Aim for scale: large swaths on sofas, smaller pieces on chairs, and a runner to link spaces.
Layer lighting with folded blankets draped over the back of a sofa to catch glow from lamps.
Consider practical fabrics—cotton blends, wool, linen—chosen for durability and easy cleaning.
Pick affordable options from budget shops or end-of-season sales, and refresh seasonal textiles to avoid repetition.
Small changes yield noticeable warmth without breaking the bank.
Curb Appeal and Entryway Ideas to Boost First Impressions
First impressions start at the curb, so focus on a clean, welcoming approach that won’t break the bank. You can elevate the entry without major work by combining simple, durable updates that pay off in curb appeal.
- Refresh the path with affordable edging and a crisp broom-clean surface, and add a low-cost gravel strip for contrast.
- Improve garden landscaping with a few hardy perennials, mulch, and a defined border to guide the eye toward the doorway.
- Layer outdoor furniture near the entry: a small bench or chair, weatherproof cushions, and a slim console for keys and mail.
- Update lighting with a solar or LED path light and a porch fixture that highlights the door and enhances safety, color, and warmth.
Shared-Wall Realities: How to Handle Semi-Detached Specifics Gracefully
You’ll want to start by acknowledging shared-wall sensitivities and how sound travels between units, so you can address concerns before they become complaints.
Plan practical, low-cost adjustments—like insulation tweaks, door seals, and mindful layout shifts—that reduce noise transfer without major renovations.
Keep neighbors in the loop with clear expectations and timing, so everyone feels respected and you avoid costly disputes.
Shared-Wall Sensitivities
Shared walls in semi-detached homes demand practical sensitivity: small sound leaks, vibration, and airborne particles travel through studs, cavities, and masonry, so you should identify weak points and address them early.
- Inspect seals at joints and windows for drafts; upgrade with weather stripping and caulk where needed.
- Add mass or decoupling strategies to reduce sound transmission, focusing on shared studs and drywall layers.
- Use low-dust materials and isolate work zones to minimize particle spread into your neighbor’s space.
- Establish clear neighbor communication: notify planned changes, expected noise windows, and access needs to maintain goodwill and trust.
Neighbors’ Noise Considerations
Even with good insulation, your semi-detached neighbor’s peace depends on considerate noise planning and clear communication. You’ll minimize disruption by mapping quiet hours and scheduling louder tasks for daytime, when possible.
Start with neighbor communication: brief them on upcoming renovations, expected durations, and preferred contact methods. Use simple signals for urgent issues, like a door hanger or text alert.
Invest in practical sound controls: mats under heavy equipment, silicone door sweeps, and vibration pads for appliances. When vibrations can’t be avoided, place machines away from shared walls and stagger operation times.
Document commitments in a short note or contract to reduce misunderstandings. Keep dialogue constructive, address concerns promptly, and follow through on agreed limits.
This approach emphasizes noise mitigation without escalating conflicts or costs.
Seasonal Refresh Ideas to Keep Momentum Year-Round
Wondering how to keep the energy and progress rolling throughout the year? You can sustain momentum with seasonal tweaks that aren’t heavy or costly. Plan small, repeatable routines that show quick wins and build confidence.
- Schedule quarterly reviews to adjust lighting and plantings, focusing on garden landscaping and outdoor lighting for year-round curb appeal.
- Rotate color accents with affordable, durable textiles and containers, swapping themes by season.
- Refresh entryways with inexpensive, weather-resilient decor and a tidy, welcoming path.
- Budget-friendly maintenance tasks (filters, seals, caulk) timed with seasonal shifts to prevent bigger costs later.
Keep a simple checklist, track costs, and reuse materials where possible to stay under budget while preserving momentum.
Quick DIY Projects You Can Do Safely as a Beginner

Getting started with quick, beginner-friendly DIY projects is about small, safe steps you can complete in a day or weekend without special tools. You’ll focus on low-cost upgrades that deliver noticeable results.
Begin with quick declutters and reorganization to maximize space, then tackle surface refreshes like drawer liners, contact paper, or fresh paint on a single wall.
For garden planning, choose inexpensive containers, mulch, and hardy plants to boost curb appeal without digging into large projects.
When arranging rooms, test furniture arrangement and lighting before buying new pieces; rotate existing furniture to open sightlines and improve flow. Use tape to map layouts, and measure carefully.
Finish with a simple, durable sealant or stain on a wood surface to extend life and appearance, keeping costs minimal.
When to Call in Pros: Signs You’ve Reached Your Limit and How to Hire Smart
Sometimes you’ll hit a wall where DIY just isn’t the safest or smartest move for your space; when that happens, know the telltale signs you’ve reached your limit and what to do next. You’ll recognize risk, time drain, or code concerns, then pivot to hiring smartly instead of winging it.
1) Identify clear safety or structural red flags, then estimate costs and timelines before calling pros.
2) Check for licensing, insurance, and guarantees; request written estimates and scope of work.
3) Prioritize projects with ongoing maintenance like home automation upgrades or sprinkler wiring to avoid repeat visits.
4) Ask for referrals, compare bids, and insist on detailed invoices for any gardening tips or low-voltage wiring.
Frequently Asked Questions
Can I Refresh a Semi-Detached Home on a Tight Schedule?
Yes, you can refresh a semi-detached home on a tight schedule. Focus on landscape gardening and furniture arrangement, maximize light, declutter fast, use affordable swaps, and plan a tight timeline with clear, cost-conscious steps and quick wins.
What Hidden Costs Might Surprise Me During Updates?
Surprisingly, 60% of renovations reveal hidden costs beyond estimates. You’ll encounter overruns on permits, delivery fees, and disposal. To minimize, plan cost effective lighting, opt for eco friendly materials, and budget contingencies for unexpected repairs. Stay vigilant.
How Do I Improve Privacy Without Major Renovations?
You can boost privacy with landscaping enhancements and subtle outdoor lighting. Plant tall, dense hedges or a trellis wall, staggered shrubs, and privacy screens. Use warm, motion-activated outdoor lighting to deter neighbors while saving on energy costs.
Are There Risks Repainting Walls Near Shared Plumbing?
Yes, repainting near shared plumbing can leak fumes and cause moisture issues if you skip wall preparation and proper ventilation. You maximize safety by wall preparation, choosing low-VOC paint, and careful paint selection, plus sealing gaps and checking closests.
What Permits or Approvals Could Be Required?
You’ll need to check neighborhood regulations and zoning restrictions before changes; obtain permits if required, and coordinate with your HOA or city. Budget for application fees, inspections, and timelines, ensuring compliance to avoid delays or fines.
Conclusion
If you refresh with these budget-minded tweaks, your semi-detached home can feel brand new without major upheaval. Start small: a neutral repaint, new hardware, tidy landscaping, and layered lighting. An average homeowner can cut energy bills by up to 15% with better sealing and efficient bulbs, boosting comfort and curb appeal. Track progress with a 6-week plan, celebrate quick wins, and stay pragmatic about tasks. You’ll gain impact per pound spent and fewer future fixes.