
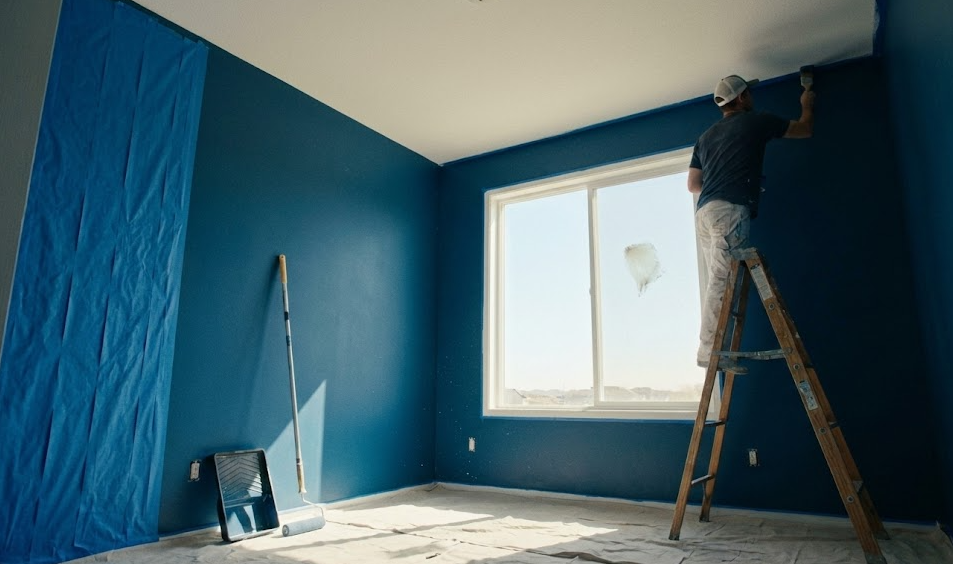

Understanding how to paint a room perfectly is about far more than just slapping some colour on the walls—it’s the preparation, technique, and attention to detail that separates a professional-looking finish from a patchy amateur job. Whether you’re refreshing a tired bedroom or completely transforming your living space, getting it right first time saves you money, frustration, and the embarrassment of having to live with wonky edges and visible brush marks.
Intro to the Perfect Room Transformation
Why this transformation works
You can transform a tired room in a weekend and save 30-50% versus hiring pros. You’ll sand glossy spots with 120-grit, prime patches with a fast-dry primer (4 hours), and plan on about 1 gallon per 350 sq ft for two coats. Cut-in 2-3 feet at a time using a 2.5-inch angled brush, keep a wet edge, then roll with a 9-inch sleeve – 3/8 to 1/2 inch nap for smooth-to-lightly-textured walls; back-roll to even texture. Want proof? You can finish an average 12×14 room in 6-8 hours if you prep smart.
Getting Your Gear Together – What’s in Your Paint Kit?
You don’t need every gadget at the hardware store – a lean kit wins. You want an angled 2-1/2″ sash brush and a 1″ trim brush, a 9″ roller plus a 4″ mini with naps of 1/4″, 3/8″ and 1/2″, an extension pole, tray and metal grid, 1.5″ painter’s tape, 9×12 drop cloths, 2″ putty knife, caulk gun, sanding block (120-220 grit) and a respirator for solvent work – that covers 95% of jobs.
Brushes, Rollers, and the Must-Have Tools
The best brush isn’t always the priciest one; pick an angled synthetic nylon-poly 2-1/2″ for latex cut-ins and a natural-hair brush for oil-based trim. Use a 1″ sash or trim brush for tight corners. For rollers, 1/4″ nap for smooth surfaces, 3/8″ for light texture, 1/2″ for standard drywall and 3/4″ if you have heavy orange-peel. Add a 4″ mini for doors and cabinets, a bucket grid, 120-220 grit sanding and a 5-in-1 tool – simple, but effective.
Choosing the Right Paint – Seriously, It Matters!
Glossy ain’t always better – sheen affects durability and flaw visibility more than color does. One gallon covers roughly 350-400 sq ft, most walls take two coats, and deeper hues often need a tinted primer or extra pass. Pick water-based acrylic latex for most interiors, oil or alkyd for trim if you want harder finish, and aim for low-VOC options (under 50 g/L) if ventilation’s limited.
A higher-end 100% acrylic will often save you time – in our last room repaint a mid-tier acrylic needed two coats across 60% of the walls while a premium product covered in one, so you actually spent less time overall even though the cans cost more. Want to hide stains or smoke? Use a shellac-based primer like Zinsser BIN first; water stains call for an oil-based stain blocker. Sheen choice matters: flat hides imperfections, eggshell or satin works for living spaces, semi-gloss or gloss for trim and kitchens since they tolerate scrubbing. And if you’re covering textured plaster expect reduced coverage – plan for 250-300 sq ft per gallon there, not 350-400.
Prepping Like a Pro – Don’t Skip This Step!
Studies show that 80% of paint issues trace back to sloppy prep, so you treat prep like the foundation of the whole job. Pull down curtain rods, remove outlet covers, fill nail holes with lightweight spackle, sand smooth, and wipe walls with a damp cloth – those quick fixes save you hours later. And if you’re short on time, do one wall at a time but don’t skimp on sanding; smooth surfaces make paint behave better.
Clearing the Space – Out with the Old, In with the New
Removing 90% of furniture from the room before you paint cuts cleanup time by up to half and lets you work without awkward obstacles. Move big pieces to another room or the hallway, stack smaller items in labeled boxes, and use 6-mil drop cloths for floor protection. Want faster turnaround? Rent a small storage pod for bulky stuff – worth it if you’re painting multiple rooms.
Taping Off Surfaces – The Secret to Crisp Lines
Painter’s tape can prevent up to 95% of edge bleed when applied correctly, so you pick the right tape for the surface – low-tack for new drywall, medium for trim, and high-adhesion for rough or glossy surfaces. Press the tape down firmly, seal the edge with a putty knife, and peel at a 45-degree angle while paint is still tacky for the sharpest line.
Blue painter’s tape can hold cleanly for up to 14 days on painted walls, but if you’re working on textured plaster or exterior trim you might choose a specialty tape like green Frog Tape that uses paint-block technology. You should press the tape edge down with a putty knife or your thumbnail, overlap at corners, and score the tape with a utility knife when cutting into moldings. Peel slowly, pulling back toward the painted surface at about 45 degrees while the paint is slightly tacky – do that and you avoid lifting fresh paint and getting fuzzy edges.
Cut-In Like a Champ – Here’s How It’s Done
People assume cutting in is just about a steady hand; it’s really about the right brush, paint load, and rhythm. Use a 2-3 inch angled sash brush, load only about one-third of the bristles, hold at roughly 45 degrees and work in 2-3 foot sections so the edge stays wet and blends with the roller. Brace your forearm on the wall if you need to, move your whole arm not just the wrist, and pace yourself – cleaner lines come from technique, not speed.
Mastering the Edges – The Art of the Cut-In
Many think edges are only decorative, but precision is mechanical – a set of motions you can practice. Start by cutting a 1/4 inch buffer from the ceiling or trim, then pull the brush toward the room with light pressure in two short strokes, reload and repeat. Use a 2-3 inch angled brush for corners and a flat 3 inch for long runs, and if you see a blob, swipe it outward and blend before it skins over.
Tricks for a Flawless Finish – Avoiding Mistakes
People often assume drips and ragged lines are inevitable; they’re not if you control paint and timing. Keep a wet edge by finishing each wall within 10-15 minutes, blot excess paint on the can rim instead of overloading the brush, and use a damp cloth to catch tiny smears. Tape helps for awkward joins but press it firmly and remove while paint is still tacky to avoid tearing the film.
Don’t assume tape is always the easy fix – misused it causes more work. If you opt to tape, pick blue painter’s tape, run a putty knife or your fingernail along the edge to seal it, then cut in with light strokes; load the brush only one-third so you avoid puddles. If you get a drip, lift it with the tip of the brush then feather outward, and pull tape off within 30-60 minutes while paint’s still slightly wet to prevent peeling. Keep a small artist brush and a damp rag handy for touch-ups you can do in under a minute.
Rolling It On – Rolling Techniques You Need to Know
Like mowing a lawn you need consistent strokes to get an even finish, not random scrubbing; rolling fast covers more ground but you’ll get lap marks if you stop and restart. Use a 9-inch roller for walls, keep a wet edge of 6-8 inches, and work in 3×3 foot sections so each pass blends. If you plan two coats, expect about 350-400 sq ft per gallon, so pace yourself and don’t skimp on overlap.
The Right Roller for the Job – Size Does Matter!
Compared to a mini-roller, a 9-inch roller gets you done quicker but a 4-inch is great for tight spots; pick nap based on texture: 3/16″ for smooth drywall, 3/8″ for lightly textured, 1/2″ for semi-smooth, 3/4″ to 1″ for heavy texture. You’ll save time with the right nap: a 3/8″ loaded properly covers about 100-150 sq ft per coat before reloading, so plan naps by surface not just speed.
How to Get Even Coverage – It’s All in the Technique
Like laying tile you follow a pattern so seams disappear; start with a loaded roller and lay a loose W or M across a 3×3 foot area, then fill it in with parallel passes, overlapping about 50% each stroke. Keep pressure steady, don’t press hard, and finish with light long strokes in one direction to level out texture and eliminate ridges.
For example, on a 12×12 room with 8-foot ceilings (about 384 sq ft of wall), one gallon will almost cover one coat since typical latex covers 350-400 sq ft, so expect to use just over a gallon per coat and plan two coats. Work wet-to-wet, reload every 100-150 sq ft, and always blend into the previous wet edge – that little habit alone cuts lap marks by half.
My Take on Drying Time – Patience Pays Off
Why You Should Wait Between Coats – Seriously!
Many folks think once paint feels tack-free you can slap on the next coat, but that’s often too soon. You should usually wait 2-4 hours for latex in 70°F/50% RH conditions, and oil-based paints can need 18-24 hours. Humidity, temperature, and ventilation change those numbers fast – high humidity can double dry times. So if you rush, you’ll trap solvents, get sagging or uneven sheen, and then you spend hours fixing what a little patience would’ve prevented.
The Timing Game – When’s the Right Time to Recoat?
People often treat recoat time like a fixed rule – it’s not. Check the manufacturer label first; then do the fingernail test – press lightly, if it gums you wait. In hot low-humidity weather you might recoat in 1-2 hours; in cool, damp conditions that same paint could take 12-24 hours. And yes, ventilation matters – a fan cutting drying time by 30-50% can be the difference between success and a ruined finish.
Some assume the shortest advertised recoat time always applies – bad idea. For example, a waterborne primer might say recoat in 1 hour at 77°F and 40% RH, but drop temp to 60°F or bump RH to 70% and you’re looking at 6-8 hours or more. Aim for manufacturer temps, keep humidity low, use airflow, and err on the side of waiting – you’ll save time overall because you won’t have to sand or recoat uneven areas later.
The Final Touches – Making It Pop!
A tiny quarter-inch of uneven paint along trim catches more attention than you’d expect, so those last passes really matter. Step back every 6-10 feet, check under side lighting and at different angles, and fix any sheen or texture mismatches with a 2-3 inch angled brush or foam pad. Do a final lint-free wipe, air the room for 30-60 minutes, then inspect in both natural and artificial light to spot what still needs a soft blend or a second thin coat.
Touch Ups – Don’t Leave It Hanging
Small dings and roller marks often hide under a careful touch-up, so don’t repaint the whole wall. Sand the spot gently with 220-grit, wipe with a damp cloth, then use paint from the original can and a 1/2-inch angled brush to feather the edge with light strokes; let it dry 2-4 hours and assess sheen. If texture’s off, dab a damp sponge to soften the edge before the paint sets, and often one thin second coat seals the fix.
Removing Tape Like a Pro – No More Torn Paint!
You shouldn’t wait until paint is bone dry to pull painter’s tape – pull it when the finish is just tacky, usually 30-60 minutes for latex in normal temps, and you’ll avoid ripped edges. Pull slowly at a 45-degree angle back over itself, keeping tension low so the tape peels away without lifting paint. If tape resists, warm it with a hair dryer on low and try again.
Sometimes scoring the paint line before pulling the tape saves you from a patch job – you press a fresh utility blade gently along the tape edge to break the paint film so it won’t lift. For oil-based paints you’ll wait longer – 6 to 24 hours to get tacky depending on humidity; latex usually gets there in 30-60 minutes. If a strip peels, score and then feather with a 1/4-inch angled brush using paint from the can, light strokes. Pros also warm the tape or wipe the edge with denatured alcohol for stubborn high-gloss.
FAQ
Q: How should I prep a room before painting to get a pro-level finish?
A: One weekend I decided to paint the whole living room after a late-night DIY binge – I thought a quick wipe and slap-on would do. Big mistake, I had splotches, peeling, and tape bleed, so I learned fast.
Start by stripping the room of loose stuff – outlet covers, curtains, nails, the whole nine yards. Wipe walls with a degreaser or simple soap and water if it’s dusty or has cooking grime, then sand any glossy spots so the paint will adhere. Patching holes with spackle and sanding smooth is worth the tiny bit of effort, because flat walls make everything look cleaner.
Caulk gaps between trim and walls, and put down drop cloths or plastic – don’t be stingy with protection. Use painter’s tape on trim and windows, press it down firmly, but don’t tape over crumbling paint – fix that first. Prime patched areas and any dramatic color changes or stains so the topcoat goes on even and true.
Prep takes time. But it pays off in fewer touch-ups and a finish that actually looks done right.
Q: What’s the best technique for cutting-in edges without getting tape lines or sloppy strokes?
A: The first wall I ever tried to cut-in ended up with jagged edges and I swear it looked like a kindergarten art project – I had to scrape and redo half the room. After a few tries, I picked up a few habits that changed everything.
Use a good angled sash brush, about 2 to 2.5 inches, and load it properly – dip just a third of the bristles and tap off the excess. Hold the brush like a pencil at a slight angle, and paint a 2 to 3 inch band along the ceiling, corners, and trim, working in manageable stretches so the paint stays wet for blending. Keep your wrist steady – short controlled strokes beat wild flailing every time.
Feather the edge toward the center of the wall so when you roll you can blend without creating a ridge. If you get a blob, grab a damp rag or a small craft brush and smooth it before it skins over. Practice makes a huge difference – you’ll be surprised how normal steady strokes feel after a couple of walls.
A steady, patient cut-in will make the rolling part 10 times easier.
Q: How do I roll walls to avoid lap marks and get that smooth, even finish?
A: I once rolled into a patch that had started to dry and ended up with a nasty lap line across the middle of the wall – ugh. After redoing it and watching a pro, I picked up a routine that mostly eliminates those marks.
Choose the right roller nap for your wall texture – smooth walls get a 1/4″ to 3/8″ nap, lightly textured walls 1/2″ or more. Load the roller evenly in the tray, roll off the excess, then apply paint in a loose W or M pattern and fill it in without lifting the roller – that spreads paint quickly and keeps a wet edge. Work in sections you can finish before the edge dries, and overlap each pass by about half the roller to avoid lines.
Back-roll lightly after you’ve filled the section to flatten the texture and get an even sheen. Two thinner coats beat one thick glob every day of the week – it covers better and dries more uniformly. If you see a lap forming, stop and blend it while wet or feather it out with just a bit of touch-up, not pressure.
Keep a wet edge and pace yourself – that single habit cuts down on most lap marks and saves a lot of rework.