


Underfloor heating can be costly to run if you don’t design for efficiency, but it isn’t doomed to high bills. You’ll need solid insulation, proper zoning, and a smart control strategy to minimize heat loss and avoid overheating. Electric systems spike costs unless used with low-demand hours and efficient controls; hydronic systems with heat pumps often win on long-term operating costs. Curious how to balance upfront vs. running costs for your space and climate? Let’s break down the options and practical tweaks.
How Underfloor Heating Works: Basics, Types, and What Affects Running Costs

Underfloor heating works by circulating warm water through pipes (hydraulic) or using electric heating elements embedded in the floor, transferring heat upward into the room. You’ll see two core types: hydronic systems, which use a boiler or heat source and networked pipes, and electric mats or cables embedded in the floor.
In either case, efficiency hinges on insulation, thermal mass, and controlled delivery. Historical trends show a shift from bulky, centralized setups to compact, modular layouts with better controls.
Technological advancements include advanced thermostats, zoning, smart integrations, and improved pipe materials and low-profile electric elements.
Your running costs improve when you reduce heat losses, optimize floor temps, and match output to real load. Understanding these basics helps you assess efficiency and long-term economics.
What Are Your Underfloor Heating Options: Electric vs Hydronic Explained
Electric heating uses thin mats or wires you install directly in floors, offering fast response and simple zoning.
Hydronic systems rely on a boiler and loops of tubing, delivering steady warmth with minimal running costs but higher upfront setup.
We’ll compare installation basics, lifecycle costs, and where each option fits your home to guide your choice.
Electric Heating Basics
If you’re choosing between electric and hydronic underfloor systems, electric options are typically simpler to install and faster to heat. You’ll run low-profile mats or films embedded in or under the floor, powered by an on/off thermostat. The core benefit is immediate response time and precise control, making zoning straightforward.
Efficiency hinges on heat output per area and insulation, so sizing matters. Electrical mats convert energy directly to heat with minimal loss, and modern materials reduce voltage drops and IR losses.
Historical trends show a shift to foil and carbon-based elements for even distributions. Technological innovations include self-regulating elements and smart thermostats that learn usage patterns.
Consider installation costs, running hours, and floor surface tolerances to determine if electric heating suits your space.
Hydronic System Essentials
Hydronic underfloor systems use heated water circulated through tubes or manifolds embedded in the floor, offering even warmth with minimal height impact and strong compatibility with large areas. You’ll find these systems scalable from small rooms to whole homes, though installation is more involved than electric options.
You control output with thermostats and zone controls, improving efficiency when used with proper insulation and a reliable boiler or heat pump. Material durability matters: copper or PEX tubing resists corrosion and pressure, while manifold and pump components must match system load.
Historical trends show a shift toward low-temperature, high-efficiency setup, heavier emphasis on insulation and controls. Consider maintenance access and retrofit feasibility early, since hydronic runs can complicate renovations.
Choose proven manifolds, durable fittings, and compatible heat sources for long-term reliability.
Cost Differences Overview
Underfloor heating options differ mainly in upfront and running costs, installation complexity, and long-term efficiency. You’ll want a practical comparison between electric and hydronic systems, focusing on total ownership.
Electric mats incur lower upfront costs and faster rollout, but higher running costs with electricity rates driving long-term expenses. Hydronic systems demand a larger initial outlay and more complex installation, yet they often deliver lower running costs, especially with heat source efficiency and court of use in larger areas.
Consider maintenance needs, grid reliability, and potential retrofit challenges. Historical installation trends show hydronic setups favored new builds for mass comfort, while electric options gained traction in renovations.
Aesthetic appeal matters too: hidden pipes keep walls clean and floors seamless, aligning with modern design preferences.
Electric vs Hydronic: Which Costs More to Run?
When comparing running costs, electric underfloor heating generally costs more to operate day-to-day than a properly sized hydronic system, mainly because electricity is pricier per unit of heat. You’ll see the gap in energy bills, especially in longer heating seasons, since electric mats respond quickly but burn watts continually.
Hydronic systems spread heat with a boiler and thermal mass, lowering per-hour cost, though installation is more complex.
- Cost comparison turns on fuel price volatility and usage patterns
- Installation challenges can delay comfort and inflight costs
- Maintenance frequency affects long-term economics
- Temperature control precision matters for efficiency
If you value predictability and lower monthly peaks, electric may feel premium; if you prefer stable, potentially lower operating costs over time, hydronic wins.
What Factors Really Drive Your Monthly Underfloor Heating Bill?

Your monthly bill isn’t just about the heater itself. The Energy Source Efficiency, insulation levels, and system design all set the baseline and the variability you’ll see month to month.
Tuning these factors—choosing efficient fuel, boosting insulation, and optimizing layout—helps you control costs without compromising comfort.
Energy Source Efficiency
How efficiently your energy source converts fuel or electricity into usable heat largely determines monthly bills. You’ll see that efficiency hinges on system design, fuel type, and control strategy more than blanket claims about prices.
Historical trends show gradual gains in boiler and heat pump efficiency, while material innovations improve heat transfer and reduce losses in pipes and manifolds. You benefit from selecting a source with high conversion effectiveness and compatible underfloor components.
Pay attention to boiler modulation, pump curves, and seasonal controls; these matter as much as upfront cost. A smarter setup minimizes wasted energy and steadies room temperatures, lowering runtime and bills.
Material innovations facilitate better heat delivery and optimized efficiency standards keep your underfloor system reliably economical.
- Emotional impact: you feel empowered when efficiency pays off
- Historical trends shape today’s choices
- Material innovations enable better heat delivery
- Clear controls prevent wasted heat and money
Insulation Levels Matter
Insulation levels set the baseline for how much heat your system must produce to keep rooms comfortable. When you tighten insulation, you reduce heat loss through floors, walls, and ceilings, so your underfloor heater runs less intensely and for shorter periods.
Pay attention to thermal bridges, leaks, and slab edges; sealing these cuts unneeded cycling and steadies temperatures. For retrofit projects, mineral wool or rigid foam beneath slabs can improve performance without major disruption.
Consider floor finish choices, since bulky carpets or dense underlays can negate gains by adding heat resistance. Decorative options and aesthetic considerations matter, but they shouldn’t trump insulation quality; choose coverings that respect heat flow.
In short, better insulation yields lower running costs and quicker, steadier comfort.
System Design Impact
System design largely governs monthly costs by matching heat output to room needs and controlling when and where heat is delivered. You’ll bias efficiency by zoning, selecting the right panel spacing, and using responsive controls to prevent overshoot.
A well-planned layout minimizes waste, reduces runtime, and lowers peaks on your bill, while still delivering comfort across living areas. Think about interior design and aesthetic impact: tasteful placement won’t compromise performance, but mismatches can create hotspots or dead zones.
Properly sized emitters, good water temps, and smart scheduling sustain comfort without excessive energy. Invest in predictable operation rather than brute force heat.
- You feel relief when rooms heat evenly, not slowly or unpredictably
- You avoid costly overrides by smart, targeted control
- You preserve interior design, without compromising efficiency
- You enjoy consistent comfort that respects aesthetic impact
How Insulation Impacts Running Costs for Underfloor Heating
Even with underfloor heating, proper insulation directly cuts running costs. You reduce heat loss through floors, walls, and ceilings, meaning your system works less hard to maintain comfort.
Start with a high-performance layer beneath the heating circuit; the better the insulation, the less heat escapes into the subfloor. Choose materials with low thermal conductivity and moisture resistance to prevent energy waste and potential damage.
You’ll notice more consistent temperatures, faster response times, and lower boiler or heat pump demand.
Keep edge insulation continuous around the perimeter to prevent cold bridging. Aesthetic integration matters, so don’t compromise thickness or finish quality where aesthetics meet performance.
Installation complexity rises with retrofit projects, so plan materials, access, and sealing carefully for predictable savings.
Room Type and Usage: Where Underfloor Heating Costs Add Up
Room type and usage drive variation in costs: you’ll see more spend in rooms that demand consistent heat and stay occupied, versus seldom-used spaces.
Patterns matter too—longer, frequent cycles raise energy use, while intermittent or scheduled operation can cut it.
Consider zoning versus whole-house strategies to target the hotspots without overheating the rest.
Room Type Variability
Room-by-room use drives underfloor heating costs, since different spaces have varying heat-loss profiles and occupancy patterns. You’ll notice rooms with large windows, high ceilings, or open layouts demand more watts per square meter to stay comfortable. Hallways and utility spaces often waste less energy, while living rooms and kitchens pull heat more aggressively during activity bursts.
Decorative accents can alter the perceived warmth, sometimes masking true heat demand, which ties into installation challenges when retrofitting or upgrading layouts. You’ll want to plan zones that reflect actual usage to avoid over-supplying heat. By aligning system design to each room’s needs, you curb wasted energy and improve control.
- You’ll feel smarter about your budget when zoning aligns with use.
- Small changes, big impact on comfort and cost.
- Decorative accents influence perceived warmth, not just style.
- Installation challenges become predictable with careful mapping.
Usage Patterns Impact
Usage patterns drive the real cost of underfloor heating because different spaces and activities pull heat differently. In practice, you’ll notice rooms with high heat loss or steady occupancy push different loads, affecting run times and thermostat behavior.
Historical trends show living areas often heat more continuously, while kitchens and bathrooms cycle on/off with peak demand, influencing overall energy use. Cultural preferences shape expectations for comfort, shaping setpoints and wake/sleep schedules that alter energy profiles.
For homes with mixed usage, grouping high-heat areas or scheduling mid-day boosts can reduce waste. In stand-alone rooms, you’ll benefit from modest, targeted mat or pipe layouts rather than blanket coverage.
Plan around activity patterns, not only room size, to optimize cost efficiency.
Zonal vs Whole-House
Zonal heating targets specific areas, letting you heat only occupied or high-heat-loss zones rather than the entire house. With underfloor systems, you gain control over where warmth goes, which shapes your energy use and comfort. But the choice between zonal and whole-house affects cost clarity, installation, and interior decor integration.
Zonal setups can reduce waste in unused rooms, while whole-house layouts maximize consistency. You’ll face installation challenges when retrofitting into existing floors, especially with layering, insulation, and sensor placement. Consider how room type influences load and thermostat strategy, not just price.
For interior decor, low-profile controls and hidden mats matter. For installation challenges, plan access and maintenance upfront to avoid surprises down the line.
- You’ll feel the relief when hot zones respond quickly
- You’ll avoid waste in unused rooms and save energy
- You’ll confront fit-and-finish decisions in decor
- You’ll navigate messy retrofits with careful planning
Ideal Temperature Settings for Comfort and Efficiency
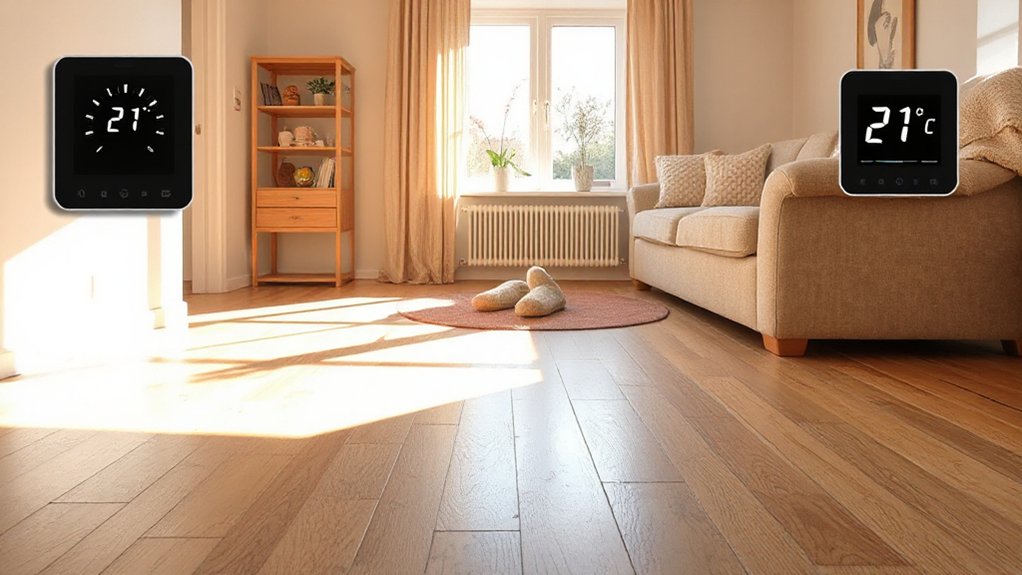
To stay comfortable without wasting energy, set temperatures to a base level you’ll tolerate all day and adjust only when needed.
For underfloor heating, aim for a steady 18–20°C in living spaces, 16–18°C in bedrooms, and slightly higher in bathrooms if you routinely use them.
Use a lower overnight setback of 2–3°C to save energy without sacrificing comfort.
Maintain even heat distribution by keeping doors open between rooms or using gentle airflow so warm air isn’t trapped under floorboards.
Use insulation and floor finish awareness; tile heats quickly but can feel cooler, while timber or carpet can soften the sense of warmth.
When planning garden landscaping or interior decoration, consider how each space’s usage affects your target temperatures and comfort.
Smart Controls and Zoning to Save Money
Smart thermostats boost efficiency by modulating underfloor heat based on real-time occupancy and weather data.
Zoning lets you tailor temperatures to different rooms, improving comfort while cutting waste.
Scheduling and automations translate these controls into consistent energy savings without you micromanaging.
Smart Thermostat Efficiency
Smart thermostats save money by giving you precise control over when and where heat runs. You’ll optimize cycles, reduce overshoot, and learn your patterns with real-time feedback.
Efficiency hinges on accurate scheduling, responsive setback recovery, and correct device pairing with your underfloor system. Keep outdoor decor and furniture placement in mind when planning sensor layout and heat distribution, ensuring exterior elements don’t skew readings.
Use load-shaping features to minimize quick heatups after doors or windows open. Regular firmware updates can tighten control loops and improve compatibility with radiant circuits.
Map occupancy: away, home, sleep, and activities to fine-tune baselines. Pair zones for smoother progression, prevent short-cycling, and maximize return on every watt.
- Clear schedules beat guesswork, every time
- Responsive setbacks cut idle heat
- Accurate placement boosts sensor reliability
- Regular updates preserve system harmony
Zoning Home Comfort
Zoning your home improves comfort and saves money by directing heat only where it’s needed. You’ll use smart controls to isolate rooms or zones, so unoccupied spaces don’t draw heat.
Start with a practical layout: map rooms by usage, occupancy, and sun exposure, then assign separate circuits or valves for each zone. This approach minimizes temperature drift and reduces overall energy consumption without compromising comfort.
Historical installation considerations matter: retrofits may require extra trenching or panel work, yet modern, pre-zoned systems integrate more cleanly.
Aesthetic considerations matter too: you’ll want discreet control panels and unobtrusive sensor placement that don’t clash with décor.
Maintain consistent boundary temperatures to avoid overcompensation, and verify zone dampers respond promptly to thermostat signals, ensuring predictable performance and long-term savings.
Scheduling Energy Savings
- Reduced waste means immediate savings
- Responsive tweaks feel like smart intuition
- Hidden tech, visible comfort
- Seamless design, reliable performance
How to Estimate Your Potential Monthly Cost
To estimate your monthly cost, start with your heater’s wattage, the home’s square footage, and your local electricity rate. You’ll convert watts to kilowatts, multiply by hours of use, then apply the price per kilowatt-hour.
For a rough figure, estimate daily operating hours during the coldest month, then scale for the season. Add insulation quality, flooring type, and thermal mass to refine the estimate, since they affect runtime.
Use a simple formula: monthly kWh = (heating watts × hours per day × days in month) ÷ 1000, then monthly cost = kWh × rate.
Historical trends show electricity prices drive variability, while Environmental impact reflects energy source mix.
Update your estimate as rates or usage patterns change and compare with alternative heating options.
Real-World Running Cost Ranges by System Type

Real-world running costs vary by system type due to efficiency differences, control strategies, and how each system distributes heat.
- You’ll see lower costs with high system efficiency when setpoints are well-tuned and zoning is effective.
- Cost comparison across electric, water-based, and heat pump options shows electric SCRAMS can spike if usage is high.
- Hydronic loops with well-designed manifolds often reduce overhead, improving overall cost per square meter.
- In practice, heat pump systems typically offer the best running economics for moderate climates, balancing efficiency and comfort.
Note: Avoid discussing maintenance topics here. Instead, focus on how selection, insulation, and control settings drive real-world operating costs.
Maintenance and Longevity That Influence Ongoing Costs
Maintenance and longevity quietly shape ongoing costs if you don’t plan for them upfront. You’ll protect efficiency by implementing simple, repeatable maintenance routines and noting system behavior changes early.
Regular checks of manifolds, pumps, and circulatory components help prevent sudden failures and costly repairs. Track insulation integrity around loops; degraded covers or openings raise heat losses and increase running hours.
Schedule annual flushes if your system uses closed circuits, and verify thermostat calibration so you don’t overshoot settings.
Prioritize cost-effective insulation during installation and after retrofit to minimize heat demand. Use concise, documented maintenance routines to guide technicians and homeowners alike, reducing downtime and prolonging midlife performance.
A proactive approach keeps operating costs predictable while extending overall system longevity.
Common Myths About Underfloor Heating Costs Debunked
Many myths about underfloor heating costs persist, but separating fact from fiction starts with how the system actually performs. You’ll see that costs aren’t a fixed destiny; they hinge on design, insulation, and usage patterns, not gimmicks.
Historical myths often blame sky-high running numbers, yet modern controls and zoning reduce waste. When you factor in installation costs, the total figure varies by retrofit vs new build and floor type, but long-term efficiency can offset upfront investments.
You gain reliable comfort with minimal maintenance when correctly specified.
- You’ll unpack false claims about always-bank-breaking bills
- You’ll distinguish hype from measured, evidence-based figures
- You’ll see how insulation and zoning cut waste
- You’ll understand how installation costs influence total budget
Practical Ways to Cut Running Costs Today
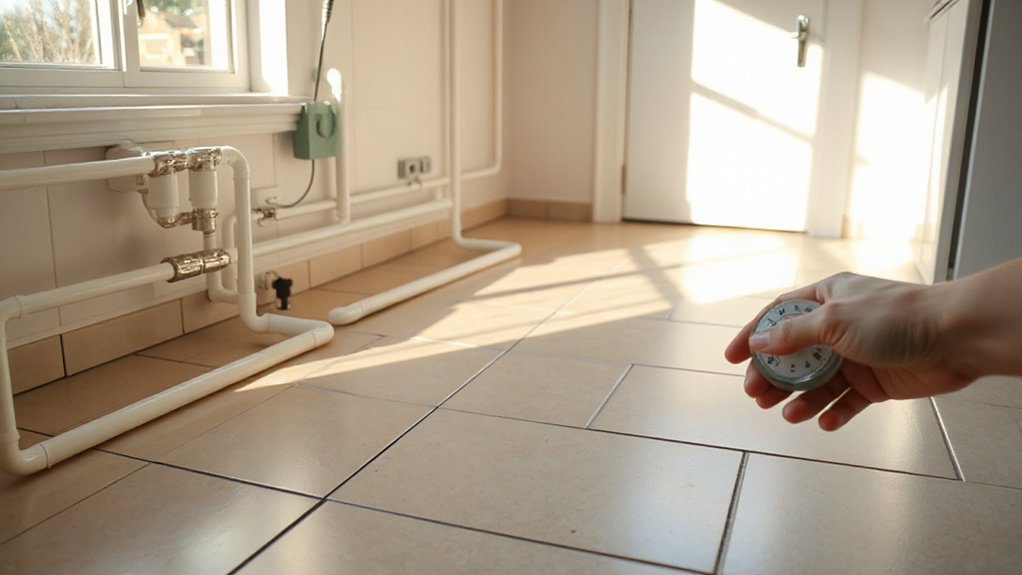
To cut running costs today, start with proper zoning and control settings: turn down temperatures in unused rooms, schedule higher temps only when you’re there, and use early-moor heating with shorter, strategic warm-up periods. You’ll maximize efficiency by aligning room needs with occupancy, not ambient guesses.
Implement precise zoning restrictions on thermostats to prevent runaway heat in vacant zones. Use decorative fixtures sparingly to avoid added thermal mass that slows temperature response.
Pair digital timers with adaptive scheduling to respond to daily shifts, and set back during extended absences. Prioritize insulated floors and doors to reduce heat loss, and calibrate flow rates to match load changes.
Regularly review energy dashboards and adjust limits as exterior conditions evolve for consistent savings.
Is Underfloor Heating a Good Investment for Your Home?
Underfloor heating can be a solid long-term investment if you value comfort, efficiency, and space flexibility. You’ll gain steady heat distribution, reduced drafts, and better interior aesthetics, especially when paired with sleek decorative covers.
Over time, higher upfront costs can be offset by lower operating expenses and improved resale appeal. Consider installation challenges: retrofit into existing floors may require thorough planning, zoning, and accurate sizing to avoid cold spots.
Mechanical reliability is strong, but upkeep depends on choosing compatible controls and sensors. If you prioritize consistent comfort and future-ready design, the system pays back through efficiency and space utilization.
Weigh long-term savings against initial expenses and integration with your home’s decor.
- Consistent comfort across rooms
- Enhanced interior design options
- Long-term energy savings
- Clear upgrade path for renovations
Frequently Asked Questions
Do Underfloor Heating Systems Heat Rooms Evenly?
Underfloor heating heats rooms evenly when properly designed and installed. You’ll benefit from energy efficiency, but performance depends on insulation and layout. Consider installation costs, zoning, and pipe or mat placement for consistent temperatures across spaces.
How Long Does It Take to Heat a Space?
Underfloor systems heat spaces gradually, typically reaching comfort in 30–90 minutes depending on insulation. You’ll see better energy efficiency over time, reducing ongoing costs, though installation costs are higher upfront than traditional radiators.
Can Underfloor Heating Work With Existing Radiators?
Yes, underfloor heating can work with existing radiators, but it’s not ideal without a zoning plan. You’ll pursue alternative heating options for compatibility, and consider installation costs, controls, and pump compatibility to avoid efficiency losses.
Will Underfloor Heating Cause Higher Electricity Bills?
Underfloor heating won’t dramatically spike bills if you size it right; it’s efficient. It can raise electricity use if mis-sized or run high. Energy efficiency improves with proper installation costs considered and smart controls. Installation costs matter upfront.
What Maintenance Is Required to Prevent Heat Loss?
Yes, you maintain efficiency by inspecting insulation and pipes, ensuring gaps are sealed and vents clear. Regularly replace filters, test controls, and monitor system pressure. Focus on Thermal insulation, System durability to minimize heat loss and extend lifespan.
Conclusion
Underfloor heating isn’t free, but it isn’t doomed to ruin your wallet either. If you insulate well, choose the right system (preferably a hydronic setup with a heat pump), and optimize controls and zoning, running costs stay manageable. Regular maintenance helps keep efficiency high. In short, implement smart design and steady upkeep, and you’ll see favorable energy use—as the saying goes, slow and steady wins the race.