
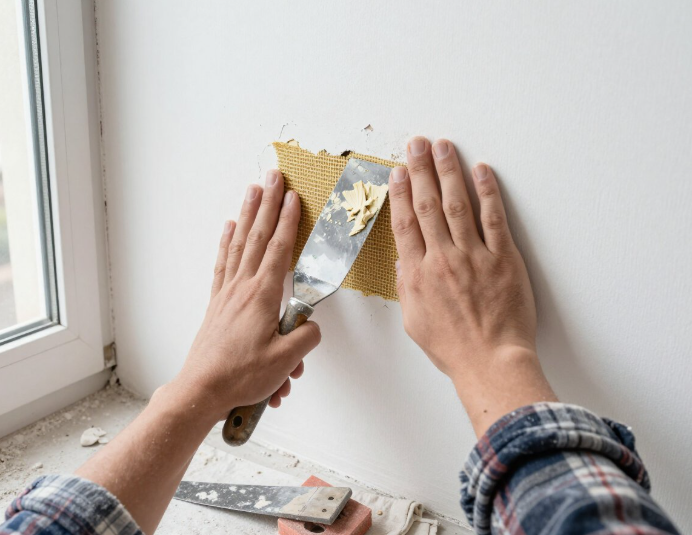

Learning how to patch drywall holes is an essential DIY skill that saves you calling out expensive professionals for what’s actually a straightforward repair job. Whether you’re dealing with small nail holes from picture frames, fist-sized accidents from doorknobs, or larger damage from furniture mishaps, the right patching technique will make those holes disappear completely once you’ve painted over them.
Most homes have 3 to 5 small drywall nail holes per room, so you end up patching sooner or later… You’ll get quick fixes for pinholes and simple tape-and-mud methods for wider gaps, plus when to cut a patch and when to call it quits. Want results that don’t scream DIY? I’ll walk you through the tools, the steps, common slip-ups, and how to make your wall look like new again – no fuss, just practical how-to.
Why You Shouldn’t Panic Over Small Nail Holes
Most homes have 3 to 5 small drywall nail holes per room, so you’ll see them sooner than you think. If the hole is under 1/4-inch you can fix it in 10-30 minutes with lightweight spackle, a fingertip or a 2-3 inch putty knife, quick sand with 220-grit, then spot-prime and paint. It won’t mess with your wall’s integrity and you won’t need a full patch job unless the hole’s bigger than a quarter or the drywall is crumbling.
The Easy Fixes That’ll Save You
A thumbtack or small picture-hanger usually leaves about a 1/8-inch hole, and that’s one of the easiest fixes. You can dab spackle, let it dry 20-30 minutes, sand smooth and paint-done. For slightly larger 1/4-inch holes use mesh tape under spackle or a dab of caulk for trim areas; for hairline cracks flexible acrylic caulk works great. Quick, cheap, and most homeowners can do it between Netflix episodes.
What’s the Secret Sauce for a Smooth Wall?
120-220 grit sandpaper is what pros reach for to get that invisible finish. Apply thin coats of joint compound, feather each coat 3-6 inches beyond the repair, let each dry 4-6 hours, sand with 120 then finish with 220, then wipe with a damp sponge to remove dust before priming. It’s the layering and feathering that erase edges, not one thick glob of mud.
Use a 3-inch putty knife held at about a 25-30 degree angle and pull in long smooth strokes to lay each coat; skip the heavy pressure – you want thin layers that shrink a bit as they dry so you can see low spots to fill. If your wall has texture, match it with aerosol texture or a small stomp brush before paint, and always seal the repaired spot with a primer so the sheen and absorption match your surrounding paint.
Seriously, How Do You Handle Bigger Holes?
You throw a backpack against the wall and suddenly there’s a 6-inch crater where drywall used to be – what now? You’ll want to turn that ragged hole into a neat, square or rectangular opening, fit a 2×4 backing behind the wall, and screw in a drywall patch sized to the opening. For holes 4 to 12 inches you usually use a taped patch and two skim coats of 20- to 30-minute-setting joint compound, then sand, prime, and paint.
Tools You Absolutely Need
If you’re prepping for a big patch, grab a drywall saw, utility knife, 6-inch and 12-inch taping knives, 120- and 220-grit sanding block, mesh tape or paper tape, 20- and 45-minute setting compound, a drill with fine-thread screws, a 2×4 for backing, and a can of primer and matching paint. You’ll use a 6-inch knife for feathering and a 12-inch knife for the final skim; setting compound cuts down cure time when you’re on a schedule.
Tools and Uses
| Drywall saw / utility knife | Cut neat rectangular openings and trim patch pieces |
| 2×4 backing + screws | Create a secure anchor behind the hole |
| Mesh or paper tape | Bridge joints and prevent cracks |
| 6″ & 12″ taping knives | Apply and feather joint compound |
| Setting compound (20/45 min) | Faster build-up for large gaps |
| Sanding block (120/220) | Level and finish between coats |
| Drill + drywall screws | Secure patch to backing |
| Primer & paint | Seal and match the wall finish |
Step-by-Step Guide to Patch Like a Pro
Start by squaring the hole, then screw a 2×4 backing behind the drywall and fasten a cut-to-size drywall patch. Tape the seams, apply a first coat of setting compound with a 6-inch knife, sand light, then apply two fuller skim coats with a 12-inch knife, sanding between coats. Prime the patched area and paint to blend. Want faster results? Use 20- or 45-minute compound and work in 90-minute cycles.
When you square the hole to, say, 6×8 inches, cut the patch from 1/2″ or 5/8″ board to match thickness, pre-drill and screw it to the backing every 6 to 8 inches. Use paper tape on straight seams for strength; mesh tape’s okay for quick fixes. Sand with 120 grit first, then 220 for finish. Prime with an acrylic primer and let it dry 2 to 4 hours before painting.
Steps and Fast Tips
| Square hole | Make a clean rectangle for a snug patch fit |
| Install backing | 2×4 behind the hole, screw through drywall into backing |
| Attach patch | Screw every 6-8 inches; countersink slightly |
| Tape seams | Paper tape for seams, embed with thin compound |
| Three coats | Set coat, then two finish coats; sand between |
| Prime & paint | Use acrylic primer; match finish after 2-4 hours dry |
My Take on Using Joint Compound – What You Need to Know
Mixing It Right – Don’t Mess This Up
You probably once grabbed a tub, stirred like pancake batter and ended up with lumpy mud, right? Add water slowly, mix with a 1/2-inch paddle on a drill for 2-3 minutes, then let setting-type compounds slake 5-10 minutes before remixing. Aim for mayonnaise-thick for filling and a bit thinner – like heavy cream – for feathering. Premixed only needs a splash. Too thin and it sags, too thick and it balls up; mix slow to avoid bubbles.
When to Sand and When to Leave It Alone
After a coat dries you might grab 120-grit and go to town, then realize you sanded through the taper – ouch. Sand between coats only when the surface is fully dry to the touch: premixed usually 24 hours, setting compounds depend on the formula (20-90 minutes common). Use 80-100 grit for heavy leveling, then 120-150 for finish, light pressure, block sanding for flatness. Don’t over-sand feathered edges or you’ll expose seams under paint.
That time you thought “overnight = ready” and the primer showed micro-gouges taught you a lesson. Check dryness by pressing lightly – no denting and the sheen is gone. For delicate skim coats try wet-sanding with a sponge to cut dust, or use a vacuum-back sander. Wear an N95, protect floors, and when unsure add a thin coat instead of aggressive sanding – repairing gouges is a bigger pain than a touch-up layer.
Here’s the Deal with Mesh Tape vs. Paper Tape
Lately mesh tape’s popularity has surged on DIY channels because it’s fast and forgiving, but paper tape still gets the nod from pros for seamless finishes; you pick based on the job. Mesh is great for hairline cracks and 1-4 inch holes since you can stick it and mud right away. Paper pays off on long seams and corners where you plan a proper 3-coat skim and want the flattest possible result.
Which One Should You Use?
Recently you’ll see more people choosing mesh for quick nail pops and patching around outlets, especially when you’re short on time or tools. If you’re doing single small repairs – 1 to 4 inches – mesh usually saves you a step or two. But if your project includes seams over 3-4 feet, inside corners, or a finish you want to feather to zero, go with paper and plan on multiple coats for the best outcome.
Pros and Cons You Gotta Know
These days manufacturers tweak both tapes, so it’s worth weighing speed against strength before you start; mesh gives instant adhesion and fewer steps, paper gives stronger bonds and a smoother finish after proper taping and three coats. You should match the tape to the location – quick repairs, go mesh; long seams and final finishes, pick paper.
Pros vs Cons of Mesh and Paper Tape
| Quick to install | Weaker bond on butt joints |
| Self-adhesive – stick and mud | Can telegraph ridges through compound |
| Great for 1-4 inch patches and nail pops | Not ideal for inside corners or high-stress seams |
| No pre-coat soak needed | May trap moisture if misused |
| Easier for beginners | Less forgiving when feathering to zero |
| Saves time – fewer coats often | Often costs more per foot than paper |
Right now you’ll find mesh shines on 1-4 inch repairs and quick touch-ups where one coat does the job, while paper is the go-to for seams longer than 3-4 feet or when you’re planning a full 3-coat finish and feathering to a smooth surface; if you want a rule of thumb – use mesh for speed and paper for longevity and invisibility.
How Long Do You Really Need to Wait Between Coats?
Patience is Key – Seriously, Don’t Rush It
Recently, quick-set joint compounds and portable fans have made fast turnarounds more common, but drying still depends on product and conditions. If you’re using a setting compound it can crust in 5-20 minutes, while all-purpose mud often needs 8-24 hours between coats at 60-70°F and 30-50% humidity. Thin layers dry faster; thick globs take much longer and can sag or crack. So yes, wait – shorter waits save time but risk sloppy results if you push it.
Tips for Speeding Up the Process Without Sacrificing Quality
Use 20- to 90-minute setting compounds for deep fills, apply thinner skim coats of ready-mix mud, and keep the room around 65-75°F with a fan or dehumidifier to cut drying time by hours. Sand lightly between coats once the surface is firm, not wet. Pros often mix small batches so product is fresh and cures predictably – that matters more than cranking up heat. Want faster but clean? Go thin and controlled.
- Apply coats no thicker than 1/8 inch for skim layers to speed evaporation.
- Choose a setting compound (20-45 min) for repair bases, then finish with all-purpose mud.
- Maintain temperature 65-75°F and humidity under 50% with a fan and dehumidifier.
- Knowing which product (5, 20, 45, 90 minute) matches the patch size saves time and headaches.
If you want a real-world comparison: I patched a 3″ hole using 20-minute setting mud for the backing and two thin all-purpose coats over two afternoons; at 68°F and 35% RH it was ready to sand in about 6 hours. By contrast, on a humid day (70% RH) that same sequence took closer to 24 hours to firm up. Mix small batches, feather edges thin, and test touch before sanding – that simple.
- Mix small batches so mud doesn’t stiffen before you use it.
- Use fans to move air but avoid blasting directly on wet mud which can crater the surface.
- Seal large patches with a quick primer coat before final skim to speed paint drying later.
- Knowing how temperature and humidity change dry times lets you plan realistic work sessions.
The Final Touch – Painting Over Your Repairs
Want the repair to vanish under normal room light? Prime the patched area with a quality bonding primer, let it dry, then apply two thin coats of topcoat rather than one thick one – that prevents lap marks. Paint slightly beyond the repair, about 6-12 inches, and match the original sheen so light hits the area the same way as the rest of the wall.
Which Paint is Best for a Seamless Look?
Which finish hides your handiwork best? Flat or matte paint masks tiny surface flaws better, while eggshell or satin gives durability in hallways and kitchens; pick the same sheen as the surrounding wall and use paint from the same batch if possible. If color matching is tricky, get a small sample and test a 2-inch square on the patch before committing to full coverage.
Tricks for Blending Your Patches with the Rest of the Wall
How do you stop a patch from looking like a patch? Sand the dried compound smooth with P150-220 grit, prime the patch and a couple inches of surrounding wall, then roll outward from the center using a 3/8″ nap roller to mimic the wall’s texture; feather brush strokes at the edges to avoid ridges. Match sheen and paint in thin layers – thin hides edges better than thick.
For a 4-inch repair try this: sand the patch with P180, vacuum and tack-rag, apply one tinted primer coat, wait 1-2 hours, then roll a thin first coat starting from the patch center outward, let dry 2-4 hours and apply a second coat; if the wall has texture, blend by stippling a little joint compound and pouncing with a sponge or brush to match the pattern before priming.
To wrap up
Following this, you’ll find that tiny nail holes are often way easier than big gashes – patching is the same idea, just scaled up. You can fix most stuff with spackle, tape and sanding; big holes need a patch, sometimes a re-plaster but also patience. It’s doable. Who knew? Do it step by step, sand till smooth… and don’t be shy to try, you’ll get it and save money.