


Roof insulation upgrades can lift your EPC by cutting heat loss, boosting fabric efficiency, and lowering heating demand. Start with attic or loft-floor insulation to reduce U-values, guarantee continuous coverage, and seal gaps around seams, penetrations, and access hatches for airtightness. Consider reflective barriers to cut solar gain, especially in attics with limited ventilation. Choose materials (mineral wool, PIR, or natural options) compatible with your roof type, and plan moisture control and ventilation during retrofit. More specifics ahead.
How Roof Insulation Affects EPC Targets

Improving roof insulation directly boosts your EPC rating by reducing heat loss and increasing thermal efficiency. You’ll see a measurable impact as you compare pre- and post-installation performance, especially in the fabric efficiency metrics used for EPC calculations.
In practical terms, better insulation lowers energy demand for heating and cooling, which improves the efficiency band your property sits in. Keep in mind that building envelope quality, including roof components, feeds into standardized assessment procedures.
Roof aesthetics and apparent finish don’t drive EPC alone, but they reflect proper installation quality and long-term upkeep. Maintain clear maintenance schedules to guarantee continued performance, verify external roof access, and document any material changes.
Regular checks help sustain rating targets without triggering unnecessary remedial work later.
Upgrade Attic Insulation: Payoff and Installation Basics
Upgrading attic insulation yields clear payoffs in energy savings and comfort, so you’ll want to understand the payoff basics and the installation essentials.
You’ll compare insulation R-values, air sealing needs, and attic venting to estimate costs and long-term gains.
Here’s a concise starting point on the payoff math and practical steps to get the installation right.
Insulation Payoff Basics
If you’re considering attic insulation, know that the payoff comes from reducing heat transfer and cutting energy use, especially during extreme weather. In insulation payoff basics, you’ll quantify gains as lower energy bills, improved comfort, and steadier indoor temperatures.
The effectiveness hinges on achieving proper air sealing and sufficient material thickness, which collectively reduce unwanted heat flow. Be mindful of roof design factors—inclination, venting, and existing decking—influence how you place insulation and where thermal bridges occur.
Common insulation myths include overestimating bulkiness, underestimating air leakage, or assuming all materials perform the same in every climate. Focus on material R-values, installation tightness, and continuous coverage to maximize performance.
When evaluating options, prioritize proven performance and site-specific considerations rather than generic claims.
Attic Installation Essentials
Attic installation starts by ensuring you have a solid plan for air sealing and proper insulation thickness. You’ll optimize heat flow, reduce drafts, and improve EPC ratings with precise material selection and installation sequencing. Focus on airtight connections and consistent coverage to avoid cold spots.
- Verify attic access and sealing points to limit air leakage.
- Choose insulation with appropriate R-value and density for your climate.
- Install with uniform thickness, avoiding compressions near joists.
- Integrate ventilation and weatherproofing techniques to prevent moisture buildup.
Key considerations include roof maintenance and long-term durability, ensuring fasteners, baffles, and vapor barriers perform as designed. Maintain regular inspections to catch signs of moisture intrusion, sagging, or gaps.
This approach minimizes heat loss and supports steady roof performance while sustaining energy savings.
Loft Floor Insulation for Efficient U-Values
Loft floor insulation reduces heat loss and improves overall U-values, so you’ll see steadier indoor temperatures with less energy use.
We’ll cover the key benefits, techniques for reducing U-values, and practical installation considerations and best practices.
You’ll learn how material choice, thickness, and gaps affect performance and how to implement efficient, code-compliant solutions.
Loft Floor Insulation Benefits
But how much difference does loft floor insulation make? You’ll improve heat retention with a simple upgrade that reduces heat loss at the source. Properly installed insulation creates a continuous layer beneath the loft floor, minimizing cold bridging and improving overall U-values for the roof assembly.
The result is steadier indoor temperatures and lower energy usage without altering living spaces or aesthetics.
- Reduces heat loss through the floor, contributing to lower EPC scores
- Works alongside ceiling insulation to improve overall thermal performance
- Maintains historical preservation by avoiding major structural changes
- Supports long-term cost savings with durable materials and straightforward retrofit
Roof aesthetics stay intact, and you can preserve historical preservation goals while achieving practical energy efficiency.
U-Value Reduction Techniques
To reduce U-values effectively, implement continuous loft floor insulation that minimizes thermal bridging and creates a uniform resistance across the roof assembly. You should select high-performance insulation with low lambda values and verify full coverage to stop gaps around joists.
Address thermal bridging by detailing flush joints, eliminating gaps at penetrations, and using edge-to-edge boards where possible. Maintain consistent thickness across the floor to prevent cold spots and confirm that insulation remains undisturbed by services or storage.
Combine insulation with airtight sealing at all seams and around access hatches to preserve performance. Consider integrating an insulated hatch liner to preserve continuity.
Roof ventilation must be balanced; excessive venting can undermine gains, while adequate ventilation reduces condensation risk without compromising U-values.
Installation Considerations Best Practices
Effective installation is crucial to maintain the performance of loft floor insulation and achieving the target U-values. Guarantee continuous coverage that avoids gaps around joists, penetrations, and edges, and verify that all seams are airtight. You should follow best practices to preserve roof ventilation and use appropriate insulation materials without compromising airflow.
- Plan layout to minimize cold bridges and ensure tight, continuous layers across the floor.
- Use proper depth and density to meet target U-values, testing with a compliant method.
- Seal around joists, penetrations, and edges to maintain airtightness.
- Align edges with vents and openings to avoid blocking roof ventilation pathways while maintaining accessibility.
Choose compliant rolls or boards, and verify joint and edge integrity after installation.
Which Roof Types Suit Vaulted Insulation: and Limits
Certain roof types readily accommodate vaulted insulation, while others impose practical limits due to ceiling height, attic access, and structural constraints. You’ll find pitched roofs with attic space and knee walls are most compatible, enabling continuous insulation and minimal perforations for services.
Flat or low-slope roofs can also accept vaulted setups when joist space and drainage are managed, but may require closer coordination with structural engineers. Constraints to watch include ceiling height losses, access hatch placement, and the need to preserve ventilation channels.
Consider roof garden layouts or solar panels, which may limit insulation depth unless dedicated service routes are planned. In all cases, guarantee compatibility with truss or rafter design, load-bearing capacity, and local building codes.
Reflective Barriers: When They Help Your Energy Performance

Reflective barriers can reduce heat transfer by reflecting radiant energy away from living spaces. You’ll want to take into account how they cut solar gain, especially in attic assemblies with limited ventilation.
For a clear assessment, compare installed materials, installation gaps, and overall efficiency gains in your climate.
Reflective Barriers Basics
Are reflective barriers worth it for your attic? In this essentials-focused look, you’ll learn what reflective barriers do and how they fit into your insulation strategy. You’ll avoid common insulation myths and separate hype from evidence, so you can plan effectively.
1) How reflective barriers work: they reflect radiant heat rather than absorbing it, reducing heat flow between the roof and living space.
2) Material basics: typically foil-faced films or multi-layer products, installed with an air gap for effective performance.
3) Installation notes: correct placement matters; keep the barrier clean, unpunctured, and aligned with joists or rafters as specified.
4) Practical limits: insulation myths persist; barriers assist with radiant control but don’t replace thorough insulation.
Solar Gain Reduction
Reflective layers reflect infrared energy away from the attic, reducing cooling loads and mitigating heat transfer through ceiling assemblies. In practice, you’ll see better comfort and lower energy use when barriers complement insulation depth and ventilation.
Consider solar panel integration; properly positioned reflective barriers prevent heat buildup near PV equipment and roof surfaces without hindering performance. Also assess roof color impact, since darker roofs can re-radiate heat differently, influencing overall gains.
Choose systems that maintain ventilation, avoid gaps, and align with existing insulation strategies to maximize EPC improvements.
Sealing for Tightness: Airtightness and EPC Gains
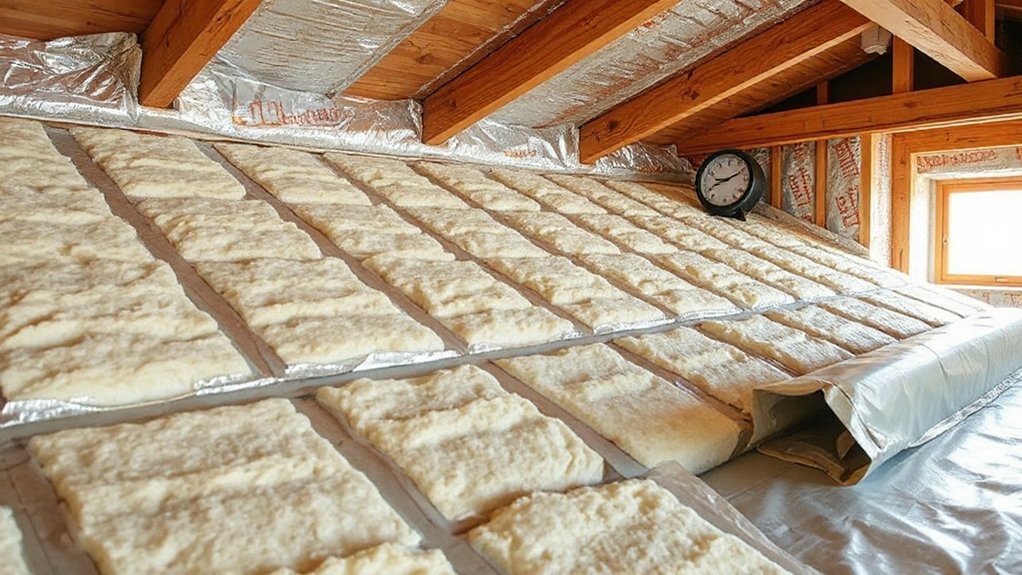
Sealing for tightness is the key to lowering heat loss and boosting energy performance. You’ll curb drafts by targeting gaps at the attic hatch, floor joists, and around service penetrations. Airtightness directly influences EPC scores by reducing uncontrolled air leakage and heat transfer.
- Inspect and seal air leaks with appropriate tapes, sealants, and membranes.
- Use airtight barriers at attic-to-wall junctions and around penetrations.
- Seal chimney and flue collars only with compatible, fire-rated products.
- Verify airtight integrity with a blower door test and address any detected leaks.
Impact is amplified by consistent detailing across color schemes and roofing materials, ensuring continuity of the airtight layer. Maintain compatibility between sealants and substrates to prevent failures or moisture.
Ventilation During Insulation Upgrades: Keep It Balanced
Ventilation must stay balanced during insulation upgrades to prevent moisture buildup and maintain indoor air quality. You should plan ventilation changes alongside insulation work to avoid creating stagnant pockets or pressure differentials.
Use targeted exhausts and supply boosts to manage moisture-laden air without over-ventilating. Track humidity levels in living spaces and ducts, and adjust rates as work progresses.
Maintain continuous ventilation during any demolition, installation, or sealing phases to prevent condensation and mold risk. Favor controls that are adjustable and furlanked to suit seasonal conditions.
Prioritize indoor air quality by ensuring fresh air intake remains clean and filtered. Moisture control hinges on balanced airflow, proper ducting, and timely rebalancing after insulation is finished.
Review results with a qualified installer to verify performance.
Choosing Insulation Materials: Mineral Wool, PIR, Natural Options
When selecting insulation materials, you’ll weigh performance, cost, and installability to match your climate and renovation goals; mineral wool, PIR, and natural options each bring distinct benefits and trade-offs.
- Mineral wool: excellent fire resistance, sound dampening, and performance at a wide insulation thickness range.
- PIR: high R-value per inch, compact profiles, quick installation, but limited color options.
- Natural options: lower embodied energy, breathable formulations, versatile for retrofit shapes, with variable color options.
- Compatibility: guarantee compatible framing, vapor control, and roof assemblies to avoid gaps and thermal bridging.
Note: match thickness to required U-values; consider color options from aesthetic grouping and verify long-term durability.
Cost and EPC Trajectories: What to Expect
Cost and EPC trajectories for roof insulation upgrades vary by material choice and project scope, but a few patterns hold across options. You’ll typically see upfront costs concentrated on materials, installation, and potential ventilation adjustments.
Roof materials influence heat loss reductions, so higher-performance options may deliver faster EPC gains, but they often require more labor and compatibility checks. Expect an initial dip in efficiency rating while work occurs, followed by a measurable uplift as the new insulation integrates with existing systems.
Pay attention to ventilation systems: improper sealing or vent obstruction can offset gains, while well-designed ventilation supports stable indoor climate and accurate EPC scoring.
Over the mid term, annual energy savings compound, guiding the trajectory toward improved rating bands with payback varying by climate and usage.
Quick Snag-and-Tidiest Job: Practical Steps
To finish a quick snag-and-tidiest roof insulation upgrade, start with a tight, high-impact plan: confirm materials, verify compatibility with your existing roof deck and ventilation, and set a realistic schedule.
1) Confirm product specs and thickness limits to avoid compressing existing insulation.
2) Inspect roof ventilation paths; ensure intake and exhaust aren’t blocked after install.
3) Schedule installation during favorable weather to prevent moisture issues and reuse any viable materials.
4) Plan insulation recycling steps, separating waste and arranging proper disposal or reuse where possible.
You’ll work efficiently, minimize waste, and maintain a clean job site while improving performance and comfort. Roof ventilation and insulation recycling are integral to a tidy, compliant upgrade.
Retrofit Planning: Site Assessment and Measuring U-Values
Site assessment determines what retrofit changes are needed and how to measure effectiveness. You’ll survey roof assembly, insulation gaps, and existing U-values, noting materials, layer thicknesses, and support structure. Document current temperatures, heat loss paths, and ventilation influences to establish baseline performance.
Use standardized methods to calculate U-values for each roof segment, recording conductance through roofing materials, interfaces, and air films. Plan measurements at representative points to capture thermal bridges and moisture risk.
Define target U-values based on local climate, building use, and EPC goals, then map retrofit steps to achieve them. Select compatible roofing materials and insulation types, considering compatibility with color schemes and aesthetic constraints.
Prioritize safety, access, and moisture control to ensure durable performance across retrofit phases.
Compliance and Documentation: Proving EPC Improvements
You must document compliance evidence and maintain auditable records to prove that EPC targets are met. You’ll structure proof around how roof insulation upgrades affect performance, ensuring data integrity and traceability. Focus areas include measurement records, product datasheets, and installation verification.
To keep audits smooth, align evidence with accredited methodologies and clearly tag each item for cross-checking.
- Compile pre- and post-upgrade measurements, including U-values and air leakage tests.
- Attach product certificates and installation notes, noting any insulation removal steps and materials.
- Document roof ventilation changes and their impact on moisture risk and thermal comfort.
- Store digital copies with versioning, change logs, and authorization stamps for rapid retrieval during EPC reviews.
Frequently Asked Questions
How Long Does a Typical Roof Insulation Upgrade Take?
A typical roof insulation upgrade takes a day or two, depending on space and access. You’ll improve thermal efficiency as you install insulation materials, ensuring proper ventilation and airtight seams, with minimal disruption to your home schedule.
Will Insulation Upgrades Affect Interior Ceiling Height?
Will insulation upgrades affect interior ceiling height? Not structurally; you lose no ceiling height. However, ceiling clearance can feel tighter if storage or fixtures compress space, subtly altering room aesthetics while improving thermal performance.
Are Grants or Subsidies Available for Insulation Projects?
Yes, you can access financial incentives through government programs. You should check current grants, subsidies, and tax credits, compare eligibility, and apply promptly. These programs help offset insulation costs and improve energy performance for your project.
Can I Upgrade Insulation Myself or Need a Pro?
Yes, you can DIY insulation, but for best results, hire professional installation if unsure. Picture tight seams and perfect batt alignment; DIY works, yet pros guarantee safety, codes, moisture control, and ideal performance.
What Maintenance Is Required After Insulation Installation?
After insulation installation, you should inspect for settled gaps, confirm vents stay clear, and monitor moisture levels. Monitor thermal performance and moisture control regularly, reseal joints if needed, and address any damp patches promptly to prevent degradation.
Conclusion
Roof insulation upgrades can meaningfully lift your EPC rating with targeted improvements and solid measurement. You’ll see faster payback when you upgrade attic and loft floor insulation, plus appropriate reflective barriers where they fit. One striking stat: even modest attic insulation gains can cut heat loss by 10–20% in typical UK homes, translating to lower bills and better scores. Plan a quick site assessment, document U-values, and keep compliance proofs handy for faster EPC updates.