


You’ve seen a cracked ceramic tile on a heated bathroom floor after a cold snap, and you’re wondering if the same could happen in your project. The short answer is: it depends on substrate prep, joint spacing, tile type, and how you control heat and movement. If you keep these factors in check, underfloor heating can work without cracking, but a misstep now can set you up for costly failures later—and that risk is exactly why you should read on.
What Causes Tiles to Crack With UFH?

When underfloor heating is installed under tile, cracking typically results from differential movement between the floor structure and the tile layer. You’ll see stresses arise where subfloor shrinkage, expansion, or settling clashes with the ceramic or porcelain surface.
Thermal expansion varies by material, so mismatches push and pull at joints, edges, and control joints, creating hairline cracks that can widen over time. Proper bonding helps, but movement isn’t eliminated; it’s managed.
Use an appropriate adhesive and skim coat with adequate elasticity to absorb movement, and guarantee the tile layout includes expansion gaps at perimeters and fixed structures. Tile aesthetics and heating efficiency depend on consistent, controlled movement.
Choose compatible tile, substrate, and UFH components, install correctly, and avoid overloading zones to minimize crack risk.
How UFH Works With Tile Floors
UFH transfers heat to tile through a conductive layer, so tiles warm evenly from beneath without hot spots.
The system relies on controlled electric or hydronic circuits to raise tile temperatures while limiting expansion stresses in the tile.
You’ll see how tile durability matches the heating design, with proper spacing, adhesive, and grout to maintain performance.
How UFH Heats Tile
Ever wonder how underfloor heating actually warms tile floors? You’re using a radiant system, typically either electric mats or a water-based loop embedded in a lightweight substrate. Heat transfer relies on low water temperatures or modest electrical outputs, designed to prevent thermal shock to tile and grout.
Tiles conduct heat efficiently when installed with a thin, compliant layer that minimizes air gaps and maximizes contact. You’ll notice heat ramps faster with electric mats, slower with hydronic slabs, but both rely on steady, controlled temperatures, not blasting heat.
Historical trends show gradual refinement of installation tolerances, while cultural influences push preferences for surface temperature and feel. Expect uniform warmth, precise control, and minimal downtime between setpoint changes.
Tile Durability With UFH
Tile floors with UFH are designed to move heat gently across a constrained surface, so the tile and grout stay within their thermal limits and resist cracking. You’ll notice durability benefits when the system controls temperature ramp rates and minimizes rapid thermal cycling.
With proper installation, tile faces experience gradual expansion and contraction, reducing stress at edges and around fixtures. Choose compatible substrates and continuous heat mats to prevent delamination.
Precision in layout matters: guarantee movement joints align with tile grids and exclude overly thin tiles that may fracture under heat, especially in high-traffic areas.
Consider Tile aesthetics and grout color to maintain long-term visual consistency, since color shifts can reveal microcracking. Regular inspections verify adhesive integrity and grout resilience, sustaining performance over time.
Tile Types That Withstand UFH
You’ll want durable, UFH-friendly tile options that resist thermal cycling and maintain bond integrity.
Consider tiles rated for high-heat environments and compatible with underfloor heating systems.
Prioritize low porosity and stable sizes.
This sets the stage for choosing specific tile types that meet both durability and installation reliability.
Durable Tile Options
When choosing tile for underfloor heating (UFH), stick to options proven to perform under sustained temperature changes and moisture exposure. Durable tile options include porcelain and glazed ceramic with low water absorption, plus real stone selected for consistent thermal mass.
Favor tiles with high compressive strength and minimal porosity to resist cracking from expansion. Look for calibrated edges to ensure uniform joint gaps and reduce stress concentrations. Avoid high-shrinkage ceramics and irregular surfaces that trap heat.
Decorative patterns and color options should be considered within the tile’s technical spec, not as aesthetic shortcuts, to prevent misleading expectations.
Confirm your substrate, underlayment, and mortar are matched to the tile type and UFH system, and verify that the installation follows producer guidelines for heating cycles.
UFH-Friendly Tile Types
Porcelain and glazed ceramic tiles with low water absorption stand out as UFH-friendly options because their dense, stable bodies resist cracking from thermal cycling and moisture exposure. You’ll prioritize tile types with minimal porosity, uniform thickness, and strong bonding strengths to the substrate.
1) Porcelain tiles: low water absorption, high compressive strength, and reliable dimensional stability under fluctuating temperatures.
2) Glazed ceramic: consistent glaze thickness, predictable thermal response, and diverse color options and design patterns.
3) Large-format tiles: fewer grout joints, reduced movement, and improved heat transfer efficiency when paired with proper underlayment.
Color options, design patterns, and calibrated setting materials help you achieve durable, aesthetically cohesive UFH installations.
Best Tile Options for Underfloor Heating
There are several tile options that pair well with underfloor heating, each balancing heat transfer, durability, and installation ease. You’ll prioritize low-porosity ceramic or porcelain for stable thermal response, and consider engineered stone for minimal expansion.
Large-format tiles reduce grout lines, improving heat distribution and cleaning ease. Matte finishes help hide flaws and provide slip resistance.
Porcelain with a low water absorption rate offers consistent performance under radiant heat, and heat-conductive textures can aid heat transfer without sacrificing durability.
For versatility, opt for neutral tones and controlled veining that align with design trends. Color options matter, as lighter hues reflect heat efficiently and darker shades hide dust.
Design trends favor cohesive looks with grout color matched to tile for a seamless surface.
Subfloor Preparation Essentials
You’ll start by ensuring the subfloor surface is flat, clean, and properly primed to support underfloor heating.
Control moisture with targeted tests and barrier strategies before adhesion or layering, so the tile system bonds reliably.
Address both surface prep and moisture management now to prevent failures later.
Subfloor Surface Preparation
1) Verify substrate flatness within tolerance using a long straightedge and level. Address high spots and hollows to ensure a smooth surface.
2) Clean and dry the surface, removing dust, oils, and contaminants that could hinder adhesion or cause future movement.
3) Confirm compatibility with decorative patterns and tile sealing plans. Choose compatible primers and thin-set mortars to optimize bond strength and finish quality.
A properly prepared subfloor reduces movement, enhances heat transfer, and supports long-term performance.
Poor prep leads to cracking, debonding, and uneven heat distribution, undermining decorative patterns and tile sealing outcomes.
Moisture Control Strategies
Are moisture concerns often the single most overlooked risk to bond strength and tile longevity? You assess substrates before you install underfloor heating, prioritizing moisture management to protect adhesive bond and grout integrity. Use calibrated RH testing, and verify concrete or subfloor is within specification for the chosen tile system.
If present, address hydrostatic pressure, vapor transmission, and seasonal humidity swings with appropriate barriers, primers, and compatible mortars. Implement a proactive schedule that aligns with heat-on/off cycles to avoid trapping moisture.
Match products to installation conditions to sustain Art installation goals and Flooring aesthetics, while preserving bond performance. Document testing results, cure times, and ventilation needs to ensure durability.
Maintain ongoing moisture monitoring during service life to prevent delamination and cracking.
Insulation for UFH: What You Need to Know
Insulation is essential for UFH systems because it minimizes heat loss and guarantees the floor heating delivers consistent warmth where you need it. You’ll target the right layer for heat containment, balancing depth, and compatibility with your tile choice.
A well-insulated schematic improves heating efficiency and stabilizes room temperatures without overworking the boiler or pump.
- Choose a high-performance insulation board or mat with appropriate R-value for your climate.
- Verify compatibility with thin-set mortars and tile aesthetics to avoid gaps or movement.
- Install uniformly across the subfloor to prevent heat pockets and ensure consistent output.
Key focus: proper insulation assures heating efficiency, reduces energy use, and preserves tile aesthetics while maintaining comfort.
Tile Adhesives for Heated Floors
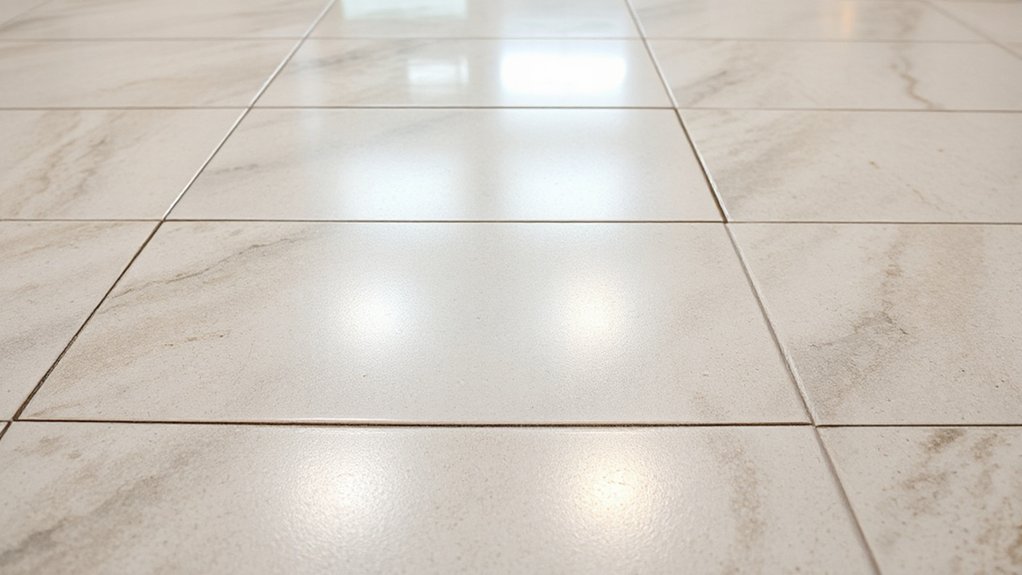
Finding the right tile adhesive is crucial for heated floors because improper bonding can compromise heat transfer and tile integrity. You’ll choose an adhesive with suitable polymer modification and an appropriate open time for thinsets or mastic, depending on substrate and tile type.
Consider the surface temp range of your underfloor system, and select a product rated for continuous exposure to heat without degrading bonding strength. Use a compatible grout after curing to avoid delamination.
For large-format tiles, opt for a high-tack, extended-working adhesive to minimize voids and ensure even heat conduction. Apply an even bed, back-butter where needed, and maintain consistent pressure to prevent hollow spots.
Tile patterns and grout colors influence final aesthetics but should never override bonding performance or heat compatibility.
Installing With Proper Tolerances
Proper tolerances are essential for a reliable floor heating installation, so verify substrate flatness and levelness before laying any tile. You guarantee consistent grout lines and joint widths to prevent tile stress from thermal movement, which preserves both Tile aesthetics and heating efficiency.
Achieve this by planning the substrate plane, using a straight edge, and checking tolerance specs from the tile and underlayment manufacturers.
- Confirm substrate flatness within the stated tolerance for large-format tiles.
- Keep squared, aligned joints to minimize edge lifting and micro-cracking.
- Use compatible setting materials that accommodate slight expansion without compromising coverage or heat transfer.
With these steps, you reduce hot spots, maintain even heat distribution, and preserve the visual quality you expect from your tiled surface.
Managing Heat-Up and Cool-Down Cycles
Establish target temperature bands that suit tile thickness and substrate type, and avoid rapid surges during start-up and shut-down. Monitor ambient and floor temperatures, using sensors that report in real time to your control system.
Plan color coordination and decorative patterns to accommodate potential shade and texture shifts during heating, ensuring visuals remain coherent across cycles.
Regular maintenance checks for fasteners and heating elements prevent localized hotspots. Document cycle performance to refine the balance between comfort, durability, and architectural intent.
Movement Joints and Expansion Gaps
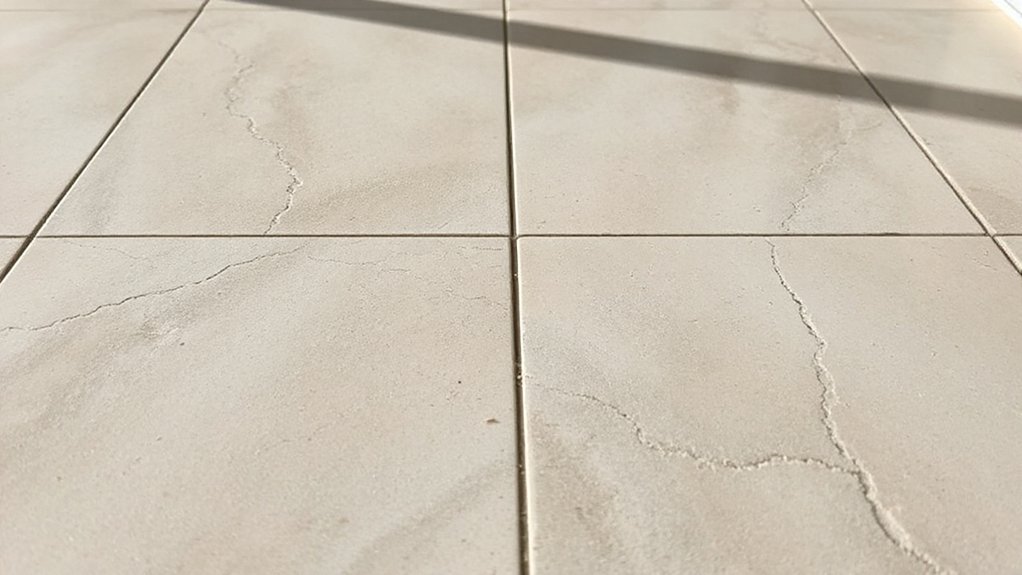
You must account for Movement Gap Sizing to accommodate thermal movement without stressing tiles.
Plan Expansion Joint Placement to align with room geometry, substrate changes, and underfloor heating zones.
This discussion sets practical sizing and placement rules you’ll apply in installation sequences.
Movement Gap Sizing
Key steps include calculating perimeter and isolating zones, then applying uniform gaps around fixtures and edges to avoid sound/thermal bridges. Use a standard 2–3 mm for porcelain and 3–5 mm for large format tiles unless manufacturer guidance differs.
Consider movement joint spacing every 8–12 ft in both directions for large areas. Color options and grout selection influence final appearance and performance; select low-stain grouts and color-matched options that minimize visual disruption while maintaining joint functionality.
1) measure, 2) space, 3) verify with manufacturers.
Expansion Joint Placement
Expansion joints must be placed to accommodate differential movement between substrates, underfloor heating, and surrounding structures. You should map joints to anticipated movement paths and install them at substrate transitions, column lines, and walls.
Position expansion gaps at doorways, at changes in floor height, and where heated zones abut nonheated areas. Use movement joints that suit tile thickness, mortar, and adhesive types, ensuring compatibility with floor sensors and heating cables.
Align joints with grout lines where possible to minimize visual disruption, but prioritize structural function over pattern. When detailing tile patterns, plan joint placement to avoid disrupting critical grout colors and maintain a cohesive appearance.
Specify grout colors that tolerate joint movement and shading differences, reducing visibility of gaps while preserving durability and clean aesthetics.
Early Warning Signs of Tile Stress
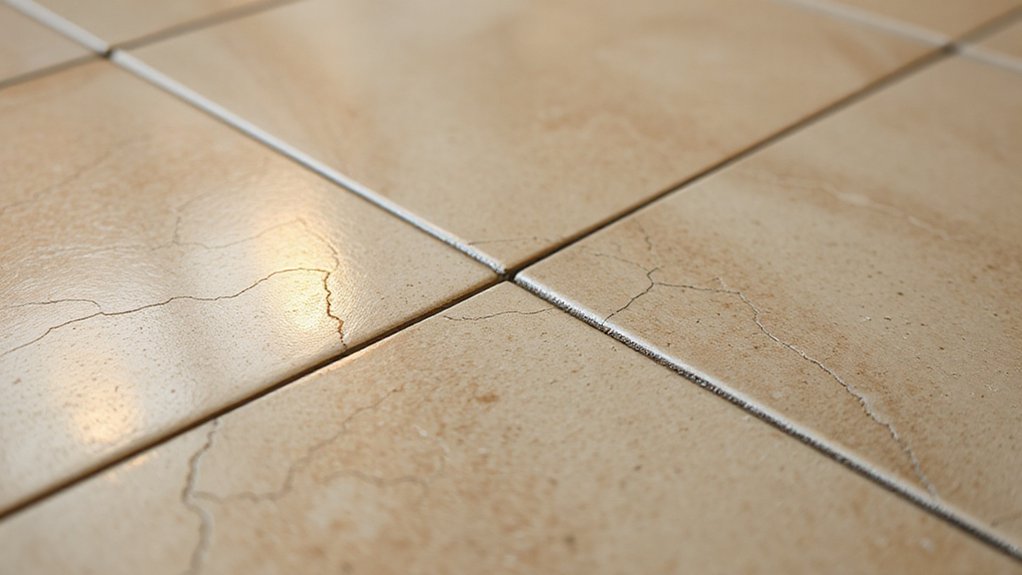
- Observe minor grout cracking or color changes near edges or shifts.
- Track edge lift or micro-movements after thermal cycling, especially around expansion joints.
- Check for shadowing or color shading shifts indicating moisture infiltration or substrate movement.
Color coordination helps you judge aesthetic impact during remediation, while grout selection influences crack visibility and joint performance.
Prioritize compatible grout and prudent, ongoing inspection to mitigate escalation risk.
Subfloor Moisture and Tile Integrity
Does subfloor moisture directly affect tile integrity, or is moisture control the silent prerequisite to reliable tile performance? You assess moisture before laying, not after. Elevated subfloor humidity or varying moisture gradients can cause tile debond, curl, or microcracking once underfloor heating heats the substrate.
You’ll measure with calibrated tools, follow a substrate drying protocol, and guarantee a stable, code-compliant moisture level at install. Inconsistent drying or residual moisture promotes adhesive failure and uneven tile thickness, which undermines tile aesthetics and longevity.
Use a vapour barrier where required, seal porous substrates, and respect drying times between coatings. Grout color decisions can be moot if moisture migration causes efflorescence or shrinkage stresses.
Prioritize uniform, low-humidity conditions to maintain predictable performance and service life.
When to Hire a Pro for UFH Tile Install
You should hire a pro for UFH tile installs when the project scope includes complex layouts, radiant circuits, or integration with existing systems that require precise routing, calibration, and testing. A professional guarantees consistent heat output, proper sensor placement, and reliable startup.
- Consider decorative patterns that demand exact alignment and spacing to preserve symmetry.
- Align grout selection with heat exposure to avoid cracking or color shifting.
- Verify enclosure compatibility and control integration to prevent interference with other systems.
Engaging a pro reduces troubleshooting time, minimizes risk of thermal stress, and guarantees code compliance. You’ll benefit from tested installation procedures, calibrated thermometers, and verified circuit continuity before cover plates go in.
For high-stakes layouts or mixed materials, precision, documented methods, and quality assurance matter most.
Real-World UFH Tile Case Studies
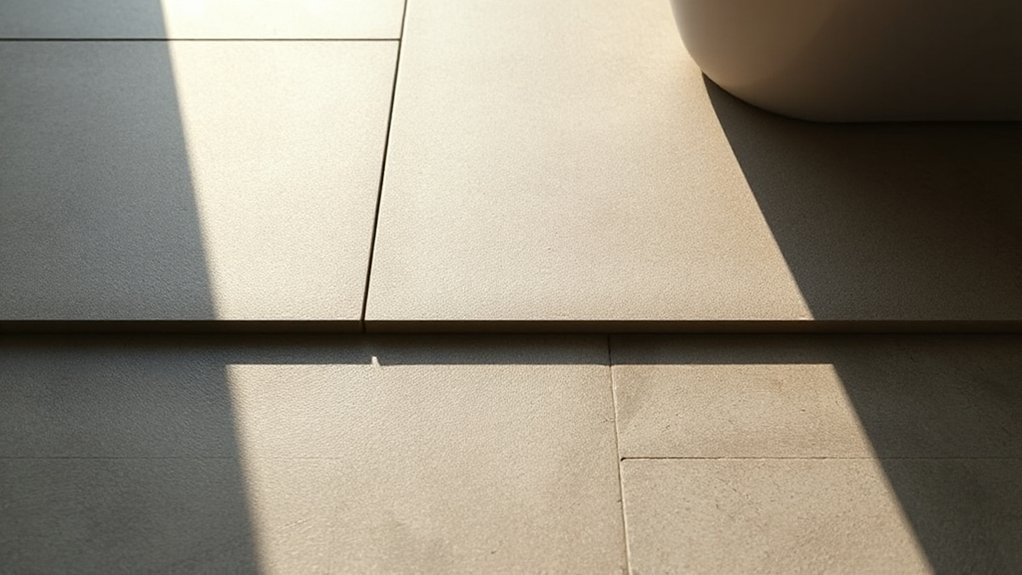
Real-world UFH tile projects reveal how variables like tile type, substrate, and heat load interact to affect performance. You’ll see polymer-modified mortars and decoupling membranes making a measurable difference in movement tolerance, especially on plywood or concrete slabs.
Case studies show porcelain versus natural stone respond differently to thermal expansion, guiding your choice based on expected load and room use.
Substrate prep, including clean, flat surfaces and proper insulation, emerges as a decisive factor for even heat distribution.
You’ll also note the impact of tile patterns on grout lines, where tighter layouts can exaggerate or mask movement if not planned with expansion gaps.
Grout colors matter aesthetically and for joint visibility under radiant heat, influencing perceived warmth and uniformity.
Maintenance Tips to Prolong UFH Tiles
Maintenance is essential to keep UFH tiles performing as designed; start with a routine inspection of the tile surface and grout, checking for cracks, loosening, or grout gaps that can trap moisture or allow heat to escape. This precludes hidden damage and preserves efficiency.
- Inspect decorative patterns for uneven wear or color fading, noting any thermal misalignment that could indicate grout deterioration.
- Monitor grout color for staining or darkening, which may signal moisture ingress or sealant breakdown needing resealing.
- Schedule periodic cleaning with pH-balanced products to avoid residue that impedes heat transfer or creates slick surfaces.
Regular maintenance reduces hotspots and preserves life expectancy, while keeping decorative patterns vivid and grout color consistent.
Common Mistakes That Cause Cracking (and How to Avoid Them)
Cracking in tiles and underfloor heating systems often results from a few avoidable mistakes—misjudged expansion gaps, incompatible adhesives, or improper substrate preparation. You must plan accurate gaps, matching materials to load, and verify substrate flatness before adhesive work.
Use compatible, tile aesthetics-driven products that tolerate UFH, and verify mortar and grout properties against your system’s temperature range. Avoid oversized or overly flexible substrates that trap movement; specify deco-compatible grout to minimize stress transfer.
Misalignment, uneven heating cycles, and premature frosting can amplify cracks. Match color options deliberately so shade shifts aren’t mistaken for cracking. Test panels under heat, document cure times, and confirm waterproofing as needed to reduce delamination risk.
For long-term performance, maintain a conservative installation tolerance and rigorous QA at every stage.
Quick Start Guide: Prep Your Floor for UFH

Before you lay underfloor heating, prep the floor with a precise, methodical plan: assess flatness, clean thoroughly, and address any defects that could telegraph through the tile layer.
1) Start with a flatness check and correct high and low spots using compatible patching compounds.
2) Clean to a dust-free surface; remove oils, sealants, and debris that impede bond.
3) Plan finishes by selecting grout color and deciding on decorative patterns to avoid misalignment after heating.
This prep guarantees uniform heat transfer and grout integrity.
With UFH, choose a thin, compatible adhesive, maintain consistent bed depth, and verify moisture targets.
Decorative patterns and grout color influence visual outcome after tile cure, so document layout before installation.
Proceed only after surface tests confirm stability and compatibility.
Frequently Asked Questions
Can UFH Cause Grout Cracking Over Time?
Yes, UFH can cause grout cracking over time if movement and heating stress aren’t controlled. You mitigate with proper substrate, expansion joints, and compatible grout. Tile expansion and heating stress must be anticipated, monitored, and accommodated during installation.
Do Tile Spacings Affect UFH Performance Long-Term?
Tiles won’t stay perfectly uniform if you ignore spacing; you’ll see performance drift. Think of it like a restrained orchestra: installer techniques and heating system types—proper spacing, not too tight, avoid stress and long-term cracking.
Can Epoxy Grout Reduce Ufh-Related Cracking?
Epoxy grout can reduce ufh-related cracking by offering superior epoxy durability and grout flexibility. You’ll benefit from less movement-induced cracking, easier maintenance, and stable tile surface, though proper installation and curing are essential for maximal performance.
How Does Tile Thickness Influence UFH Risk?
From a pragmatic standpoint, you minimize risk by choosing appropriate tile thickness; thinner tiles slightly increase risk, thicker tiles improve durability. Tile durability hinges on proper substrate and joint design, accounting for thermal expansion to avoid cracks.
Are Flexible Adhesives Better for UFH Floors?
Flexible adhesives are better for ufh floors; they accommodate floor expansion and movement. You’ll reduce stress on tiles by allowing controlled flex, preventing cracks. Use appropriate cured thickness and follow manufacturer guidelines for ideal, durable installation.
Conclusion
Underfloor heating can work with tiles, but success hinges on meticulous prep and design. Choose porcelain or solid-sbody tiles, use proper thinset and movement joints, and keep temperatures within recommended ranges. Guarantee a stable substrate, moisture barriers, and correct slope. Avoid rapid temperature spikes and oversized grout joints. When installed with attention to expansion, contraction, and tolerances, the system behaves like a well-oiled machine—reliable, quiet, and crack-free. Think of it as discipline meeting durability.