
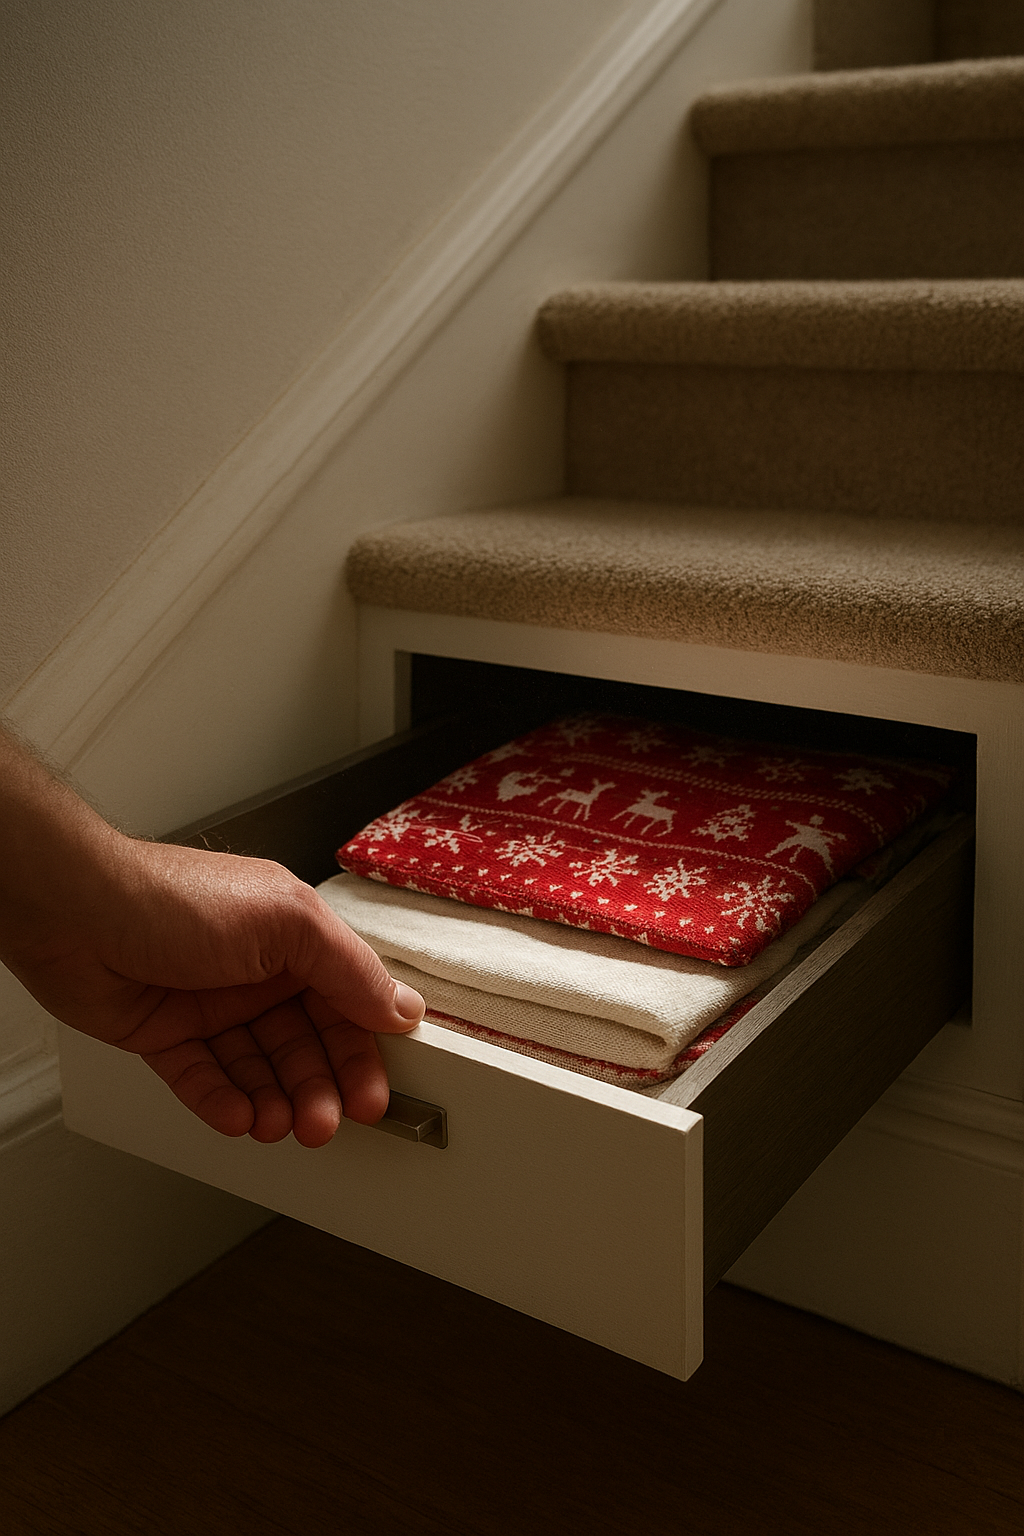

Over the years you might’ve thought the space under your stairs was useless, that it’s too awkward or DIY is for pros only. But you can build tidy, pull-out drawers that fit odd angles, save clutter and add value – and no, you don’t need fancy tools. Want to give it a try?
You can do this yourself.
I’ll walk you through materials, layout, cuts and simple joinery so your drawers slide smooth and last.
What’s the Deal with Under-Stair Storage?
Ever wondered how much useful space you’re ignoring beneath your stairs? In many homes that tucked-away void equals 6 to 14 square feet you could convert into drawers, a pet nook or a compact pantry, and you can often double your usable storage without touching the main footprint. With a few measured cuts and drawer boxes that match step geometry, you’ll reclaim space that feels hidden but performs like built-in cabinetry.
Why It’s a Game Changer for Small Spaces
Want to free up floor space in a tiny entryway or studio? Pull-out drawers under stairs let you store seasonal gear, cleaning tools, or 8-12 pairs of shoes where a closet might’ve been, and they often outperform fixed shelving because you use full depth and access everything easily. You’ll notice a clearer living area fast – less clutter, fewer trips to the garage – and that’s the kind of payoff that actually changes how a small space works.
A Sneak Peek at What You’ll Need
Curious what tools and materials to gather before you start? Grab one 4×8 sheet of 3/4″ plywood (plus a 4×8 of 1/4″ for backs if you want), full-extension drawer slides in lengths matching your stair depth (16-24″ common), a circular saw or table saw, drill, pocket-hole jig, wood glue, screws, sandpaper and finish or paint. Throw in handles, soft-close hardware if you like, and you’re about set.
Want more specifics so you don’t overspend or underbuild? Use 3/4″ Baltic birch for drawer boxes and 1/4″ for drawer backs, pick slides rated 100 lb per pair for heavy loads, and size drawers 12-20″ deep with heights from 4″ to 10″ depending on use. Buy an extra 10% material for mistakes, get 1-1/4″ pocket screws, Titebond-type glue, and prime before painting to avoid bleed-through – small choices like that save you time later.
My Take on Measuring Your Space
Surprisingly, tiny differences matter more than you think – a 1/8″ tilt or a nosing that eats 1/2″ of depth can turn a perfect drawer into a jammed mess. You should measure width at several heights, depth behind the nosing, and the vertical clearance where the drawer face will sit, then note the stair pitch and any trim profiles. For example, a 36″ wide opening with a 3/4″ face and 1/4″ side clearance gives you about 34-3/4″ of carcass width to work with.
Getting Your Numbers Down Right
That 1/8″ you shrug off will bite you later, so work methodically: measure the opening width at top, middle and bottom, depth at front and back, and the height of the tallest point; use a 25 ft tape and a 4 ft level. Check squareness by measuring both diagonals, note any 1/4″ bows, and mark offsets for skirting and trim. Then deduct material thicknesses – a 3/4″ face, 1/4″ backer, and about 1/4″ total clearance for slides is a common starting point.
Tools You Don’t Wanna Forget
You’d be amazed how much a laser distance meter speeds things up – but pair it with old-school gear: a 25 ft tape, 4 ft level, 48″ straightedge, 12″ combination square, 6″ digital caliper, folding rule for tight spots, pencil and mask tape. Throw in a small block plane if trim’s uneven, and a notepad to sketch measurements. Bring clamps – you’ll need them when holding templates in place.
When you use those tools, use them together: run a laser for quick depth checks, then verify with the straightedge to find any 1/8″ to 1/4″ bow you can’t see. Use the caliper to check gap tolerances – many slides need about 2-3 mm clearance – and apply painter’s tape to mark layout lines so you don’t smudge measurements. I once found a 1/4″ camber across a 36″ span and fixed it with shims before cutting, saved me a reroute.
Seriously, Let’s Talk About Design Ideas
Choosing the Style That Fits Your Home
When you tried jamming a stroller or an old trunk under the stairs you noticed the trim and scale felt off – that’s your cue. Pick Shaker fronts for a craftsman vibe, flat-panel lacquer for modern, or beadboard for farmhouse; match hardware finish to other rooms. Keep baseboard height consistent (typically 3-5 inches) and allow a 2-3 inch toe-kick. Small choices like a 1/8 inch reveal or matching crown make the whole run look intentional.
Functionality Meets Aesthetics
When you open a well-built under-stair drawer and everything’s organized it feels like magic, but it’s engineering too. Plan 12-20 inch deep boxes, use 3/4 inch plywood, and spec 100-150 lb full-extension slides for heavy loads; soft-close helps with kids. Zone drawers by use – toys, pantry overflow, shoes – and pick fronts that hide gaps so it looks seamless while staying super usable. Want pretty and practical?
In one project you can split a 36 inch run into three 12 inch drawers – great for shoes or pet gear. Fasten 1×2 face-frame rails to keep fronts aligned, allow 1/8 inch gaps to prevent rubbing, and add removable dividers or liners for cleaning. For damp items, add 1/2 inch ventilation holes or mesh bins; for pantry use, fit one drawer with a shallow 3 inch tray for spices and another 10-12 inch deep for cans.
Getting Started: Step-by-Step Instructions
| Step | Details |
|---|---|
| Measure the cavity | Record height, depth, and width at three points; note taper or obstructions. |
| Design layout | Decide drawer sizes – typical depths 24-28″, face heights 6-12″; sketch full-scale templates. |
| Choose materials | Use 3/4″ plywood for boxes, 1/2″ for backs, full-extension slides rated 100+ lb for heavy loads. |
| Cut and dry-fit | Cut panels, clamp and dry-fit before glue; test each slide on a jig. |
The Fun Part: Building Your Drawers
Like opening a present, assembling the drawers gives instant payoff – you get something useful and neat pretty fast. You cut 3/4″ plywood panels, glue and clamp, then reinforce with 1″ pocket screws or 18-gauge brads; aim for tight 90-degree corners and a smooth bottom panel. You’ll install full-extension, ball-bearing slides rated 100 lb and test each drawer under load so nothing binds.
Tips for a Smooth Assembly Process
Unlike flat-pack furniture, your stair cavity varies so prep matters more: pre-drill, use clamps, and square every box as you go. You’ll mark reference lines on both the stair frame and drawer face, test-fit slides on a temporary frame, and keep a 1/8″ gap around faces for paint and movement. Seal plywood edges with a thin coat of shellac to reduce swell.
- Measure twice, cut once – use a square and a story stick for repeatable cuts.
- Label every panel with tape and a number so you don’t mix up left and right.
- Apply glue evenly and clamp for at least 30 minutes for a strong bond.
- Perceiving the final reveal from the hallway helps you tweak face alignment before permanent mounting.
Compared to a standard cabinet build, under-stair drawers demand more teardown planning and shimming because floors and stair strings rarely sit perfectly plumb. You should mock up one drawer fully-build the box, mount slides on a scrap jig, and run it in the opening to check for rubbing; that single test saves hours. Use 1/8″ felt or plastic shims to level runners, and paint faces after fitting to avoid tight fits.
- Mock up with scrap wood first to validate clearances and slide alignment.
- Use a pair of 16″ clamps when gluing sides to keep faces flat and square.
- Keep fasteners 3/8″ from edges to avoid splits – pilot holes are your friend.
- Perceiving how the drawer will be used daily lets you prioritize soft-close or heavier slides.
How to Paint or Finish Like a Pro
You’ll get a pro-looking finish by sanding and prep – not by buying the priciest paint. Start with 120 grit to level flaws, finish with 220 for a glassy surface, then vacuum and wipe with a tack cloth. And you’ll save time by using a 3/8″ foam roller on flat drawer faces and an angled sash brush for edges; two thin coats usually beat one heavy one, with 4-6 hours between latex coats and 24 for oil.
The Best Paints or Stains to Use
Sometimes a stain gives a cleaner, longer-lasting look than paint for drawer faces, especially if you’re matching stair treads; oil-based stains penetrate deeper, water-based stains dry fast and clean up with soap. Choose semi-gloss or satin for durability-semi-gloss for heavy use, satin if you want fewer fingerprints. Coverage typically runs 300-400 sq ft per gallon, and always test color on scrap plywood before committing.
Sealing the Deal with a Great Finish
The clear coat will shift the color more than you expect, so test it first. Water-based polyurethane stays clear and dries in 2-4 hours, oil-based adds warmth but can yellow and needs about 24 hours; apply 2-3 thin coats, sanding 220 between each. Use long, consistent strokes, avoid over-brushing, and thin the first coat 10-15% for better penetration on raw wood.
Edge sealing matters more than most folks admit: seal exposed plywood edges and end grain first with a sanding sealer or diluted shellac to prevent blotching. Apply three coats total for drawers, sand lightly with 320 grit before the final coat, and keep shop temps between 50-85 F with humidity under 50% for best drying and leveling. If you want extra toughness around hardware, consider a conversion varnish or a wipe-on polyurethane and always do a small adhesion test with tape.
The Real Deal About Organizing Your New Storage
Surprisingly, organizing under-stair drawers is more about traffic patterns than capacity – you want the things you grab daily in the top 2 shallow drawers and seasonal gear tucked deep. Split each drawer into 3 zones (daily, occasional, overflow), use 2×3 inch labels or color tabs, and keep commonly used items within the first 12 inches of reach. Want to save time? Group like with like – tools with tools, pet stuff with pet stuff – you’ll cut retrieval time dramatically.
Creative Ways to Utilize Your Drawers
You can convert a 36-inch drawer into a shoe rack that holds up to 12 pairs, a built-in charging station with a grommet for cords, or a hidden pet feeding center – yes, really. Try foam inserts for tools, mason-jar dividers for craft bits, or a shallow drawer for mail that sort into inbox, action, archive. Which one fits your life? Mix uses – one drawer for dog leashes, another for frequently used power tools – and you’ll be surprised how tidy you get.
Maintenance Tips for Long-Lasting Storage
Sometimes a simple wipe is the best maintenance – use mild dish soap and water monthly for dusty urban homes, quarterly in high-dust rural spots. Check slide tension and screws every 6 months; lubricate ball-bearing or soft-close slides with silicone spray once a year. Note: standard concealed slides often support 25-75 lbs, heavy-duty ones 100+ lbs – don’t overload. Keep humidity between 35% and 55% to avoid wood warping.
- Wipe interiors and runners monthly in busy homes, quarterly in quieter ones.
- Lubricate slides with silicone spray annually and tighten mounting screws every 6 months.
- Use felt pads under heavy items and limit single-drawer loads to the slide’s specified rating (usually 25-100 lbs).
- After seasonal use, pull drawers, vacuum tracks, and inspect for debris or wear.
One quick annual tune-up adds years: remove each drawer, inspect the slides for bent rollers or stretched screws, tighten five fasteners per drawer (front, back, two sides, center), and replace any soft-close cartridges that chatter. Apply a light coat of furniture oil to unfinished wood twice a year and swap out worn liners – cheap, takes 20 minutes per drawer, and prevents bigger fixes later. If a slide feels loose, swap it within 1-2 years rather than forcing it.
- Keep a small kit (screwdriver, silicone spray, spare screws) near the stairs for quick fixes.
- Label fasteners and hardware after disassembly so reassembly is painless.
- Rotate heavy items seasonally to avoid constant stress on the same slides.
- After any major refit, load-test drawers incrementally to confirm smooth operation.