


Did you know that a well-planned loft conversion can add up to 20% value to a townhouse? You’ll need a practical approach: assess height, access, and budget first, then pick a style that suits your home’s structure. With smart layouts and built-in storage, you’ll maximize space without sacrificing headroom or light. It’s a methodical process, and the next steps will show you how to balance function with aesthetics. Stay with me as we map out the essentials.
Why Loft Conversions Transform Townhouses

Loft conversions transform townhouses by revealing usable space without expanding their footprint. You gain practical square footage that previously went unused, often converting attic eaves into bedrooms, offices, or storage hubs.
The transformation hinges on structural compatibility, insulation quality, and airtight detailing, which preserve energy efficiency while increasing value. Loft insulation is essential, minimizing heat transfer and reducing running costs.
You’ll want a continuous thermal envelope across floor, walls, and roof to prevent cold bridging. Ventilation strategies play a critical role, sustaining indoor air quality and controlling moisture without sacrificing comfort.
Consider ventilation strategies that balance exhaust and supply air, avoiding condensation risks in complex roof geometries. Together, these elements deliver a safe, comfortable space that leverages existing construction rather than demanding expansion.
Evaluate Loft Space: Height, Size, and Access
Before you start planning, assess the loft’s height, floor area, and access points to determine feasibility and layout options. You’ll want precise measurements for headroom, usable square footage, and stair or ladder configurations, plus door clearances to avoid bottlenecks.
Consider structural limits, load-bearing capacity, and potential daylight from skylights. Evaluate ventilation strategies to prevent damp and heat buildup, and plan for insulation improvements (loft insulation) that meet building codes without compromising space.
Map zones for sleeping, storage, and utilities, noting service routes for wiring, plumbing, and HVAC. Identify any planning-permission constraints early to avoid redesigns.
- Height and headroom accuracy
- Floor area and zoned usage
- Access quality and safety
- Ventilation strategies and moisture control
- Structural and insulation considerations
Set a Realistic Loft Budget (and What It Covers)
To set a realistic loft budget, start with a clear scope and anchor costs to your measured targets: structural work, insulation upgrades, daylight and ventilation, access solutions, and finishing touches. You’ll detail each area to prevent scope creep and unexpected overruns.
Begin with budget planning by estimating quantities, labor hours, and permit fees, then add a contingency of 10–15% for unforeseen challenges.
Prioritize essential upgrades before aesthetics to preserve value and function.
Consider material selection early; choose durable, code-compliant products that resist moisture and temperature swings, and lock in pricing with preferred suppliers to avoid market fluctuations.
Track every line item and adjust as quotes come in.
Review long-term maintenance costs alongside upfront spend, ensuring your ceiling height, insulation, and fire safety stay within local requirements.
Choose Your Loft Conversion Style

You’ll start by weighing open plan layouts against how roof window placement affects light and heat gain.
Consider how parking and access influence circulation and safety when you choose between vaulted or flat ceilings and how those choices integrate with your loft’s structure.
This guide helps you compare practical options quickly to align your style with your site constraints.
Open Plan Layouts
- Define primary zones with finish cues that reduce sound travel and support privacy.
- Integrate phased lighting to preserve brightness without clutter.
- Specify HVAC routes that minimize noise and maximize air turnover.
- Use furniture as visual buffers to segment areas without tight boundaries.
- Plan for future flexibility with modular storage and adaptable surfaces.
Loft acoustics and ventilation systems should be woven into the layout from the start to avoid retrofits and guarantee comfort.
Roof Window Placement
Consider roof aesthetic when locating vents: higher windows maximize south-facing daylight without overheating, while contiguous rows create a uniform light band for galleries or studios.
Ventilation options hinge on operable mechanisms, including top-hinged and side-hinged designs, paired with trickle vents or integrated passive stacks to promote cross-ventilation.
Avoid overfitting to a single moment of sun; plan for seasonal shifts and weather patterns.
Confirm structural integrity with manufacturer specs, and coordinate lintels, flashing, and insulation to minimize drafts and condensation.
Parking and Access
- Garage organization strategies that maximize space and accessibility
- Direct access design from garage to main living area
- Noise and vibration control between vehicle storage and habitable rooms
- Garden landscaping as a connection between built and outdoor spaces
- Sizing, headroom, and code considerations for loft circulation interfaces
Maximize Headroom With Smart Layouts
Ever wondered how to reclaim ceiling height without major structural changes? You maximize headroom by rethinking footprint and vertical geometry. Start with a shallow floor plan, consolidating storage into tall, narrow culls flanking stairs to reduce bulk overhead.
Use step-down zones only where necessary, keeping soffits away from primary circulation to avoid visual clutter. Prioritize low-profile mechanicals and lean-to mezzanines that don’t intrude on living zones.
Align ceiling lines with structural beams to create uninterrupted verticals, and consider a single, continuous stair run to minimize lost space. Employ creative lighting to draw the eye upward and enhance perceived height.
Choose sustainable materials for risers, trim, and railings to survive daily use while maintaining clean lines and tight tolerances.
Let in Light: Skylights, Dormers, and Windows
A well‑placed skylight, dormer, or window can transform a townhouse by inviting daylight deep into the core living spaces. To maximize performance, assess angle, size, and glazing, balancing heat gain with energy efficiency.
Prioritize natural ventilation by pairing operable vents with cross‑flow openings to reduce reliance on mechanical systems.
Address privacy concerns with strategic placement, frosted or low‑height glazing, and adjustable shading.
Specify weatherproof flashing and proper insulation to prevent leaks and drafts.
Use lintels and framing that support structural loads without compromising ceiling height.
Consider sound transmission when locating near busy streets.
Coordinate with HVAC and electrical layouts to optimize lighting controls and night‑time visibility.
- Skylight sizing and placement for daylight depth
- Dormer styles that preserve headroom and curb appeal
- Operable vents for natural ventilation
- Privacy‑focused glazing options and shades
- Integration with insulation and weatherproofing
Space-Saving Stairs: Design, Safety, and Style

You’ll weigh space-efficient stairs like compact winder, spiral, or alternating tread designs to maximize usable footprint. This includes safety-compliance checks—handrail height, headroom, and slip-resistant treads—so your route meets code while minimizing risk.
Finally, you’ll blend style with function by choosing materials and detailing that align with your loft’s aesthetic, from rail finishes to riser visibility.
Stairs Space Efficiency
Stairs that save space combine compact geometry with smart building details to maximize usable area without sacrificing safety or accessibility. You’ll optimize tread width, run length, and headroom to fit tight corridors while preserving comfort and compliance.
Prioritize stair aesthetics through clean profiles, hidden stringers, and low-profile risers that visually expand rooms. Safety regulations require handrails, non-slip surfaces, and consistent rise/run to prevent missteps.
Consider space-saving configurations like alternating tread, spiral, or single-string stairs only if the layout permits clear egress and headroom. Use landing options to break monotony and improve usability.
Balance mechanical services, storage under treads, and light access to maintain a bright, functional ascent.
- Micro-bedroom landing shelves and integrated lighting
- Narrow stair with recessed stringers
- Spiral stairs with balanced treads
- Alternating tread only when code permits
- Under-stair storage and concealed utilities
Safety Compliance Tips
When saving space on stairs, prioritize compliant dimensions and reliable finishes to protect users and keep access uninterrupted. You must verify headroom, run, and rise criteria per local codes.
Install non-slip treads with durable coatings to minimize slipping risks. Choose handrails that meet height and graspability specs, and guarantee continuous support along the entire flight.
Fire safety measures should include clear egress paths, smoke detector placement nearby, and a compartmentalized enclosure if required by your jurisdiction.
Structural integrity stays non-negotiable: confirm stringers, landings, and anchorage points are rated for anticipated loads, especially in multi-story layouts.
Use fire-rated materials where possible, and document testing results for inspections.
Regular maintenance checks catch fasteners, coatings, and gaps before they become safety liabilities.
Style Integration Ideas
Space-saving stairs offer more than compact footprints; with careful design, they can blend seamlessly with your townhouse’s style while preserving safety and accessibility. You’ll balance form and function by choosing treads, risers, and handrails that align with your color schemes and decorative accents, so the ascent feels intentional rather than intrusive.
- Select a geometry that maximizes usable footprint without compromising headroom or handhold comfort.
- Use matching or contrasted Material finishes to reinforce your color schemes and highlight architectural lines.
- Integrate decorative accents like glass panels or slim steel railings for visual lightness.
- Plan landing dimensions and lighting to reduce trip hazards and improve navigation.
- Incorporate storage beneath stairs with access panels that maintain clean lines and cohesive styling.
Zone by Use: Sleep, Work, and Play Areas
In a townhouse loft, you’ll separate sleep, work, and play zones to maximize function without sacrificing openness. Define each area with a clear boundary, using low-profile partitions, rugs, or shelving that won’t crowd sightlines.
Sleep zones benefit from softened lighting and blackout curtains, placed away from screens and high-traffic paths.
Work areas require an ergonomic desk height, task lighting, and power accessibility aligned with electrical outlets.
Play zones should maintain flexible layouts, supporting multipurpose furniture like ottomans and foldable tables.
Use cohesive Color schemes to unify disparate zones and Decorative accents to establish depth without clutter.
Implement zoning rules that keep transmissions between zones minimal—avoid long sightlines that invite distraction.
Regularly reassess spacing to preserve flow as needs evolve.
Insulation, Soundproofing, and Climate Control
Insulation and soundproofing are essential for a townhouse loft to maintain comfort and privacy, while climate control keeps conditions consistent across multi-level layouts. You’ll prioritize thermal insulation to minimize heat transfer between floors and exterior walls, reducing heating and cooling loads.
Integrate soundproof barriers at key junctions—between stairs, rooms, and the attic—to curb impact and airborne noise without sacrificing daylight or access.
- Use high-density mineral wool or closed-cell spray foams for walls and ceilings
- Seal gaps with acoustic sealant around penetrations
- Install resilient channels to decouple drywall from framing
Choose HVAC zoning or radiant floor heating for even climate control.
Add targeted ventilation to manage humidity and indoor air quality.
Clever Loft Storage Solutions

Think through hidden storage tactics that keep your loft uncluttered without sacrificing headroom. Consider multi-use loft solutions, like pull-down desks that double as storage benches or hinged panels that reveal slim shelves along eaves.
Start with precise measurements, load paths, and ventilation to guarantee these clever systems stay robust and accessible.
Hidden Storage Tactics
Hidden storage can transform tight lofts into usable space without sacrificing headroom or aesthetics. You’ll optimize walls, floors, and cavities with precise layouts, minimizing bulk while maximizing access. Focus on hidden compartments, integrated hinges, and low-profile mechanics to keep sightlines clean. Use vented, breathable materials where moisture could travel, and label access points for quick retrieval.
Prioritize modular solutions that shift with needs, so you can reconfigure without major disruption. Coordinate with structural elements to avoid weakening loads, and install proper lighting to reveal every niche. Remember safety: fire pathways, egress, and childproofing where relevant. Plan for finishes that blend with existing decor, so concealed storage remains attractive.
- Hidden compartments in stair risers and under treads
- Lift-up storage beneath beds and seats
- Inset cabinets above doorways and tall niches
- Hidden storage benches with integrated seating
- Flush under-floor panels for seasonal items
Multi-Use Loft Solutions
How can you maximize a townhouse loft with versatile storage that’s ready for change? Focus on modular, purpose-built components that adapt as needs shift. Start with foldaway desks, pullout work zones, and mezzanine-integrated shelving to preserve floor space while expanding utility.
Use vertical storage to keep surfaces clear, and label bins for fast reconfiguration. Implement convertible furniture: bed-to-storage platforms, dining tables that become workstations, and ottomans with hidden compartments.
Prioritize durable finishes and accessible mechanisms to reduce wear during frequent reconfigurations. Plan for climate-controlled keepsakes and seasonal items in higher bays, while daily essentials live within arm’s reach.
This approach blends vintage charm with an urban loft ethos, delivering practical, scalable storage that remains stylish and functional.
Loft Bathroom Ideas: From Wet Rooms to Spa Retreats

If you’re upgrading a loft bathroom, start by mapping the space and defining the vibe—wet rooms or spa-inspired retreats—so you can select waterproof materials, drainage, and ventilation that perform under high humidity.
- Choose a compact drainage layout and a moisture-resistant subfloor to prevent leaks and mold.
- Prioritize heated towel rails and underfloor heating for comfort without bulk.
- Opt for low-maintenance fixtures with easy-clean surfaces to save time.
- Integrate venting strategies that keep humidity in check without drafts.
- Consider vintage charm and eco-friendly materials for a timeless yet responsible look.
This approach keeps your loft bath practical, durable, and stylish, while avoiding overdesign. Focus on function first, then refine aesthetics in line with the next topic.
Finishes and Materials for Cohesive Style
When choosing finishes and materials, aim for a cohesive palette that ties together the loft’s architecture and the townhouse’s character. You’ll select flooring, wall treatments, and ceiling textures that read as a single material family or compatible contrasts.
Favor durable, low-maintenance options in traffic zones, with lighter or natural tones to maximize light. Match baseboards, trim, and cabinetry to a core wood or metal finish for uniformity, while allowing deliberate pops in textiles and hardware.
Color schemes should reinforce structural lines—stone or concrete grays with warm wood accents, or off-white walls against charcoal fixtures—keeping glare minimal.
Plan furniture arrangements around sightlines and heat paths, ensuring access to stairs and storage. Prioritize consistency in sheen levels and edge details to avoid visual fragmentation.
Electrical and Connectivity Upgrades
Upgrading electrical and connectivity systems in a townhouse loft should be planned in phases to minimize disruption. You’ll assess load needs, map outlets, and future-proof with scalable wiring.
Focus on robust electrical wiring, conduit routing, and accessible panels to simplify maintenance. Prioritize data, power, and smart-home backbone during layout decisions, ensuring code compliance and proper grounding.
Choose modular, serviceable components and label circuits clearly for quick troubleshooting. Implement centralized connectivity upgrades alongside fire safety upgrades, like tamper-resistant devices and arc-fault protection.
Plan for wireless coverage, cable management, and surge protection to protect devices and networks.
- Assess current circuits and future load
- Separate high-demand outlets and dedicated lines
- Centralize data and communications backbones
- Use conduit with easy-access panels
- Install surge protection and smart devices
Lighting Plans to Elevate Mood
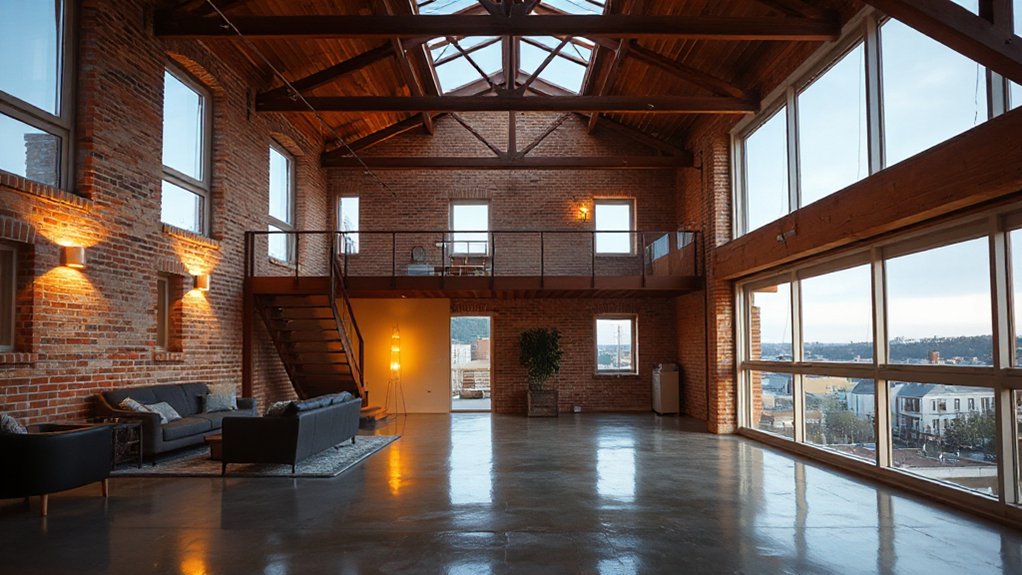
Lighting plans can dramatically lift mood in a townhouse loft by balancing brightness, color, and warmth for different zones and times of day. You’ll want layered lighting: ambient for general visibility, task for reading or cooking, and accent to highlight textures.
Choose color temperatures that suit each zone—warmer whites (2700–3000K) in living spaces, cooler whites (3500–4000K) near work areas. Use dimmers to adjust intensity and scene settings for morning, afternoon, and evening.
Integrate daylight-responsive controls to maintain consistency as natural light shifts. Consider color schemes that reflect the space’s scale and materials, avoiding high-contrast clashes.
Plan furniture placement to keep sightlines open, ensuring fixtures don’t glare. This approach sustains comfort while enhancing perceived room depth.
DIY vs. Pro: What to Tackle Yourself
You’ll start by honestly sizing up your DIY skill against the tasks at hand, focusing on carpentry, electrical, and plumbing basics.
Weigh the risk versus reward of each job, so you know which steps to tackle yourself and which to hand off to a pro.
Set a tight budget that covers materials, permits, and contingencies, and map out the sequence to avoid costly rework.
DIY Skill Assessment
Deciding what to tackle yourself vs. what to hire out starts with a frank assessment of your skills, tools, and timelines. You’ll weigh safety margins, code compliance, and the sequence of tasks before picking DIY or pro routes.
Focus on objective capabilities: measurements, basic carpentry, wiring, and insulation handling. When in doubt, err on conservative options that preserve structural integrity and future access.
Plan for necessary inspections and permits, plus realistic completion windows. Being honest about gaps saves time and budget.
- Loft insulation compatibility and retrofit considerations
- Structural reinforcement requirements for new loads
- Electric and HVAC isolation basics
- Fastener types, joist spacing, and load paths
- Temporary supports and fall protection planning
Risk Versus Reward
Balancing risk and reward means weighing what you can safely DIY against issues that benefit from a pro’s expertise. You’ll assess structural tasks, such as framing, tie-ins, and load paths, against simpler, noncritical updates you can handle with basic tools.
Prioritize decisions that affect long‑term performance and safety rather than cosmetic improvements.
When it comes to historical preservation, you must respect existing materials, codes, and archival integrity; DIY fixes may compromise authenticity and regulatory compliance.
Structural integrity is non‑negotiable: misaligned joists, inadequate fasteners, or improper shimming can trigger outages, sag, or failure.
If you’re uncertain about load distribution, connections, or moisture management, call a licensed pro. You’ll save time, protect occupants, and guarantee resilient loft conversion outcomes.
Budgeting Your Project
When planning a loft conversion, cost controls hinge on what you can safely DIY and where a pro’s expertise pays back in long-term performance. Budgeting your project means aligning scope with capability, scheduling, and risk assessment. Focus on Budget planning early, then lock in Material selection to minimize waste and delays.
You’ll want clear trade-offs between labor hours and material quality, plus contingency for unforeseen loads or permits. Create a phased plan: essentials first, then enhancements, to preserve cash flow. Document all costs, sources, and delivery windows to prevent scope creep. Seek realistic quotes for critical tasks, and compare warranties.
Track changes in real time to avoid rework. Decide which tasks you’ll DIY safely and which require pro oversight to maintain structural and code compliance.
- DIY vs. pro boundaries
- Permits and inspections timing
- Material selection impact
- Labor vs. materials balance
- Contingency planning and tracking
Permits, Regulations, and Insurance: What You Must Know
Permits, regulations, and insurance are essential foundations for a townhouse loft conversion; understanding them upfront helps you avoid delays and costly changes.
You start by checking local zoning and building codes to determine what counts as a structural alteration and which projects require plan submissions. Next, prepare and submit plans with accurate dimensions, load calculations, and fire-safety details; many jurisdictions mandate stamped drawings from a licensed professional.
Building permits process can include plan review, revisions, and inspection milestones, so track timelines and required fees.
Insurance requirements vary, but typically include liability coverage and contractor insurance; verify that policies acknowledge the project scope and duration.
Keep copies of approvals, keep inspections on schedule, and coordinate with electricians and plumbers to ensure compliance.
Real-Life Townhouse Loft Case Studies

- Case-driven insights on layout efficiency
- Lighting plans that maximize perception and function
- Material choices balancing sustainability and cost
- Storage and workflow optimizations
- Compliance and inspection checkpoints
Maintenance Tips to Keep Your Loft Pristine
Maintaining a pristine loft requires a disciplined routine and careful material care. To prevent wear, establish a weekly cleaning schedule focused on high-traffic zones and moisture-prone areas. Use microfiber cloths and non-abrasive cleaners to protect finishes on wood, metal, and glass, and avoid harsh solvents that can degrade coatings.
Implement cleaning routines that address dust, mold risk, and skyline residue behind skylights, using a gentle vacuum attachment for joints and vents. Insulate hatch gaps and seal drafts to preserve climate control, reducing condensation that invites mildew.
Protect decorative surfaces with mats and felt pads to minimize scratches. Schedule seasonal inspections of joists, insulation, and sealants, and maintain ventilation to deter mustiness.
Keep decorative accents minimal and securely mounted to curb vibration noise and shift.
Prioritizing Upgrades for Maximum Value
Upgrading a loft for maximum value starts with identifying which improvements deliver the best return on investment for townhouse layouts. You’ll prioritize changes that lower operating costs, boost comfort, and appeal to buyers. Focus on core systems first, then space efficiency, so upgrades compound value.
- Loft insulation: minimize heat loss, raise year-round comfort, and meet code quickly.
- Ventilation systems: guarantee fresh air, reduce moisture, and improve indoor air quality.
- Structural stiffening: optimize load paths and long-term durability with targeted reinforcement.
- Natural light and egress: add skylights or light tubes responsibly to enhance appeal.
- Space planning: maximize usable square footage with thoughtful zoning and storage solutions.
Frequently Asked Questions
How Long Does a Typical Townhouse Loft Conversion Take?
A typical townhouse loft conversion takes several weeks to a few months, depending on size and approvals. You’ll need time for permits, structural work, and electrical. You should plan for interior lighting and ventilation improvements as you proceed.
What Is the Typical Cost Range per Square Meter?
You’ll typically see costs around £1,000–£2,000 per m², depending on finishes and structure. You’ll evaluate interior lighting needs and ventilation systems, ensuring safe, compliant calculations while you plan, budget, and compare contractor quotes.
Are Stairs Allowed in Every Townhouse for Loft Access?
Stairs aren’t automatically allowed in every townhouse; check local building codes and HOA rules first. If permitted, prioritize structural feasibility, fire safety, and headroom. Interior design considerations: integrate storage solutions and practical access without compromising aesthetics or ventilation.
Can Existing Foundations Support a Loft Conversion?
Sure—foundation stability depends on your home; you must assess prior loads. You’ll likely need structural reinforcement. Foundation stability checks, engineer input, and possible underpinning guarantee the loft can support added weight and live loads.
Do Local Permits Usually Impact Conversion Timelines?
Yes, local permits typically affect conversion timelines. You should plan around Building regulations and a Structural assessment, since approvals hinge on compliance, inspections, and any required amendments to plans before you proceed.
Conclusion
Loft dreams, meet the realities you’ll love to hate. You’ll chase extra light, only to trip over tripping hazards from clever storage. You’ll gain headroom, then argue about permits and budgets like it’s a sport. But when the stairs sing and skylights flood the room, you’ll wonder why you didn’t start sooner. Be practical: plan, budget, and choose smart layouts. Irony aside, a well-executed loft adds value, function, and a genuine sense of space you’ll actually use.