
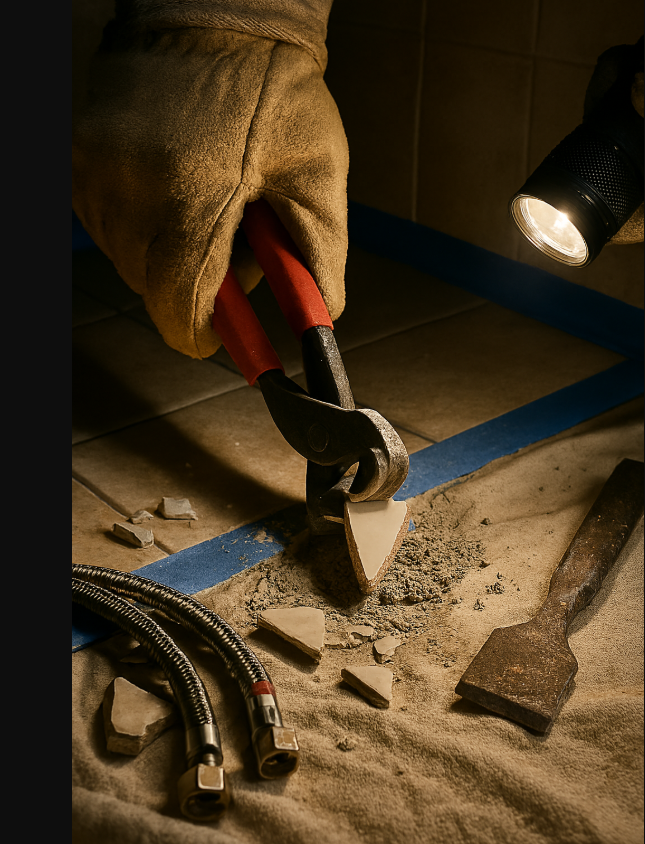

Overall, like changing a bike tire – swapping a broken or cracked floor tile is more fiddly than hard; once you see the steps you’ll get it. You’ll learn how to remove grout, lift the fragments, prep the subfloor and set a new tile so it blends right in. Got basic tools? Great. No special skills required, just patience and a bit of elbow-grease, and you’ll have your floor looking sharp again.
So, What Do I Need to Fix This Thing?
Knowing what to gather up front saves you time and prevents more damage to the floor, and it makes the job feel way less annoying. You’ll need three basic things: the right tools, the proper adhesives/grout, and a matching tile or suitable substitute. For a typical 4×4 or 6×6 ceramic/porcelain tile repair expect 30-90 minutes of work plus 24-48 hours drying time; if you source everything before you start you’ll avoid that awkward stop-start shuffle.
Tools You’ll Want to Have on Hand
Having the right tools means you won’t chip neighboring tiles or fight the adhesive. Get a grout saw or oscillating tool with a grout blade, a small cold chisel and hammer, a 1/8″ or 1/4″ notched trowel (match tile size), tile nippers or a wet saw if you need cuts, margin trowel, tile spacers, and a sponge. And don’t skimp on PPE: safety glasses, dust mask, gloves and knee pads-those save you pain and time.
Materials That Are Actually Important
The materials decide if the repair lasts or peels off in a week. You’ll need a matching replacement tile (or a close match), a latex-modified thinset mortar for floors, grout (unsanded for joints under 1/8″, sanded for 1/8″ and up), spacers, and grout sealer. For heavy-traffic spots consider epoxy grout. Also grab painter’s tape and a small bucket for mixing – thinset mixes per manufacturer and usually cures in 24-48 hours.
If you’re dealing with porcelain, pick a polymer-modified thinset; porcelain tiles are denser and need stronger adhesion. Match tile thickness too – most ceramic is about 6-8mm, porcelain often 8-10mm – mismatched thickness creates a trip hazard. Mix thinset to the consistency the bag specifies (open time commonly 10-20 minutes), press the tile firmly with full contact, and give the adhesive the full 24-48 hours before grouting or walking on it.
Is It Really That Easy to Remove the Old Tile?
Compared to ripping up an entire floor, removing a single broken tile usually looks easy, but you still face hidden hurdles – adhesive strength, tile thickness, and substrate condition all matter. You can often finish a simple ceramic tile in 20-60 minutes; porcelain or large-format tiles can take much longer and risk damaging the underlayment. So yeah, it’s doable for most DIYers, but expect surprises and plan for extra time, the right tools, and protective gear.
Prepping the Area to Avoid a Mess
Like laying a picnic blanket before a mud fight, you want layers of protection: move nearby items 3-4 feet away, cover surfaces with 6-mil plastic or contractor-grade drop cloths, and tape edges with painter’s tape so dust doesn’t wander. You’ll want an N95 respirator, goggles, and gloves; shut HVAC vents or seal them with plastic. And have a wet/dry vac handy to grab dust as you go so cleanup is way faster.
Step-by-Step Removal Process
Think of it as a small demolition sequence: score and remove grout around the tile first (about 1/8 inch deep), then break the tile into pieces with a carbide chisel or oscillating tool, pry fragments up at a 30-45 degree angle, and scrape remaining thinset with a floor scraper or rotary tool. You’ll be working in short bursts – expect stubborn adhesive; patience prevents substrate damage and makes the repair cleaner.
For more detail, start by cutting grout with a grout saw or multi-tool (3-5 minutes), then strike the chisel gently with a hammer to crack the tile into liftable pieces; use a pry bar for large chunks. After removal, scrape thinset to a smooth, level surface within 1-2 mm of the surrounding tiles, and vacuum thoroughly before laying new adhesive. Using the right blade and working slowly reduces the chance you’ll need to repair the underlayment.
Step-by-Step Removal – Quick Guide
| Action | Details / Tips |
| Score grout | Use a grout saw or oscillating blade – remove ~1/8 inch (3 mm) to free edges. |
| Break tile | Tap a carbide chisel at the center, work outward; porcelain may take harder hits. |
| Lift pieces | Pry at 30-45 degree angle with a flat chisel or pry bar to avoid substrate gouges. |
| Remove thinset | Scrape with a floor scraper or rotary tool; aim for level within 1-2 mm of neighbors. |
| Clean surface | Vacuum with HEPA or wet/dry vac, wipe with damp sponge; let dry fully before retiling. |
| Inspect substrate | Check for backerboard damage or loose mortar; repair or replace if soft spots or gaps exist. |
What’s the Deal with Installing the New Tile?
You’ve cleared the old mortar and are staring at the spot where the new tile will go – pattern lines to match, grout joints to keep consistent. Dry-fit the tile first, use 1/8-inch spacers if surrounding tiles use that gap, and check level with a small spirit level; if it sits high or low by more than 1/16 inch you’ll need to shim or shave the subfloor. Get it sitting true now and you’ll avoid a wonky seam after grout.
Getting the Tile Ready for a Perfect Fit
If the replacement tile needs trimming, measure twice and mark with a grease pencil – you don’t want surprises. Use a wet saw with a diamond blade for straight cuts, tile nippers for curves, and safety glasses because chips will fly. Test-fit the cut piece dry, then knock off any sharp edges with a rubbing stone so the tile slides snugly into a 1/8-inch grout joint without forcing it.
The Right Way to Apply Adhesive
When you spread the thinset, pick a trowel notch sized to the tile: 1/4-inch square for small 4×4 tiles, 1/2-inch for 12×12 or larger, and apply a consistent bed about 3/16 inch thick. Comb in straight lines, then back-butter larger tiles if needed so you get full contact – air pockets cause failures. Work in small bays so the mortar’s 20-30 minute open time doesn’t bite you.
For larger or heavy tiles – anything over 12 inches – you should back-butter with a thin skim of mortar on the tile backside and then comb the floor bed; that gives near 100 percent coverage which installers aim for. Mix polymer-modified thinset to a peanut-butter consistency, let it slake 5-10 minutes, remix, and use within 20-30 minutes; if it skins over, scrape it out and reapply fresh mortar. Clean excess before it hardens and allow 24 hours cure before grouting.
How Do I Make Sure the Grout Looks Awesome?
Like a picture frame that either makes the art sing or disappear, your grout decides if the whole floor reads polished or patchy. You should pick the right color, get the mix consistency spot-on, and clean as you go; small habits make big visual differences. Test a swatch on a spare tile, note how lighting changes perception, and plan for sealing-those steps cut down on surprises and give you a pro-level finish.
Choosing the Right Grout Color
Rather than matching every tile, sometimes contrasting grout makes patterns pop and hides dirt better; for example, 1/8″ joints often look sharp with a slightly darker gray, while mosaic tiles shine with a light, near-white grout. You should test 2″x2″ sample strips and view them at different times of day. Also consider grout type-epoxy holds color longer than cement-based-and how cabinets, trim, and grout sealer will alter the final look.
Application Tips for a Flawless Finish
Compared to slapping grout on and calling it done, taking a methodical approach saves hours of fuss later: mix to a peanut-butter thickness, work in 3×3 ft sections so it doesn’t skin over, float at a 45-degree angle and remove excess with diagonal strokes, then sponge gently with circular passes. Let haze firm for 10-20 minutes before buffing with a dry microfiber-too much water washes pigment and creates voids.
- Mix to a smooth, lump-free consistency-aim for spreadable, not soupy.
- Tool joints to a uniform depth and slope for consistent water runoff.
- The final buff with a dry cloth after initial haze removal brings out the true color.
Like polishing a shoe, finishing grout is all about timing and the right tools – a rubber float, a firm sponge, and a microfiber cloth. Work small, check joints with a fingernail to confirm compaction, and avoid over-wetting which can lighten the grout unevenly. Seal cement-based grout after it cures-usually 48-72 hours; epoxy grout often needs only 24 hours to reach usable hardness.
Seal cement-based grout within 48-72 hours for best protection.
- Use a grout release or mask on porous tiles to prevent staining during application.
- Sealers can change shade slightly-always test on a scrap tile first.
- The sealer will deepen the grout color, so check a sealed sample before finishing the whole floor.
Do I Really Need to Seal It?
Do you really need to seal it? It depends – glazed porcelain usually holds up fine without a sealer, but unglazed ceramic, grout and natural stone like travertine, marble or slate soak up stains and moisture fast. If your tiles sit near a sink or in a high-traffic kitchen you’ll see discoloration in months, not years. Sealing is cheap insurance: a pint of sealer runs $15-$30 and can save you a regrout or tile replacement down the line.
The Benefits of Sealing Your Tile
Want to know what sealing actually does for you? It repels oil and water so spills wipe off in seconds, it cuts grout staining dramatically and it can extend grout life by years, saving you from a costly regrout job (think $200-$600 for a small bathroom). You’ll also find cleaning easier – less elbow grease, fewer harsh cleaners. For busy homes that’s a big win.
When and How to Seal
When should you seal and what’s the quickest way to do it? Clean with a pH-neutral cleaner, let the floor dry 24-48 hours, then test a small patch; if it darkens less than 10-20% you’re good. Apply a penetrating sealer with a brush or roller, wipe off excess, then apply a second thin coat if the label says to – many products cure in 24 hours so you can walk on it the next day.
Which sealer should you pick and how often will you have to redo it? Go penetrating for natural stone and grout, topical for unglazed tiles if you want a sheen; check the label for VOC and coverage – one quart typically covers about 200-400 sq ft. Reapply every 1-3 years: high-traffic kitchens or entryways might need yearly touch-ups, showers often benefit from 6-12 month checks, and always do a water-drop test to see if it’s still repelling.
My Take on Common Mistakes to Avoid
Compared to a flawless swap, most botched tile repairs come from cutting corners on prep and tools. If you don’t remove old thinset fully or use the right trowel – 1/4″ square-notched for small 4×4 tiles, 1/2″ for 12×12 – you end up with hollow spots or lippage; grout joints should usually be 1/16″ to 1/8″ depending on tile size. You should test-fit the tile, check substrate flatness within 1/8″ over 10 ft, and match grout color before you set anything.
Rookie Errors That Could Cost You
Unlike simple DIY fixes, rookie mistakes cause repeat work and extra expense – you chip surrounding tiles by levering with the wrong tool, mix thinset too dry so it won’t bond, or ignore expansion gaps near doorways. And, you might grab the wrong replacement tile (shade and sheen vary even within the same batch), or grout too soon; let thinset cure 24-48 hours. If you skip checking underfloor heating, you can crack tile when system warms up.
Pro Tips to Get It Right the First Time
Compared with trial-and-error, a few precise moves save hours: score and remove grout with a carbide grout saw, use a 1/4″ notched trowel for tiles up to 6″, 1/2″ for larger, apply full-bed thinset for uneven floors, and use epoxy grout in high-moisture areas; cure thinset 24-48 hours then grout, seal grout after 72 hours if using a penetrative sealer. You should also keep spare tile from the original box and photograph the layout before removal.
- Use a carbide grout saw to clear joints first, it reduces chipping around the tile.
- Match glaze and batch number where possible – tiles vary by batch up to 3% in color.
- Check substrate flatness with a 10 ft straightedge; more than 1/8″ deflection needs leveling.
- After you set the tile, clean thinset squeeze-out within 15-20 minutes to avoid hard-to-remove residue.
Compared to general tips, focus on sequencing: you want to dry-fit, then remove grout to a minimum 2 mm depth around the tile, then use a diamond wheel or oscillating tool to score adhesive, and apply thinset with back-buttering on porous tiles to avoid hollow spots; use a level and spacer system to keep joints uniform. Because curing times matter, plan for 24-48 hours of set time, and carry at least 2 matching spare tiles.
- Back-butter large or uneven tiles to ensure full contact and eliminate voids.
- Use spacers sized to your grout joint plan – 1/16″ for tight joints, 1/8″ for standard ceramic.
- Wipe with damp sponge in an S-motion to avoid removing grout from the joints.
- After you finish grouting, let the grout firm for 30-60 minutes then do the final clean to avoid haze.
Conclusion
Hence, like patching a small rip instead of tossing the whole shirt, replacing a broken tile saves time and cash and feels doable once you break it down. You can pry out the old grout, set the new tile, and grout it like a pro – it’s hands-on but straightforward, and you get immediate payoff. Want to give it a go? You’ll be glad you did.
FAQ
Q: How do I remove a broken or cracked floor tile without damaging the surrounding tiles?
A: You can pull out a busted tile without wrecking the ones next to it. Start by scoring and removing the grout around the damaged tile with a grout saw or oscillating tool – take your time so you don’t nick the adjacent tiles. Wear safety goggles, gloves and a dust mask, and put down a drop cloth so chips don’t go everywhere; this stuff gets messy fast.
Protective eyewear and knee pads are well worth the small hassle.
Then chip out the tile from the center toward the edges using a hammer and cold chisel or a small masonry bit on a drill to break it up – don’t try to pry the whole thing out in one go. If the tile is bonded strongly you’ll want a carbide-tipped scraper or an oscillating multi-tool to remove thinset, keeping the substrate as level and intact as possible so the new tile sits flat.
Q: What’s the best way to set the replacement tile so it stays level and strong?
A: A properly bedded tile looks seamless and stays put for years. First, dry-fit the replacement to confirm size and thickness match and trim if needed. Mix a quality thinset mortar (not mastic for floors) to the consistency the manufacturer calls for – too stiff and it won’t stick, too runny and you’ll get voids.
Use a notched trowel sized to the tile – that makes a big difference.
Butter the back of the tile if it’s a thicker or large format piece, apply thinset to the substrate with the notched side, press the tile in while twisting a bit, and use spacers to match grout lines. Tap gently with a rubber mallet and check with a level; wipe excess mortar off the surface now, not after it hardens. Let the mortar cure the recommended time before grouting – patience pays off.
Q: How do I grout and finish so the repair blends in and lasts?
A: Good grout and sealing will make the repair disappear and keep water out. Pick a grout color that matches the surrounding joints – if you’re in doubt, mix a small sample and let it cure to judge the color. Mix grout to a creamy peanut-butter consistency and force it into the joints with a rubber float held at about a 45 degree angle.
Match the grout profile to the rest of the floor – flush or slightly recessed – that’s what sells the invisible fix.
Wipe the tile faces with a damp sponge in circular motions to remove haze, rinse sponge frequently, and let grout firm up a bit before doing a final clean. After the grout has cured per the product instructions, apply a grout sealer if the area sees moisture – that keeps stains and water migration out. If the replacement tile surface needs sealing too, do that after grout sealer so everything looks uniform.